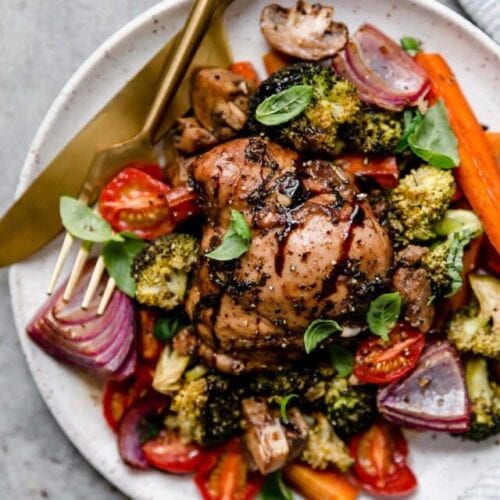
The first time I tried crispy rice was on a lunch salad I picked up from sweetgreen while out running errands. From the fresh vibrant veggies to the blackened chicken, everything on the salad was superb. But the little clumps of crispy rice really stole the show! I had to figure out how to make crispy rice at home, and I’m so happy with my recipe. Now I use it all the time to add flavor and crunch to salads, casseroles, and roasted veggies.
Recipe Highlights
Quick and easy: It takes just a few ingredients to season the rice and then it gets nice and crispy on a sheet pan in the oven in less than 20 minutes. By the time I’m done prepping the rest of my meal ingredients, the rice is perfectly textured, seasoned, and ready to use.
Use leftover rice: If I have leftover rice from take out or making too much for a meal, I’m always excited to set it away to make crispy rice the next day. It’s a great way to put extra food to a good and new use.
Southeast Asian flavor: Crispy rice salads are popular in Korean and Laotian cuisine, where a dish called Nam Khao is often served. It’s a mixture of crispy rice, red curry paste, ginger, garlic, peanuts, fresh cilantro, mint, and tossed in a sweet and spicy rice-lime-vinegar dressing.
Adds a nutritious crunch: Adding crispy rice to salads gives them a unique texture that makes it so good and different. It’s such an easy way to add energizing carbohydrates to a green salad, and every time I serve it, I love watching others gobble up every bite.

Ingredient Notes And Substitutions
One thing that’s so nice about making this crispy rice recipe is that it requires just four basic ingredients:
- Cooked rice – it’s best if the rice is cooked and cooled (like day old leftover rice). Use any rice, such as white rice, jasmine rice, basmati rice, brown rice, black rice, sushi rice, or leftover recipe from Chinese food takeout. Cook the rice in an Instant Pot or rice cooker or in a pot of water over medium-high heat with a dash of kosher salt.
- Coconut aminos – I like using liquid coconut aminos for this recipe since it’s lower in sodium than soy sauce or tamari, plus it adds just the right subtle sweetness I’m going for. But if it’s not available, use an equal amount of low-sodium soy sauce or tamari
- Sesame oil – this adds so much good flavor and helps the rice get nice and crispy. A neutral oil, such as avocado oil or olive oil also works, though it won’t impart as much flavor
- Garlic powder – may sub onion powder
Find the ingredient list with exact measurements in the recipe card below.


How To Make Crispy Rice
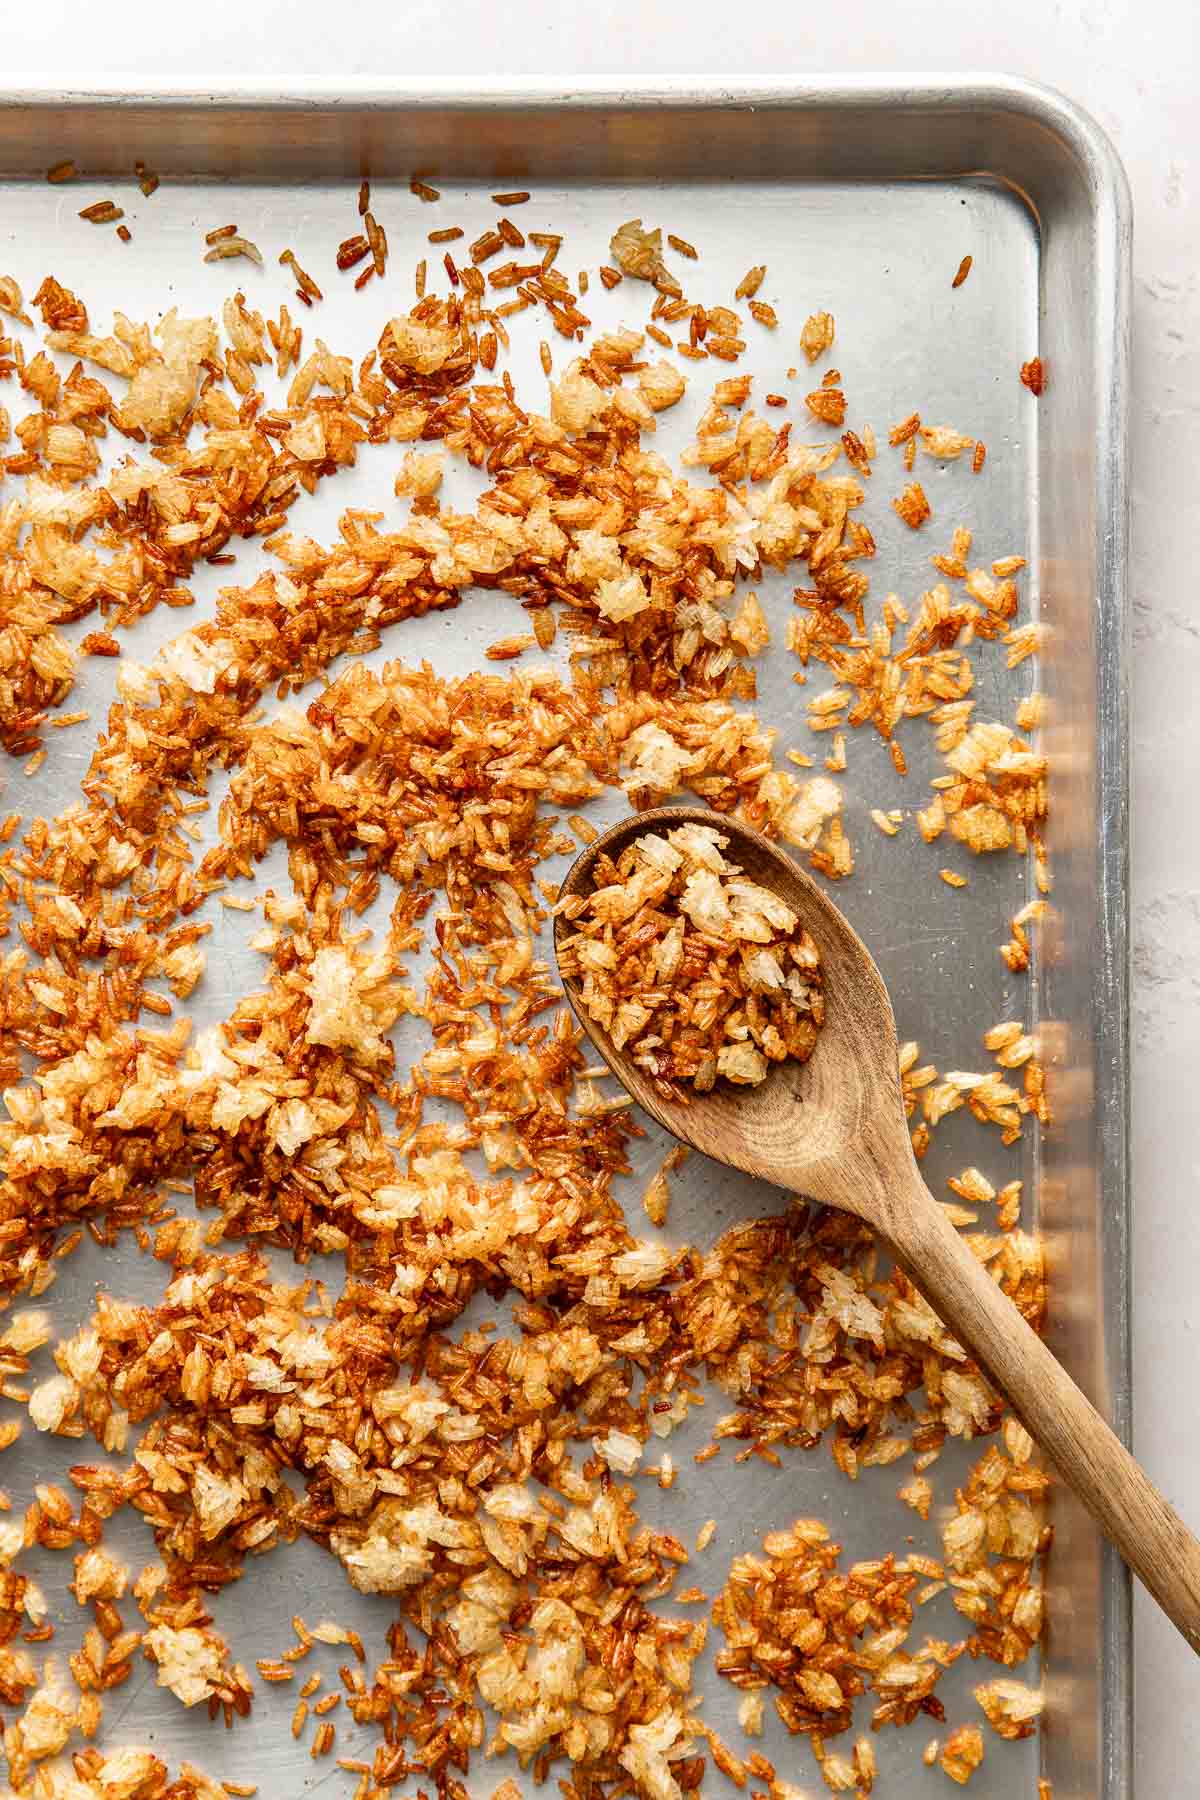
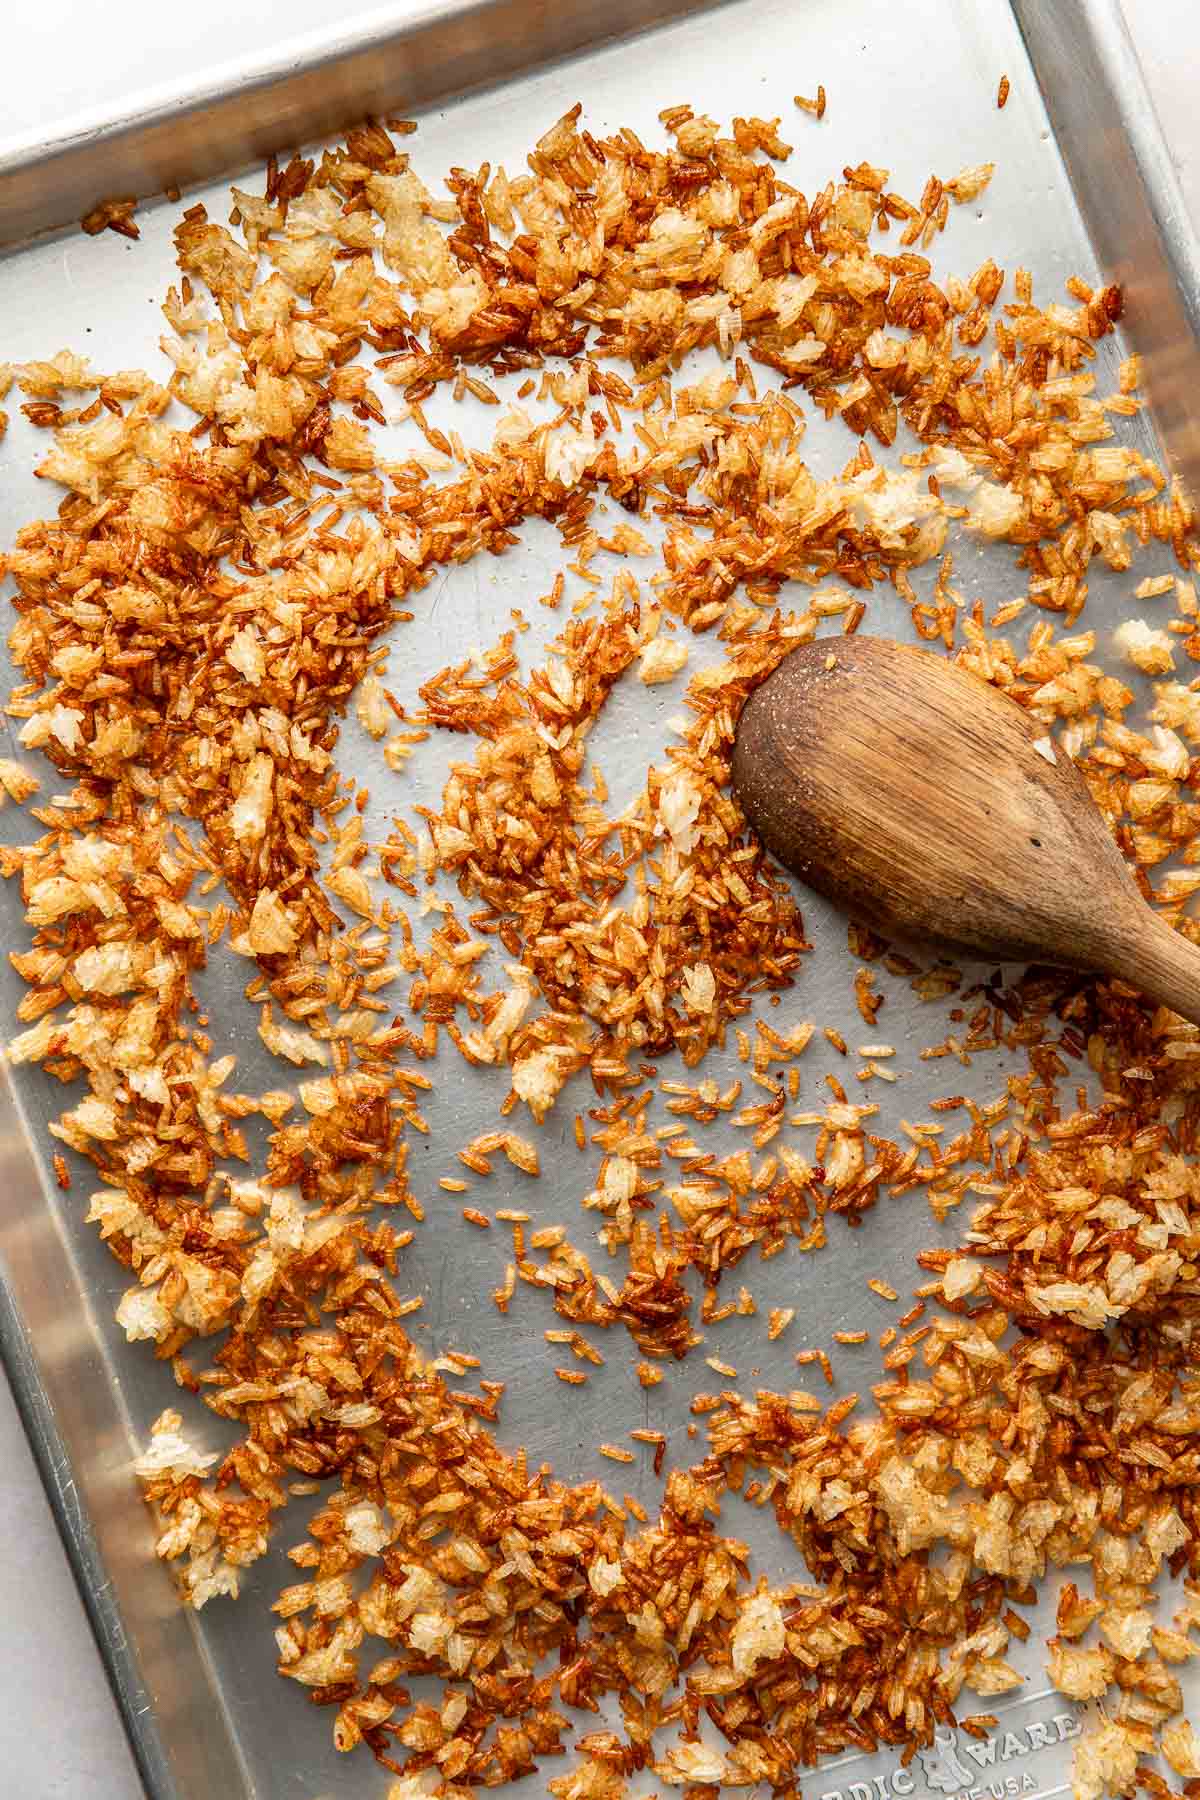
Toss ingredients together: I don’t like to dirty a large bowl if I don’t have to, so I just toss the rice with the coconut aminos, sesame oil, and garlic powder together directly on the baking sheet. I use a spatula or my hands to toss everything together until it’s nice and coated. Don’t use parchment paper or foil – the rice should go directly on the sheet pan, which helps make it crispy.
Flatten on the sheet pan: After the rice is seasoned, use a flat spatula or hands (wet them with a little water to prevent sticking or cover them in plastic wrap) to press the rice down into a flat and even layer. If little rice cakes that clump together are desired, press it down pretty hard into a thin layer.
Bake to desired doneness: Bake the rice for a total time of anywhere between 12 minutes and 20 minutes. For rice that is crispy and golden brown but still has a little chewiness to it, pull it out of the oven at 12 minutes. For really crispy and dark rice (my preference) leave it in the oven for about 18 minutes total. And definitely pull it out at 20 minutes or it will become too burnt.
For serving size and the complete directions and ingredient amounts, scroll down to the recipe card below. All of our recipes include the nutrition analysis, listing calories (kcals), protein, carbohydrates/carb, fiber, sugar, sodium, cholesterol, and more per serving.

Serve Right Away Or Use In A Recipe
When my crispy rice is done, I love how little clumps stick together making these perfect tasty little rice clusters that add so much good flavor to anything I add it to. It can be served cold, but I prefer to serve it right away when it’s warm.
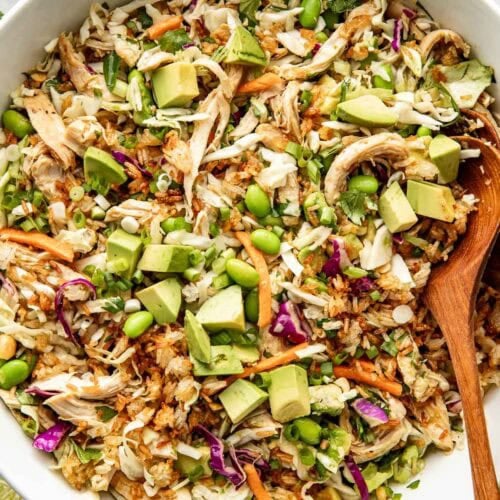
Most often, I serve it right away in my crispy rice salad recipe, this blackened chicken chopped salad, or as an addition to dinner bowls. It’s great in these teriyaki salmon bowls and these salmon bites bowls. I also love it added to this popular egg roll in a bowl recipe or these Thai chicken peanut bowls. It’s really good as the replacement for quinoa in this fall salad.
I also love the flavor and texture that crispy rice adds to veggie side dishes, like this roasted brussels sprouts salad and these roasted green beans. It’s also great in this warm sweet potato salad and this cilantro lime slaw.
I’ve also used the crispy fried rice to make my own new recipe bowl version of the popular Nobu appetizer. In a bowl, I toss the warm crispy rice with spicy tuna, sliced green onion (scallions), a dash of rice vinegar, and some sesame seeds. If I’m feeling fancy, I might top it with a fried egg.

Best Tips For Storing
Crispy rice can be made ahead of time to make meal prep easier. After it is baked and cooled, store it in an airtight container at room temperature for up to 2 days. Don’t refrigerate it or it won’t stay as crispy. And don’t reheat it in the microwave before adding it to a salad (or it won’t stay as crisp). To make it warm again, heat the crispy rice quickly in a nonstick pan over medium-high heat.
If crispy rice is added to a salad or another recipe, serve it right away for the best texture. If leftovers are refrigerated along with the other ingredients, the rice won’t stay as crispy.
More Easy Sheet Pan Recipes


Want to save this recipe?
Enter your email below & we’ll send it straight to your inbox. Plus you’ll get great new recipes from us every week!

Sheet Pan Crispy Rice Recipe
This recipe for basic crispy rice can be used to add crunch and flavor to everything from salads and dinner bowls to casseroles and veggie side dishes. It’s easy to make in the oven and adds an unexpected pop of flavor and texture that makes everything taste so good.
Ingredients
- 2 cups cooked rice*
- 1 tablespoon sesame oil
- 1 teaspoon coconut aminos, soy sauce, or tamari
- 1 teaspoon garlic powder (may sub onion powder)
Instructions
- Preheat the oven to 400°F.
- Add the cooked rice in a pile to the middle of an 18×13 sheet pan. Drizzle and sprinkle the sesame oil, coconut aminos, and garlic powder over top of the rice. Use a spoon or spatula (or your hands) to mix it together to distribute the seasonings throughout the rice.
- Spread the rice out in a single layer on the sheet pan and pat it down with the back of a spatula or your hands.
- Bake for 12 to 20 minutes, depending on crispiness preference (see Notes below), tossing after 8 or 10 minutes.
- Crispy rice is best served right away, stored at room temperature, or used in a recipe (such as Crispy Rice Salad) since the rice doesn’t stay crispy when added to a recipe and stored overnight in the fridge.
- If making ahead, store the fully cooled crispy rice in an airtight container at room temperature for up to 2 days.
Last Step! Please leave a review and rating letting us know how you liked this recipe! This helps our business thrive so we can continue providing free recipes and high-quality content for you.
Notes
* Use any cooked and cooled rice, such as jasmine rice, basmati rice, brown rice, black rice, sushi rice, or any leftover rice. It’s best if the rice is cold and mostly dry.
Baking Times:
For slightly tender crispy rice, bake for 8 minutes, then stir and flatten again. Return to the oven for another 4 minutes (12 minutes total baking time).
For very crispy rice, bake for 10 minutes, then stir and flatten again. Return to the oven for another 8 to 10 minutes (18 to 20 minutes total baking time). Don’t exceed 20 minutes or the rice may burn. It’s OK if the rice looks really dark brown – that is ideal for adding a nice crispy texture.
Nutrition Information
- Serving Size: 1/4 cup crispy rice
- Calories: 94
- Fat: 2 g
- (Sat Fat: 0 g)
- Sodium: 243 mg
- Carbohydrate: 17 g
- (Fiber: 1 g
- Sugar: 0 g)
- Protein: 2 g
- Cholesterol: 0 mg
Dietary
The photos in this post were taken by Megan McKeehan.
For ultimate success, we highly recommend reading the tips in the full blog post above. All photos and content are copyright protected. Please do not use our photos without prior written permission. If you wish to republish a recipe, please rewrite the recipe in your own unique words. Link back to the source recipe here on The Real Food Dietitians. Thank you!
I did the lower time range and it was perfect!!
Thanks, Linda!
You say not to refrigerate leftover crispy rice and not to reheat it. Isn’t there a risk of the bacteria from rice growing during that time??? Please advise.
Hi Amber, the cooked and cooled crispy rice can be stored at room temperature (not refrigerated or it won’t stay crispy) for up to 2 days. At that time, it should either be added to a salad and consumed, or it can be reheated in a skillet and added to a warm dish.