Think you can’t make your own sauerkraut at home? Think again! Our easy step-by-step tutorial for how to make sauerkraut at home will have you fearlessly fermenting your own in 7-14 days.
With our detailed photographs and simple directions, you can DIY one of our favorite probiotic-rich foods.
Making Homemade Sauerkraut is Easier than You Think
Our method of making sauerkraut is super simple and doesn’t require any fancy kitchen products. With just green cabbage, salt, a zip-top freezer bag, and a jar, you can have small batches of kraut in just 7-14 days.
We’ve made this sauerkraut in jars and crocks, with lids and without, with and without airlocks, using special weights or just a plastic freezer bag filled with water for weight. They’ve all turned out great!
If you’ve been thinking about trying at-home fermentation, this sauerkraut recipe is foolproof — From experts to beginners, this how to make sauerkraut tutorial is for you.
Bonus! Making homemade sauerkraut is also economical. For just $5 (or less), you can make a jar of sauerkraut at home that would easily cost $7-10 at the store or a farmer’s market.
The Fermentation Process
The science behind the fermentation process starts with the good bacteria, Lactobacillus, on the surface of the cabbage. This bacteria eats the natural sugars in the cabbage and produces the tangy lactic acid.
The longer the cabbage is left in the jar, the more lactic acid is produced, and the more “sour” the flavor will become. Lacto-fermentation is how yogurt, miso, pickles, and kimchi get their yummy flavors.
The tangy-tart flavor is perfect for grilled burgers, hot dogs or brats, sandwiches, salads, and more.
Fermentation and Gut Health
If you’re reading this, you may already know about the health benefits of consuming fermented foods. If you found your way here because you like kimchi and sauerkraut, you might also be interested in reasons to eat fermented foods every day.
What are the benefits of eating sauerkraut? Eating raw sauerkraut has the potential to boost gut health because of the presence of beneficial bacteria, or probiotics, that form during the fermentation process. Sauerkraut also helps to activate certain digestive enzymes to help your digestive system break down food more efficiently.
Homemade sauerkraut has lots of nutrients, too. Your mason jar kraut will contain a good dose of fiber, iron, enzymes, vitamin C, B vitamins, calcium, potassium, and lactic acid.
What You Need To Make Sauerkraut
What is sauerkraut made of? Sauerkraut only requires 2 ingredients: cabbage and salt. To turn a head of cabbage into kraut, you’ll need just a handful of ingredients and common kitchen items:
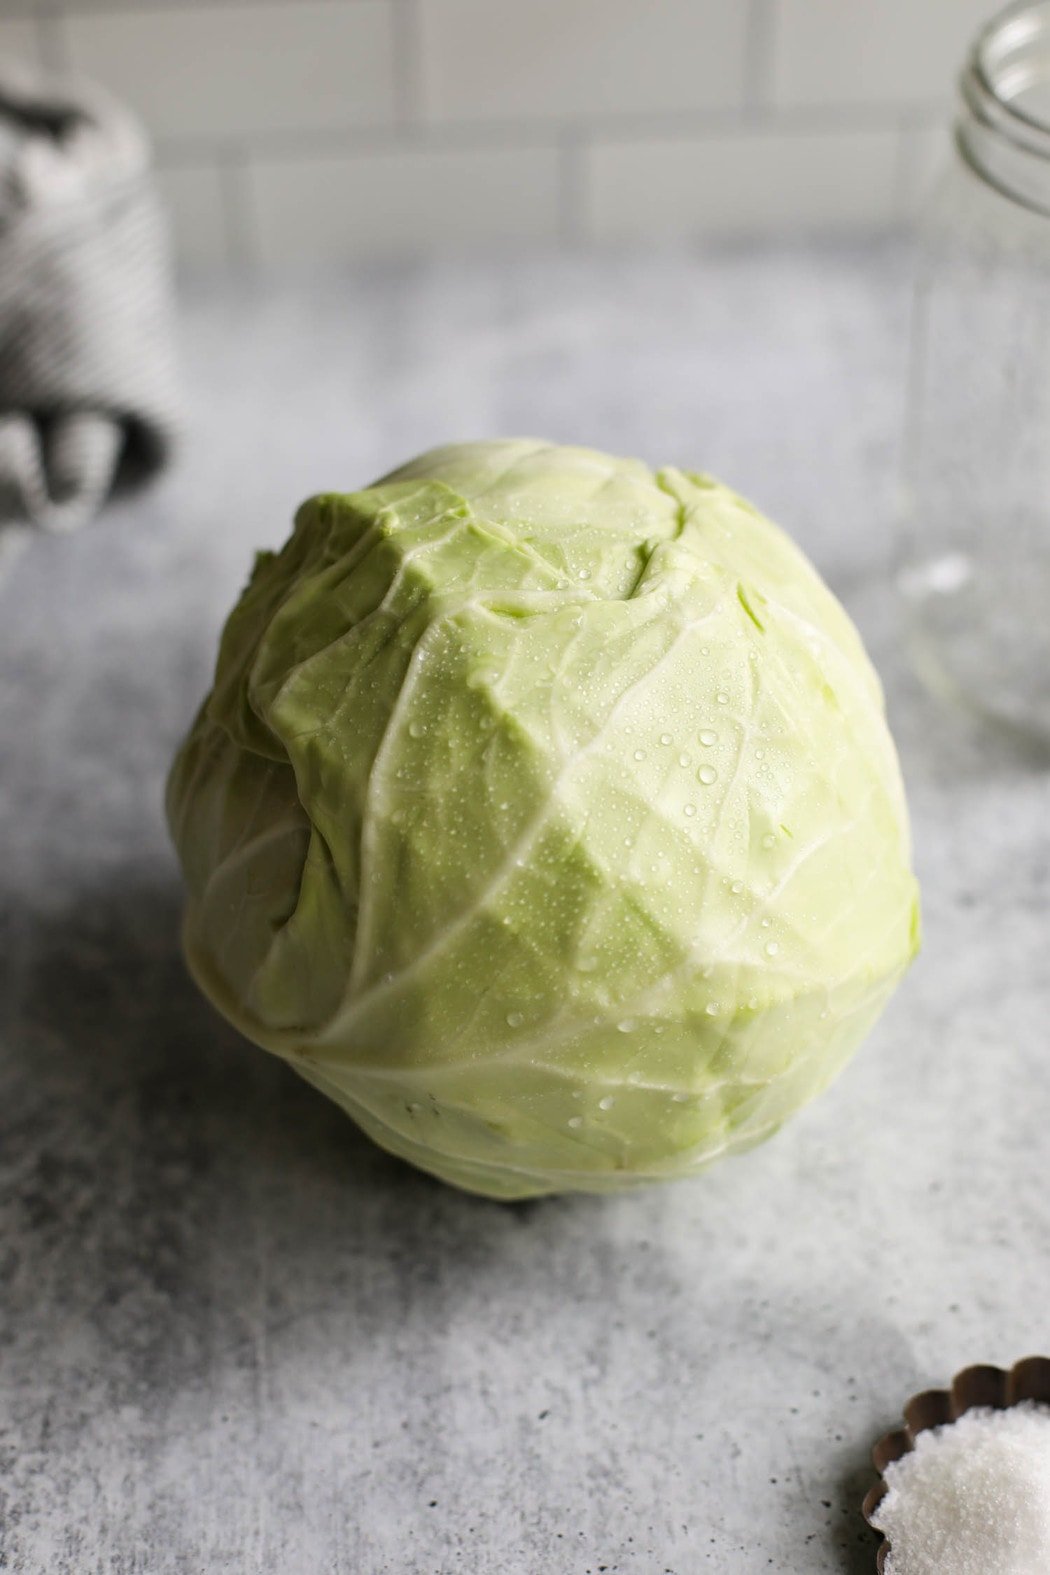
- Fresh cabbage — Look for cabbage that is firm and heavy for its size, but not too large. The leaves should be crisp, slightly shiny, and blemish-free.
- Sea salt — It’s important to use sea salt and not iodized salt when making sauerkraut. We use fine sea salt for this recipe. Pickling salt or Redmond Real Salt may also be used.
- 1-quart wide-mouth glass jar — This will serve as your fermentation ‘vessel’ instead of a stoneware crock. Using a jar lets you see what’s happening throughout the process. If you don’t already have one, they’re also easy to find at most local grocery stores, hardware stores, or big box stores like Target and Walmart.
- Large knife — A large, sharp knife such as a chef’s or cook’s knife is needed to remove the core of the cabbage and slice it thinly.
- Cutting board
- Large mixing bowl — Any kind will work; just be sure it’s large enough to be able to hold all of the cabbage once it’s sliced.
- Small zip-top plastic freezer bag — You’ll fill this bag with tap water to create an inexpensive weight. This helps keep the cabbage under the brine. A sandwich-size bag works best, but be sure it is a thicker ‘freezer’ bag with a double seal or zipper so it’s less likely to leak.
- Lid — A screw-on plastic or metal 2-piece band and lid is all you need.
- Airlock, optional — An airlock is a special lid or lid attachment that allows gases created by fermentation to escape on their own. These Pickle Pipes are our favorite airlocks because their simple, one-piece design makes them easy to use. If you don’t have an airlock, don’t fret. You can manually release the gases or ‘burp’ the jars.
- Weight, optional — The weight replaces the need for the zip-top bag. If you think you’ll want to continue your fermentation journey, you may want to invest in a set of glass or ceramic fermentation weights like these Pickle Pebbles from Mason Tops.
Our Take On Fancy Gadgets For Sauerkraut
We don’t want you to feel held back because you don’t have the “right tools.” In reality, the barriers to entry are low for fermented cabbage. There’s always time to grow into fancy crocks, weights, and airlocks as you get more adventurous in your fermenting forays.
So, feel free to roll up your sleeves and get started on your first batch of deliciously healthy sauerkraut without all the bells and whistles.
How Long Does It Take?
It takes 7-14 days for cabbage to ferment and become sauerkraut, depending on your taste preference and storage conditions.
Smaller quantities of sauerkraut, like the amount we make in a quart jar, ferment faster than larger batches. Another reason why this recipe is perfect for beginners is that there is no absolute minimum or maximum amount of fermentation time.
Your home’s temperature can speed up or slow down the fermentation time. Warmer ambient temperatures will have your sauerkraut fermenting faster, while cooler temperatures mean it will take a little longer.
Things to Watch Out For
One of the best parts about making sauerkraut is that it is safe to eat at every stage. Ensure your jar isn’t too full to make the process go smoothly. You don’t want it bubbling over and making a mess.
Surface Mold Can Appear
If you see white or bluish furry surface mold, scoop it out with a clean finger or a utensil before pressing everything below the brine again. Replace the bag with a clean water-filled bag and wash the lid before placing back on the jar, pressing everything below the brine again.
Sauerkraut is preserved by lactic acid, and even when mold forms on the surface, the rest of the kraut is typically ok. Use your best judgment on your batch. If it smells funky or tastes off, toss it and try again.
How to Make Sauerkraut
We’ve broken the process into 6 steps, with photos to help you along the way.
1. Prep the cabbage
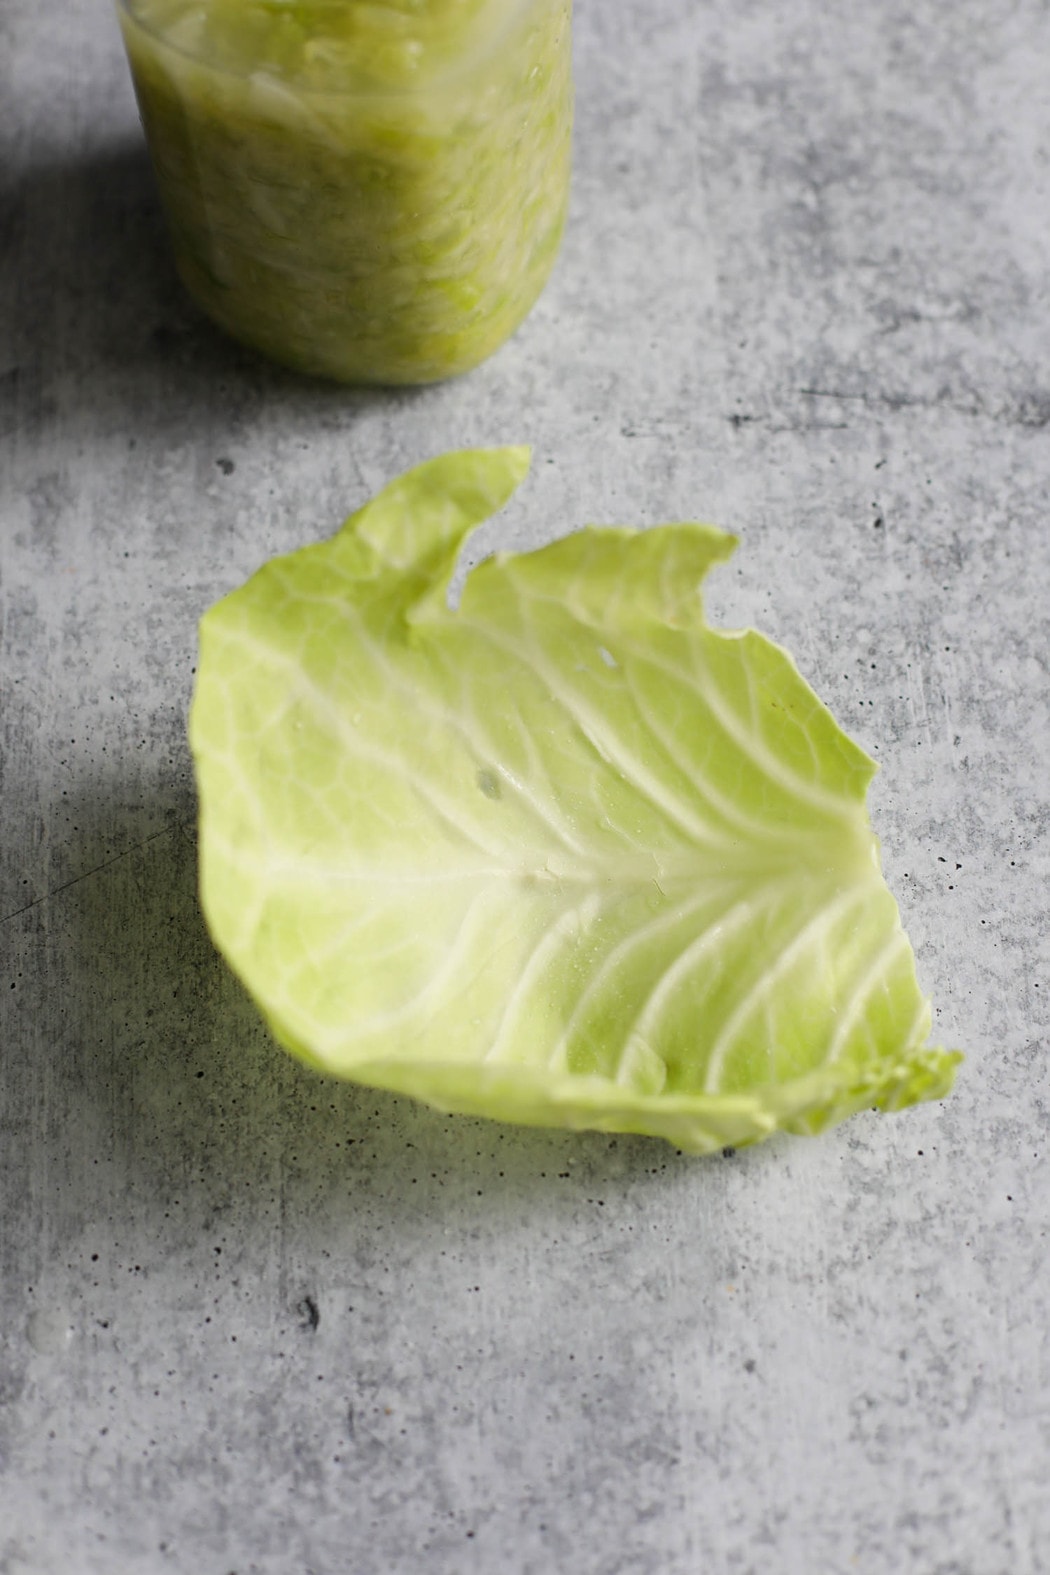
- Rinse the cabbage in cool water. Remove the coarse outer leaves and discard. Remove and rinse a few unblemished leaves and set them aside for later. Pat the cabbage dry with a clean kitchen towel or paper towel.
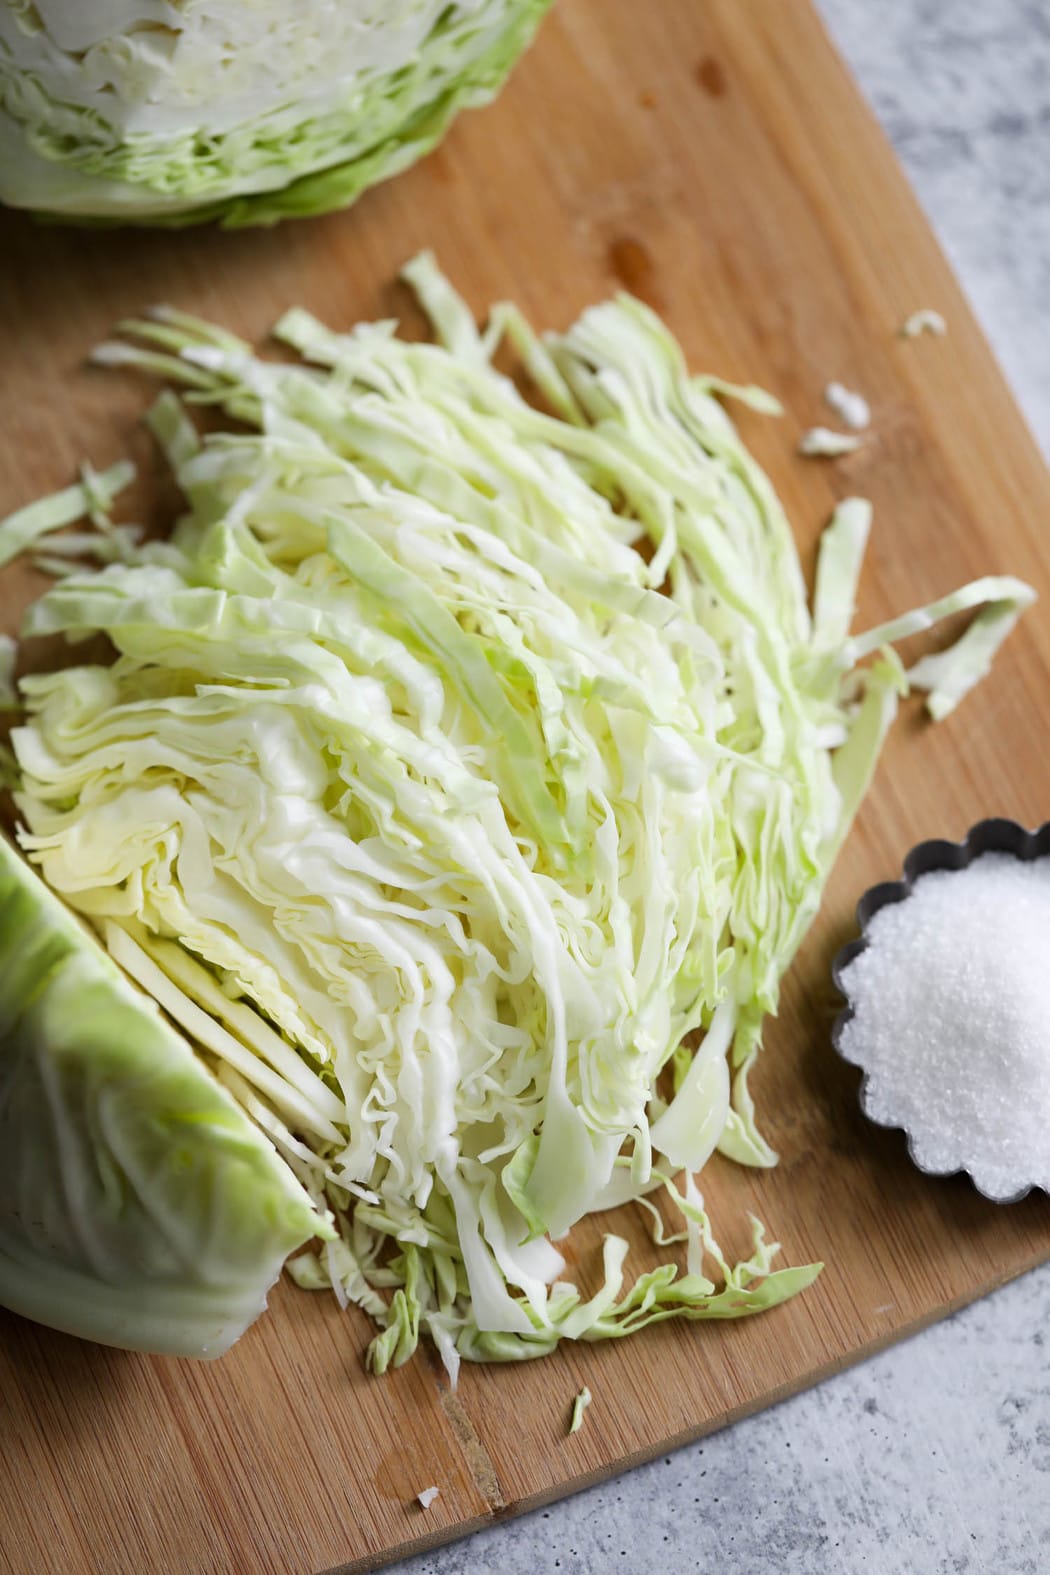
- Using a large knife, slice the cabbage in half. Cut the halves in half again to create quarters. Carefully cut away the core, then thinly slice the cabbage.
- Transfer the sliced cabbage to a large bowl.
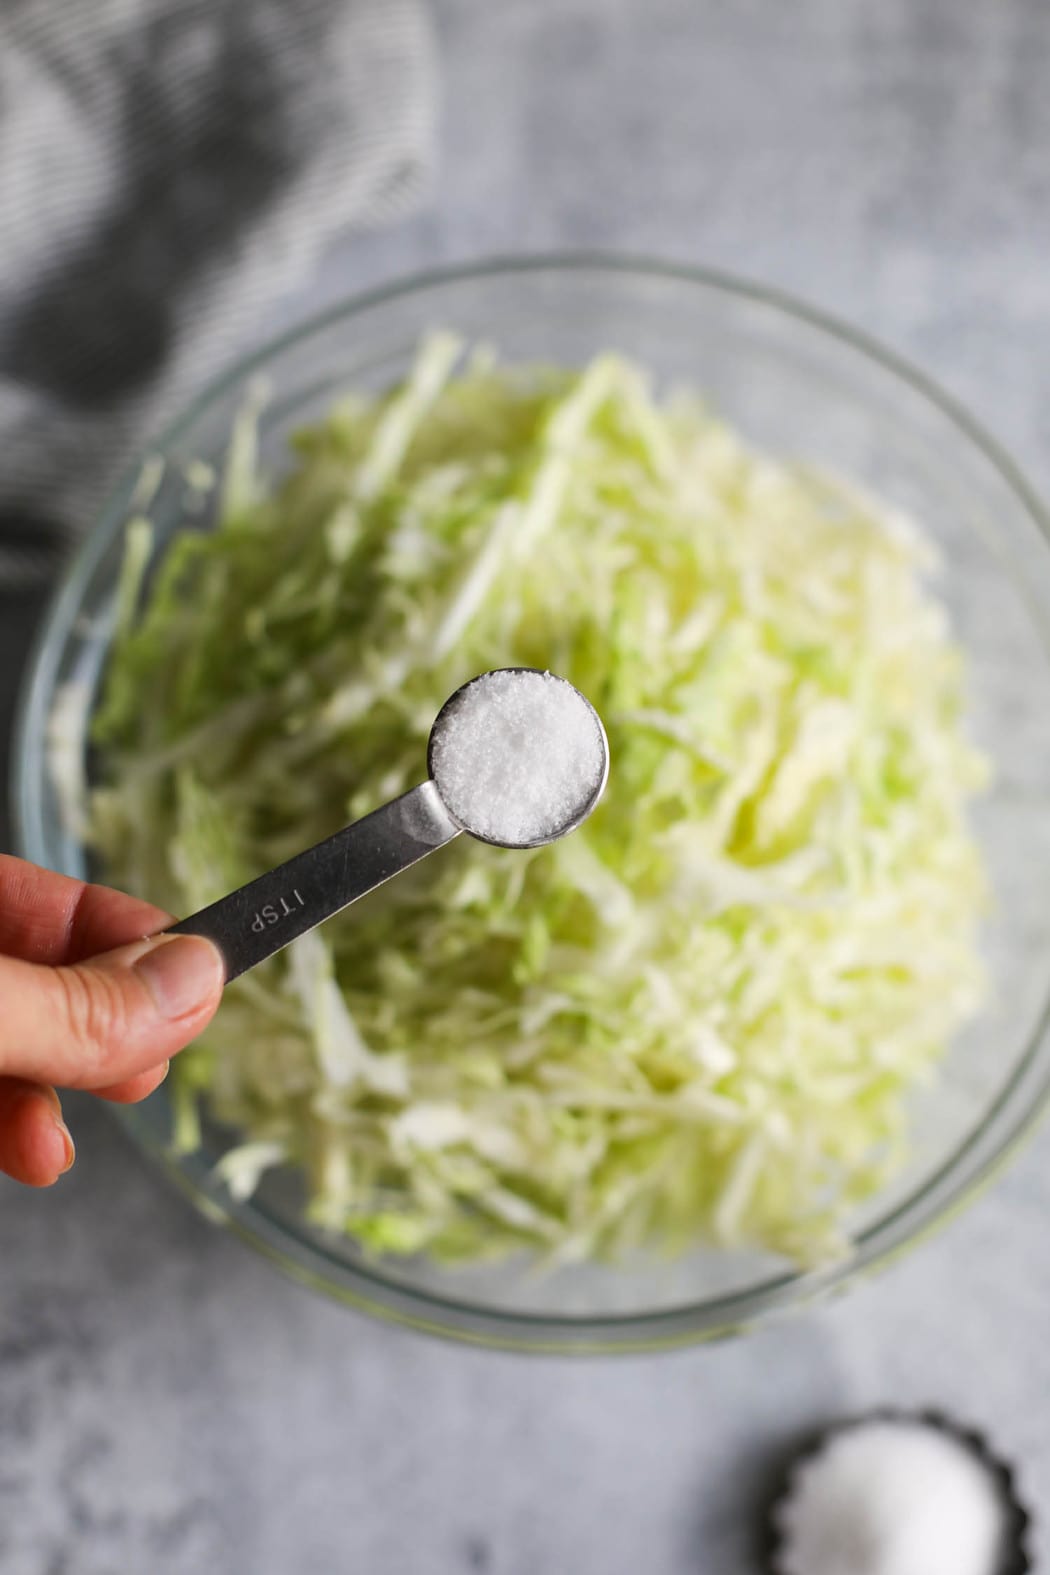
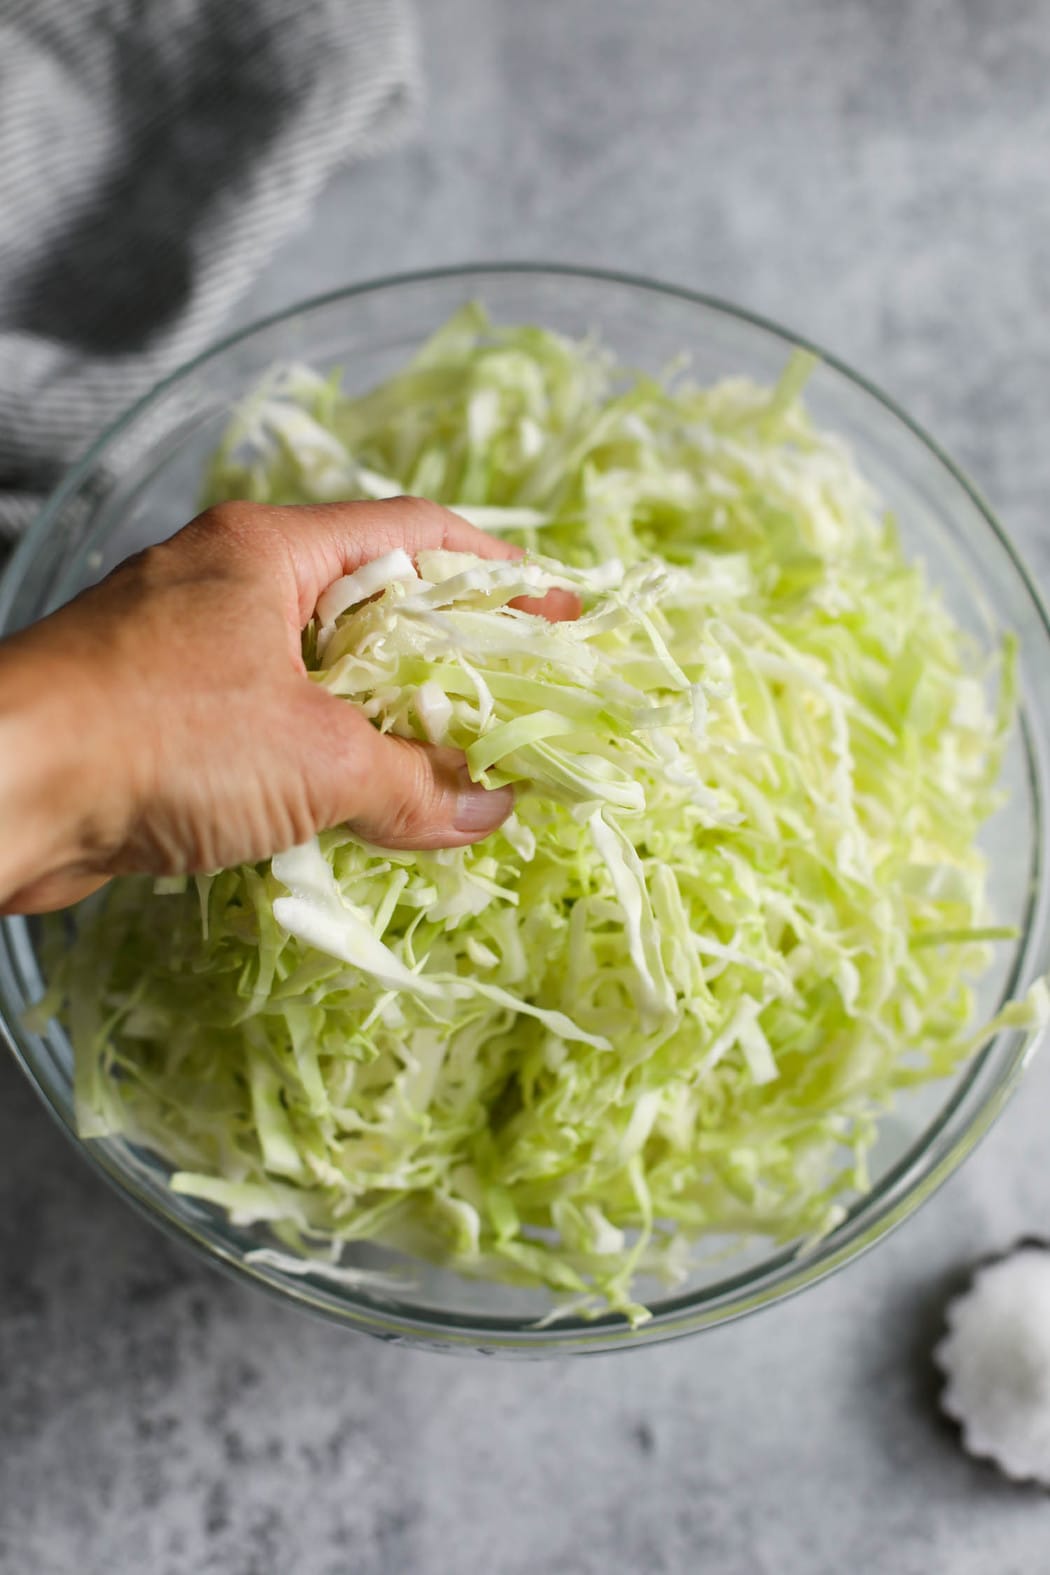
- Add 1 teaspoon of the salt and, with your hands, massage it into the cabbage. Taste the cabbage when it starts to look wet and shiny. You should be able to taste the salt without it being overwhelming (a little salty, but still taste good). Add more salt, a little at a time, as needed to get the ‘salty, but not too salty’ taste.
- Continue to massage until the cabbage becomes wet and limp. It can take 3-5 minutes for the salt-water liquid (aka brine) to pool in the bowl’s bottom. You want to be able to squeeze the cabbage with two hands and have brine run freely into the bowl.
- If you’ve put in a reasonable effort and don’t have much brine, cover the bowl and allow it to sit for 45 minutes. Massage again until the liquid runs freely when you squeeze a handful of cabbage.


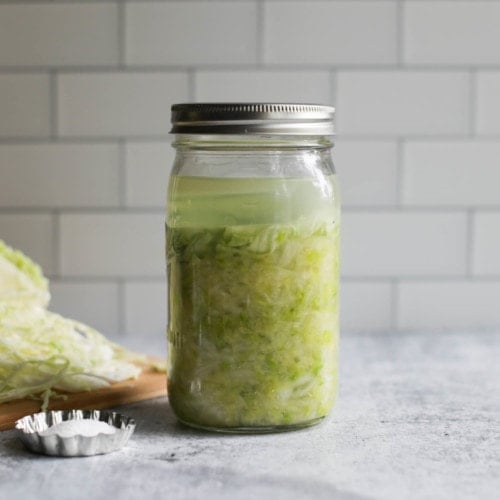
2. Pack the Jar
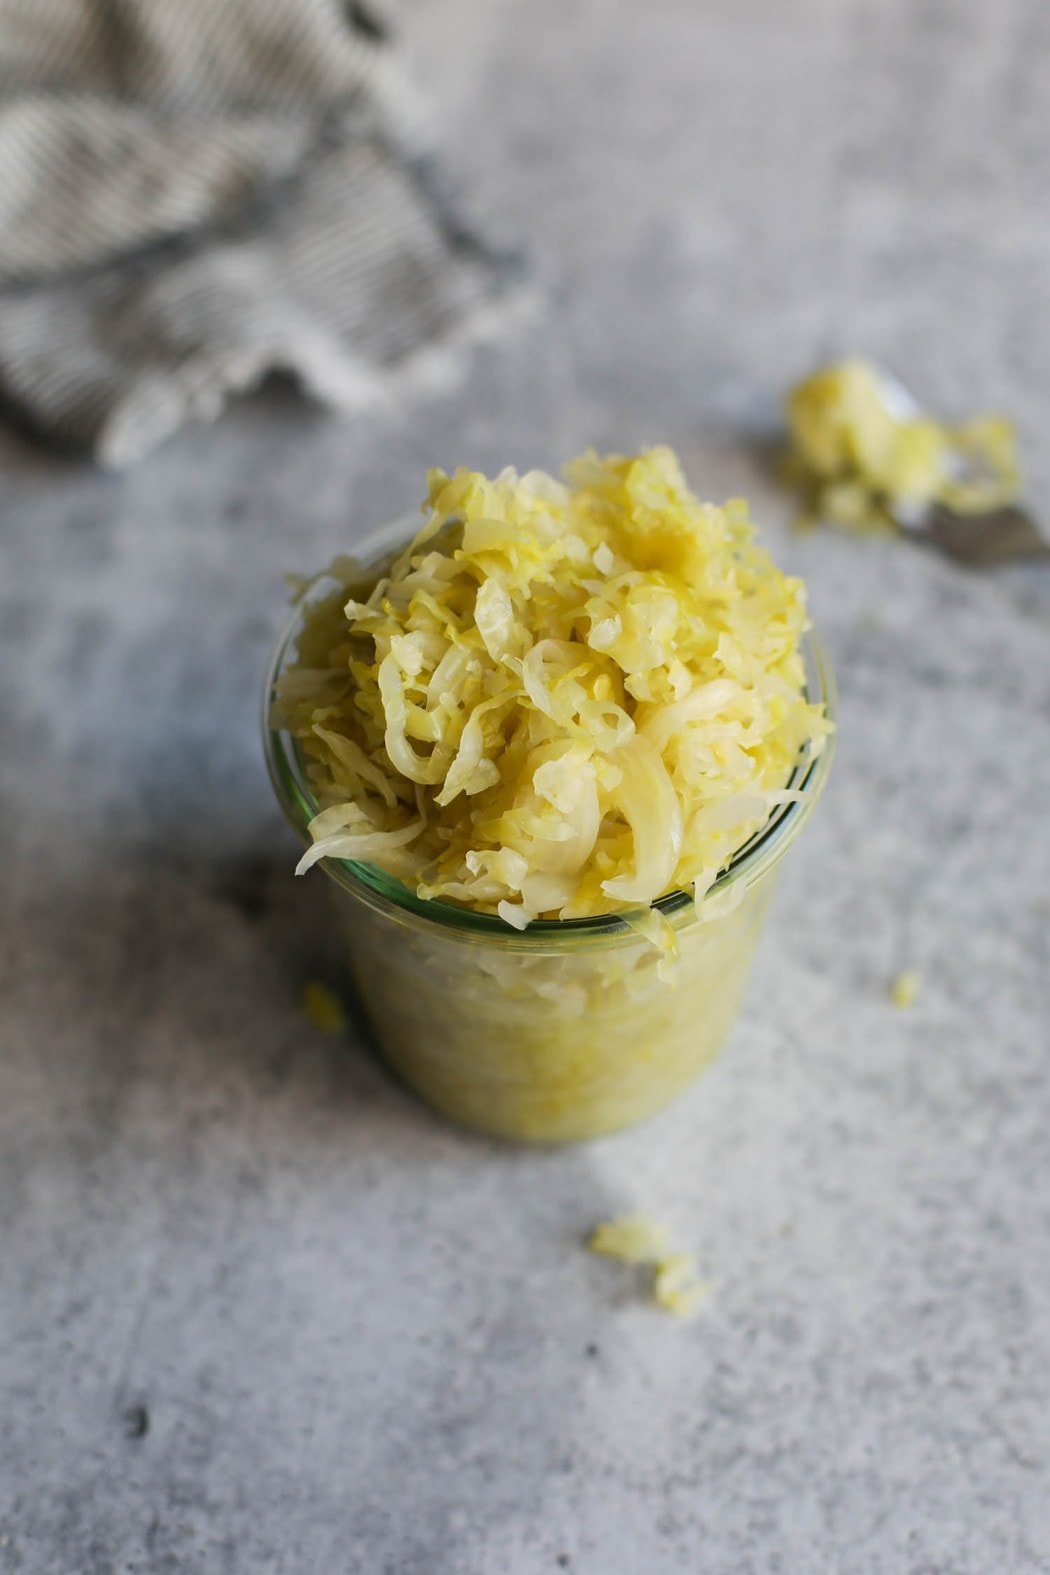
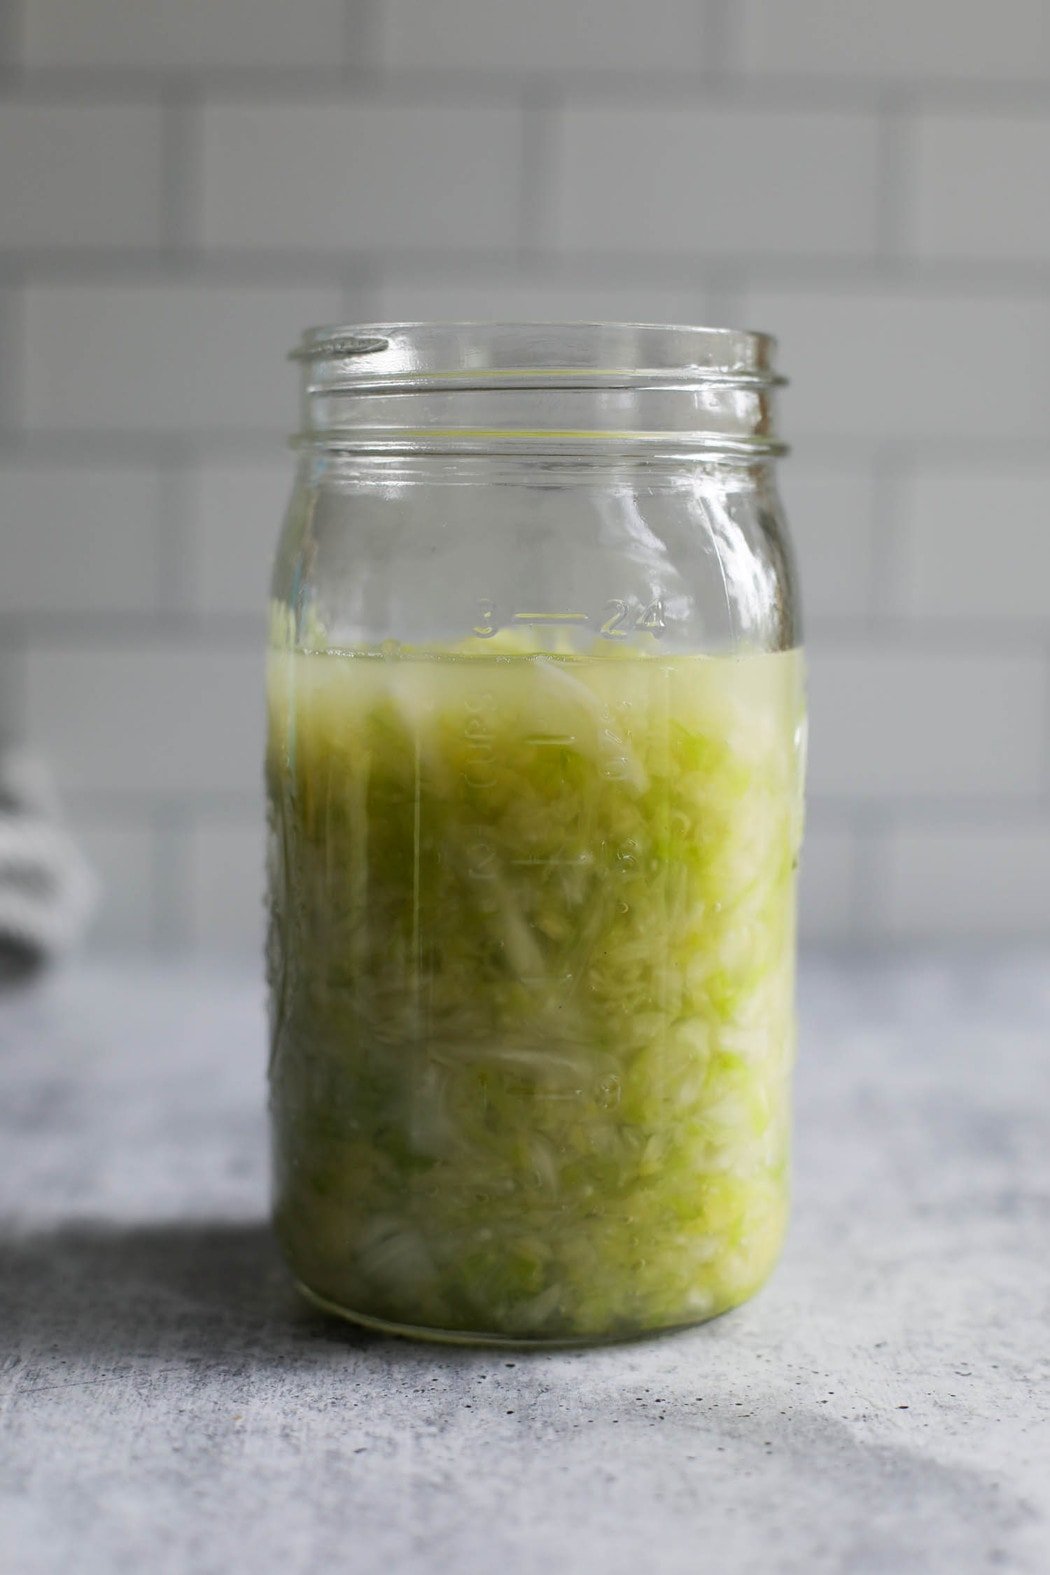
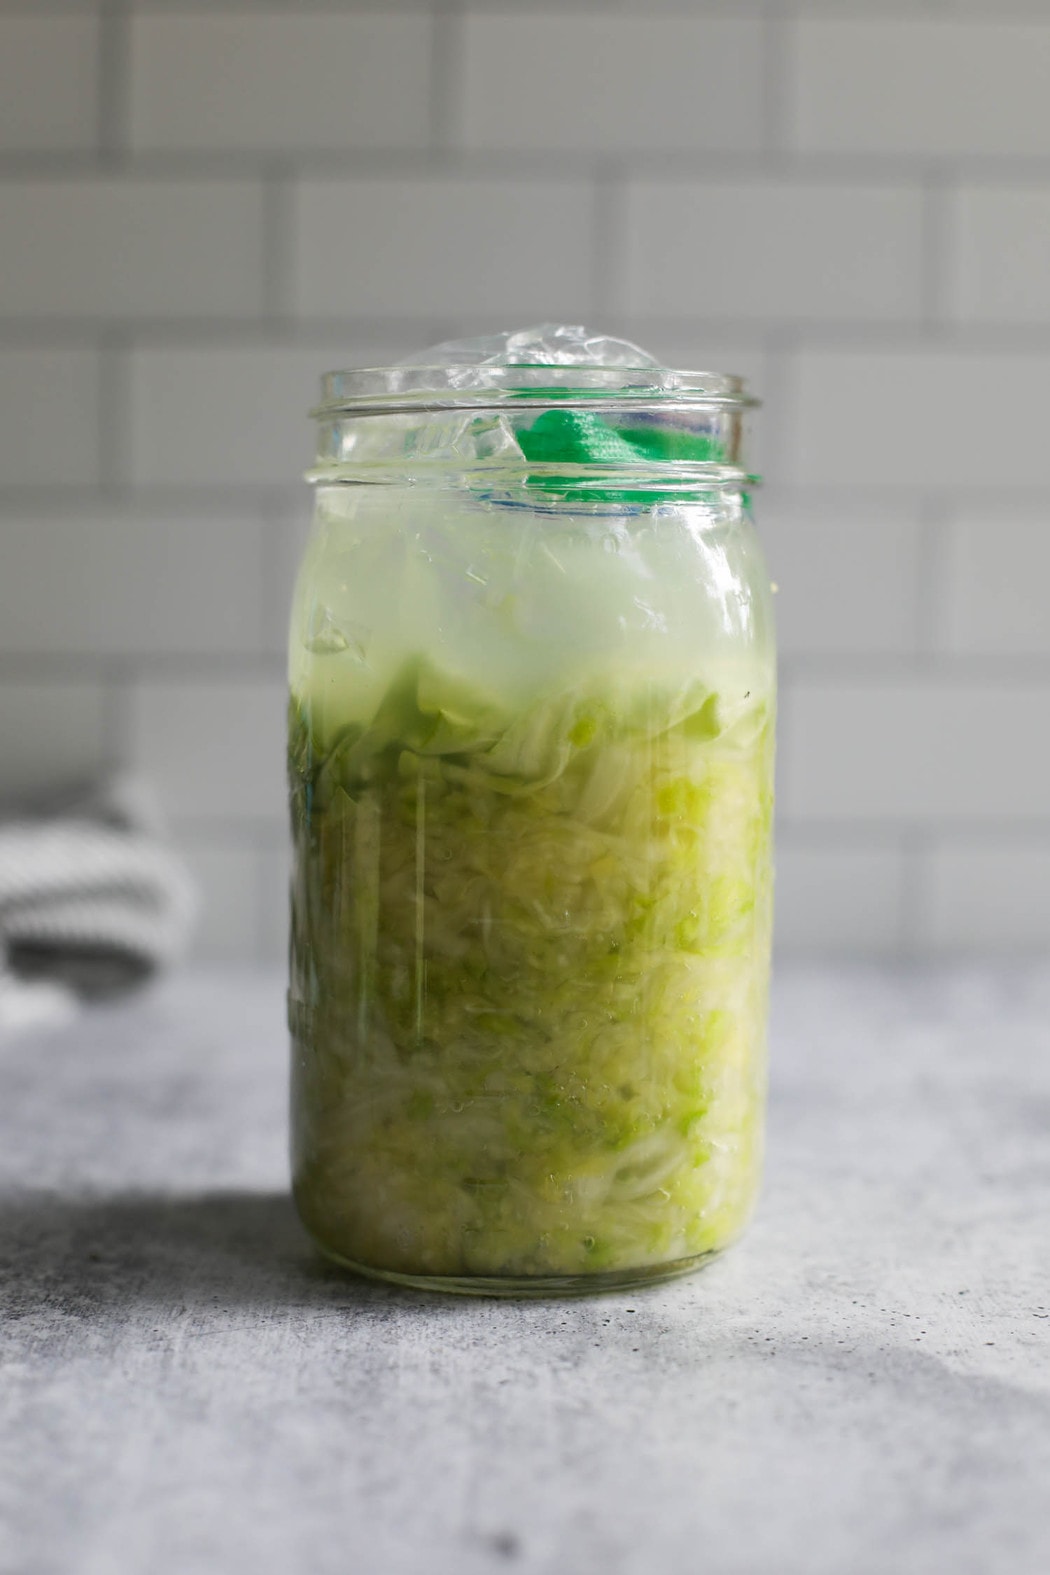
- Transfer the cabbage into a clean 1-quart mason jar, a few handfuls at a time. Use your hands to press the cabbage into the bottom of the jar, working out any air pockets, before you add more cabbage.
- Repeat the adding and pressing until all the cabbage has been packed tightly into the jar, leaving 2-3 inches of headspace at the top.
- If you have too much cabbage, place some in another clean jar (for extra kraut!). Once it’s all pressed into the jar, you should have a little brine on top of the cabbage.
- Top the packed cabbage with 1 or 2 reserved leaves, gently tucking them down along the sides to keep little bits of cabbage under the brine. If you have bits of cabbage floating in the brine after placing the leaves over the top, pick them out to the best of your ability. Anything not covered in brine (i.e., floating and exposed to air) increases your chances of developing mold.

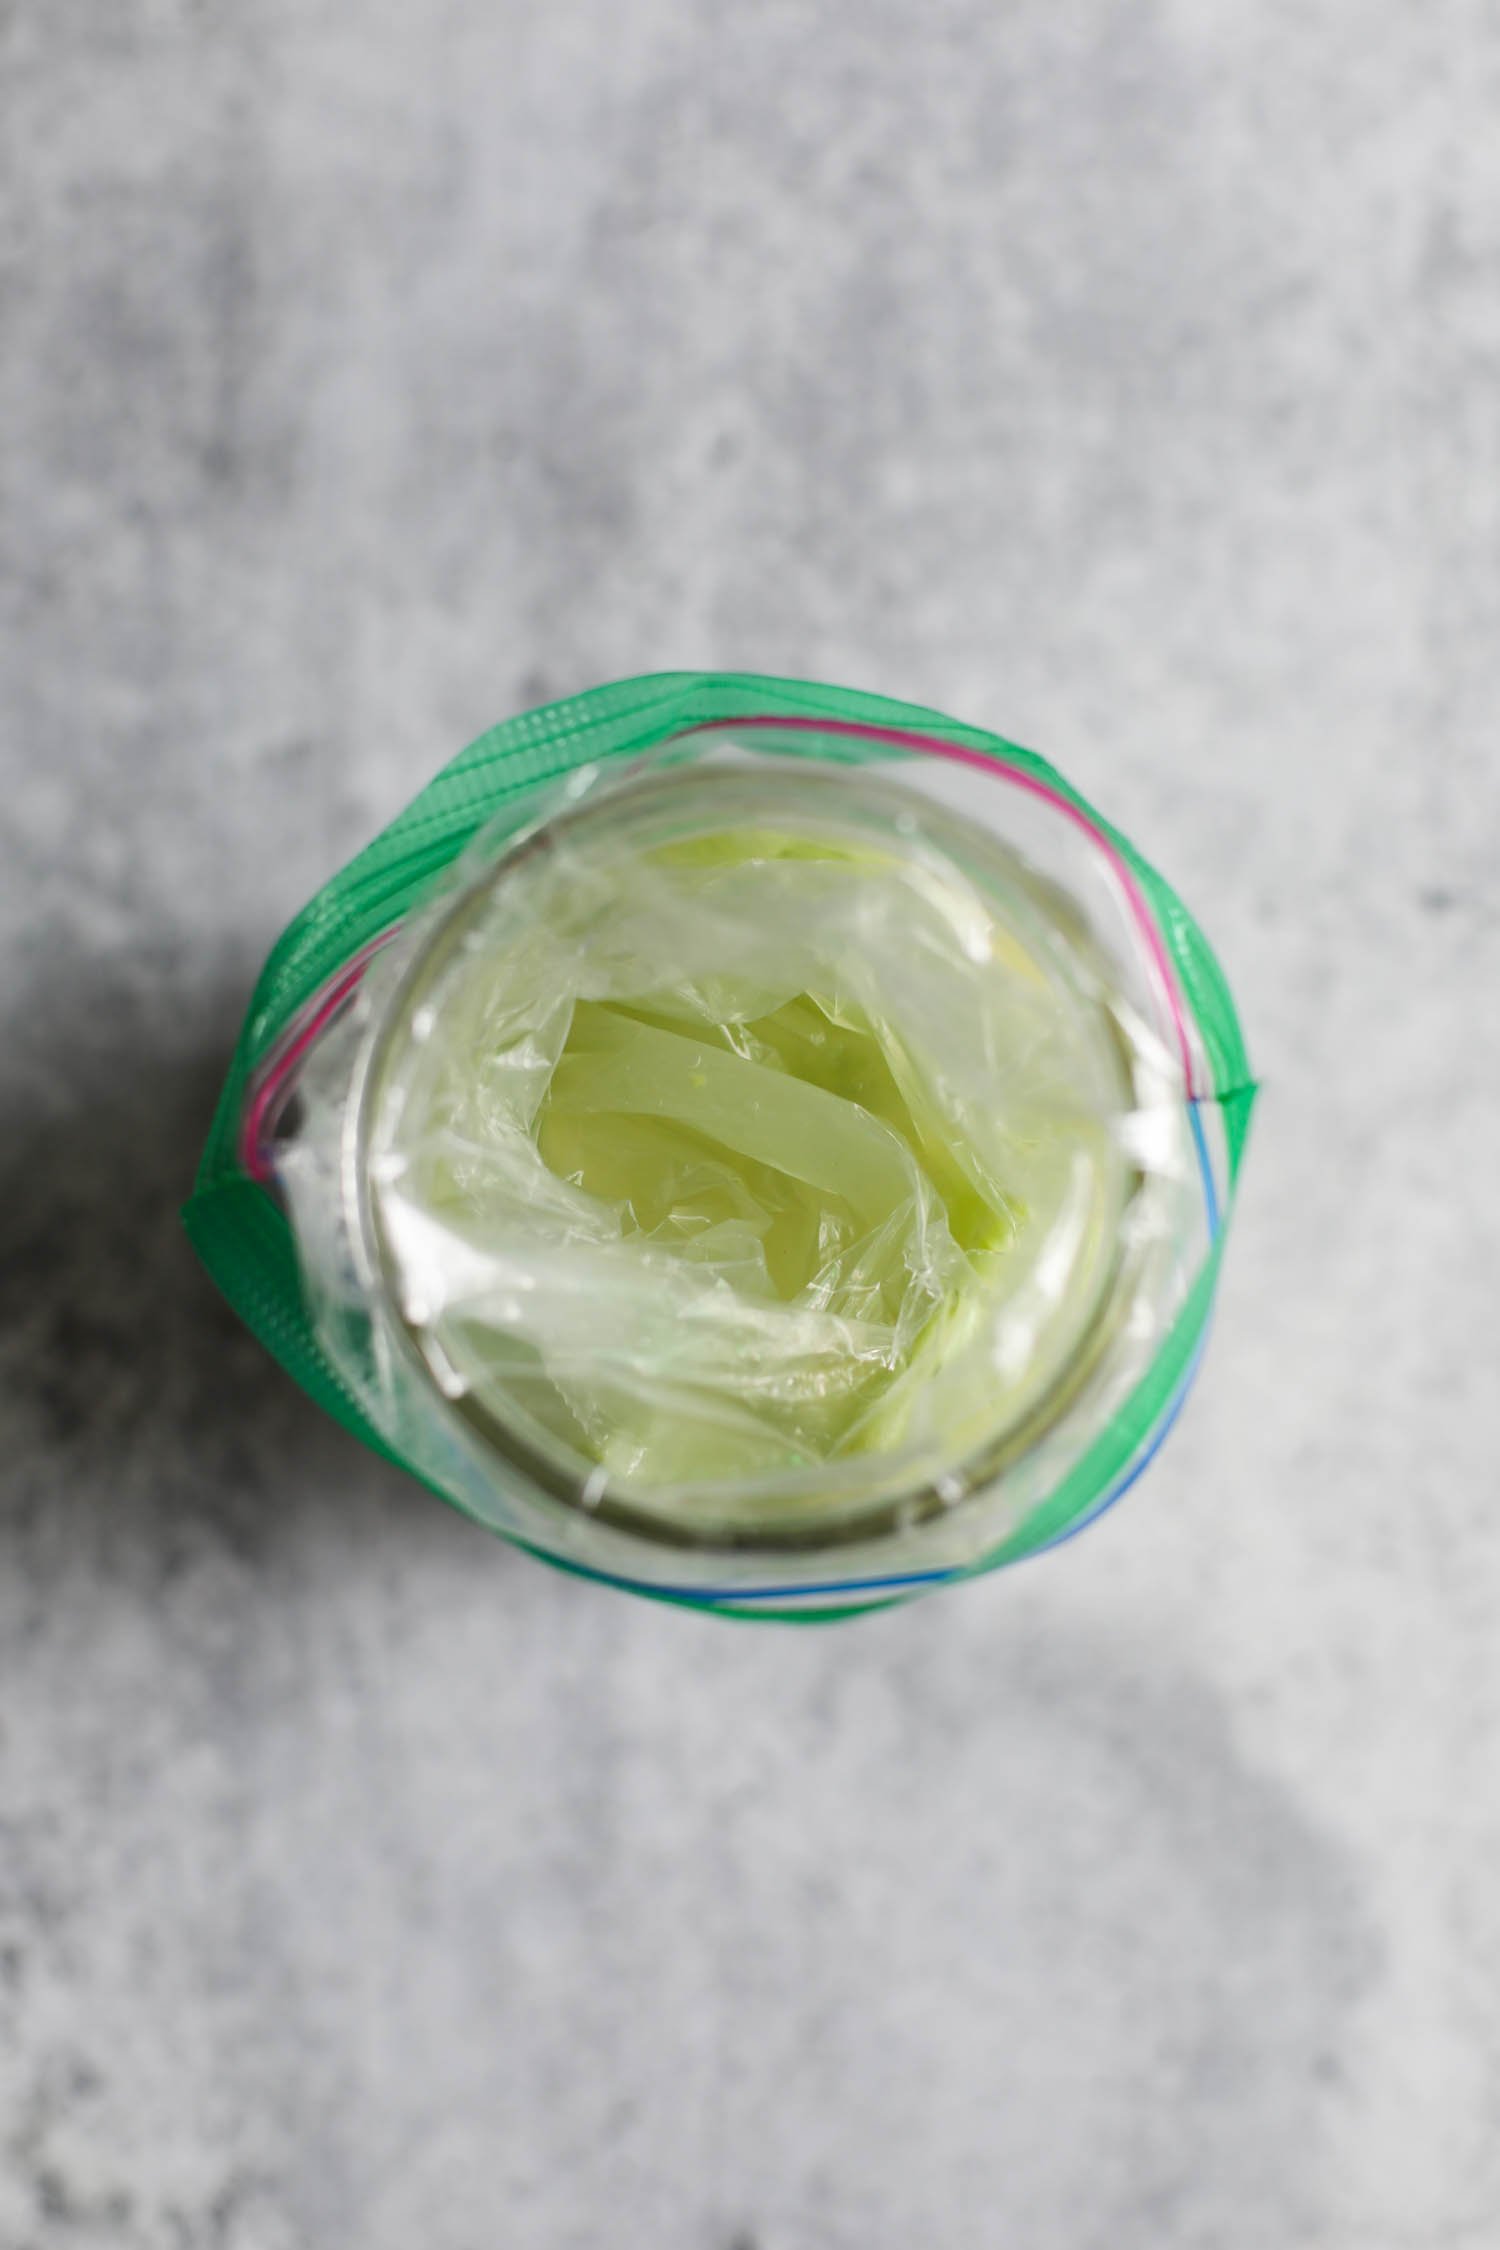
3. Weigh it down
- Place the zip-top freezer bag into the jar, using your fingers to spread it out to cover as much of the cabbage leaf as possible. Fill with cool water and seal, pressing out as much of the air as possible.
- Tuck the top of the bag into the jar and loosely screw the lid onto the jar so the gases created during fermentation can escape. You can also cover it with a clean kitchen towel. If using a lid with an airlock, follow the directions for your particular lid.
4. Ready, Set, Ferment!
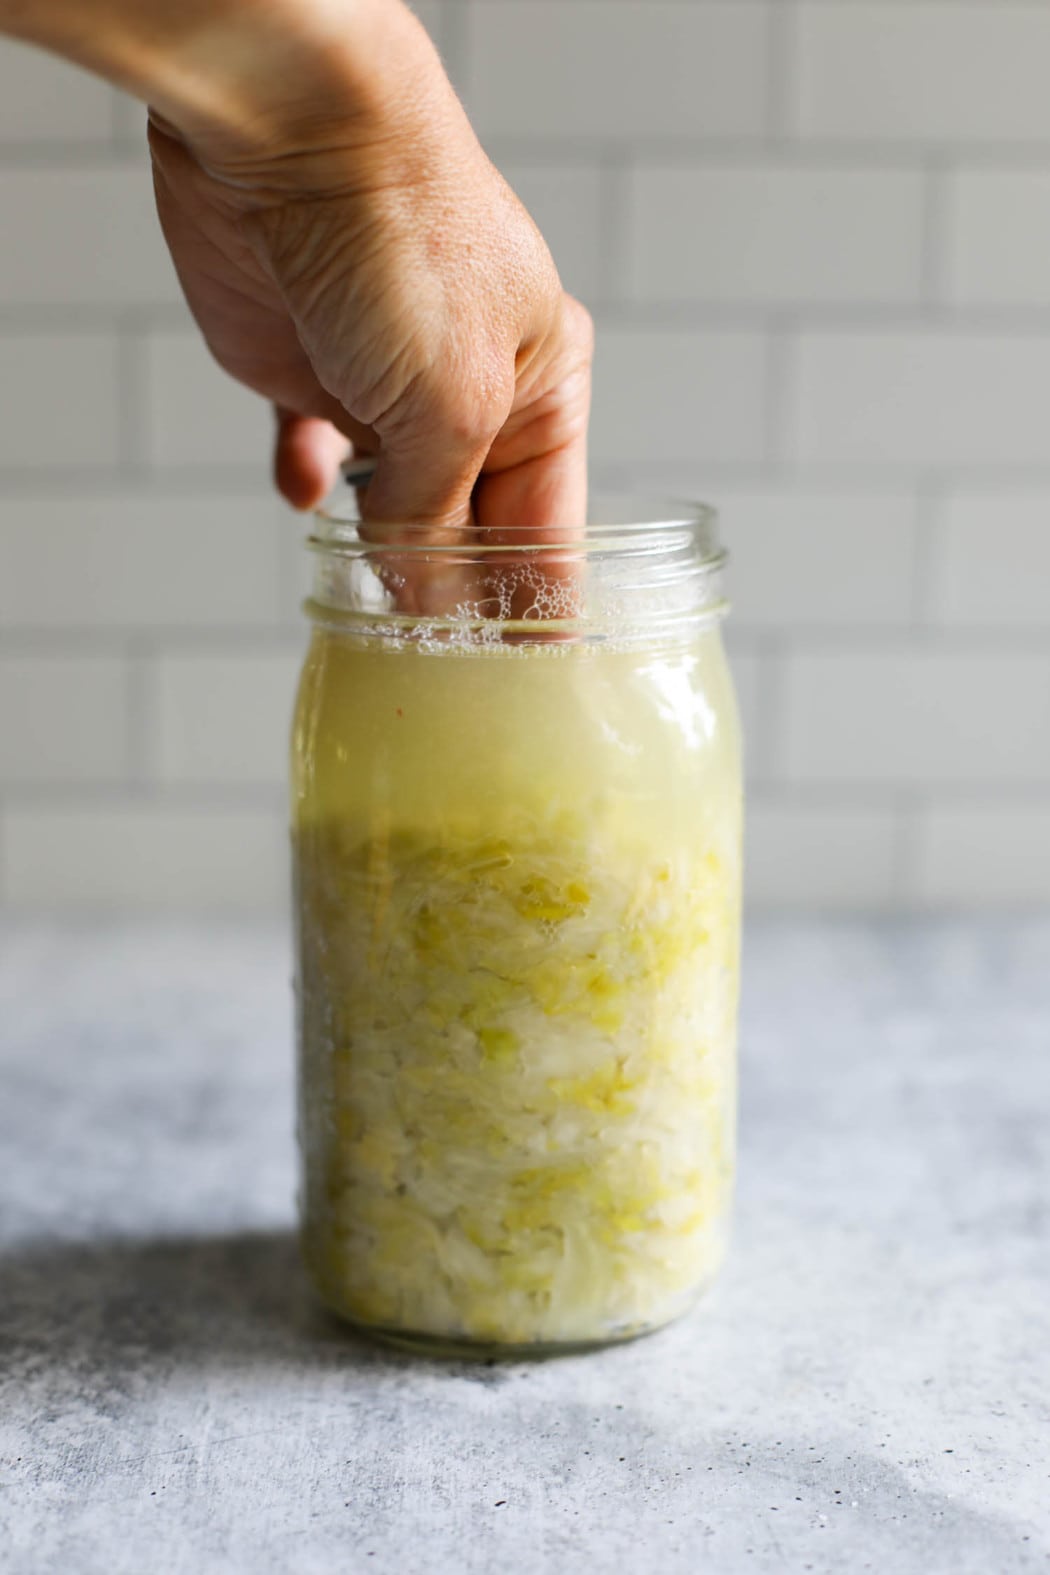
- Place the jar in an area out of direct sunlight and cool to room temperature (55-75℉) to ferment for 4-14 days. Dark is best, but it must be somewhere you won’t forget about it. If you leave it on the kitchen counter, lay a towel over the jar to give it privacy.
- Check your ferment daily to be sure everything is under the sauerkraut brine. Remember: “If it’s under the brine, everything’s fine!”
5. take a look
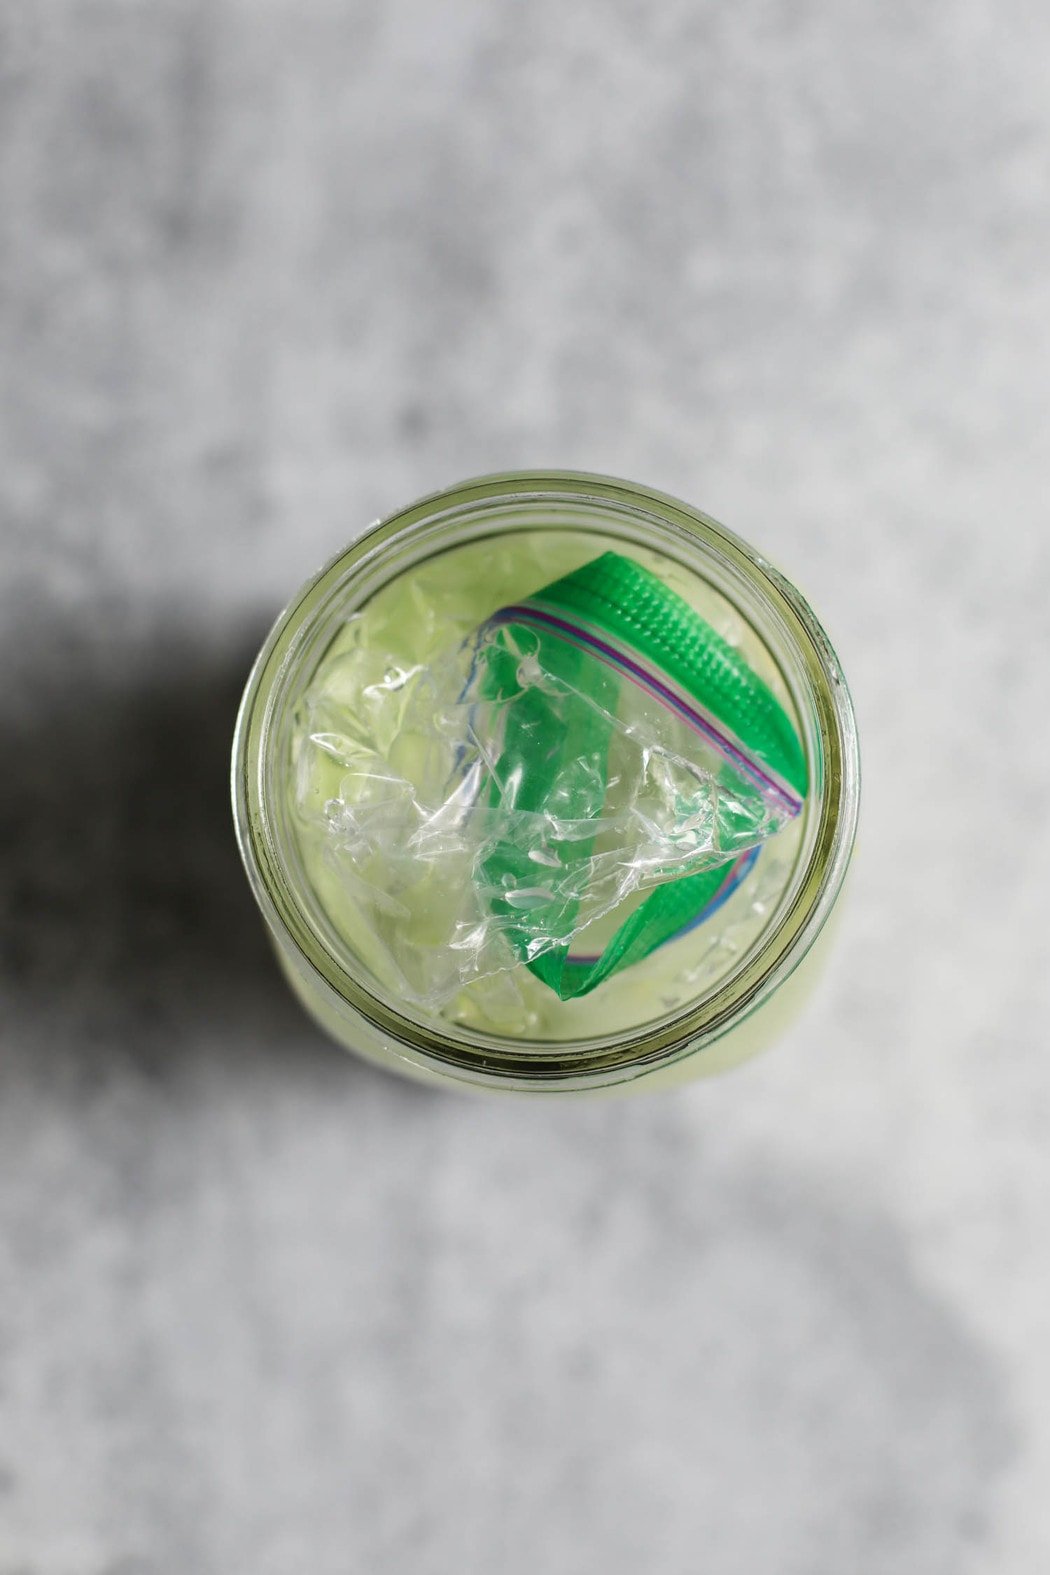
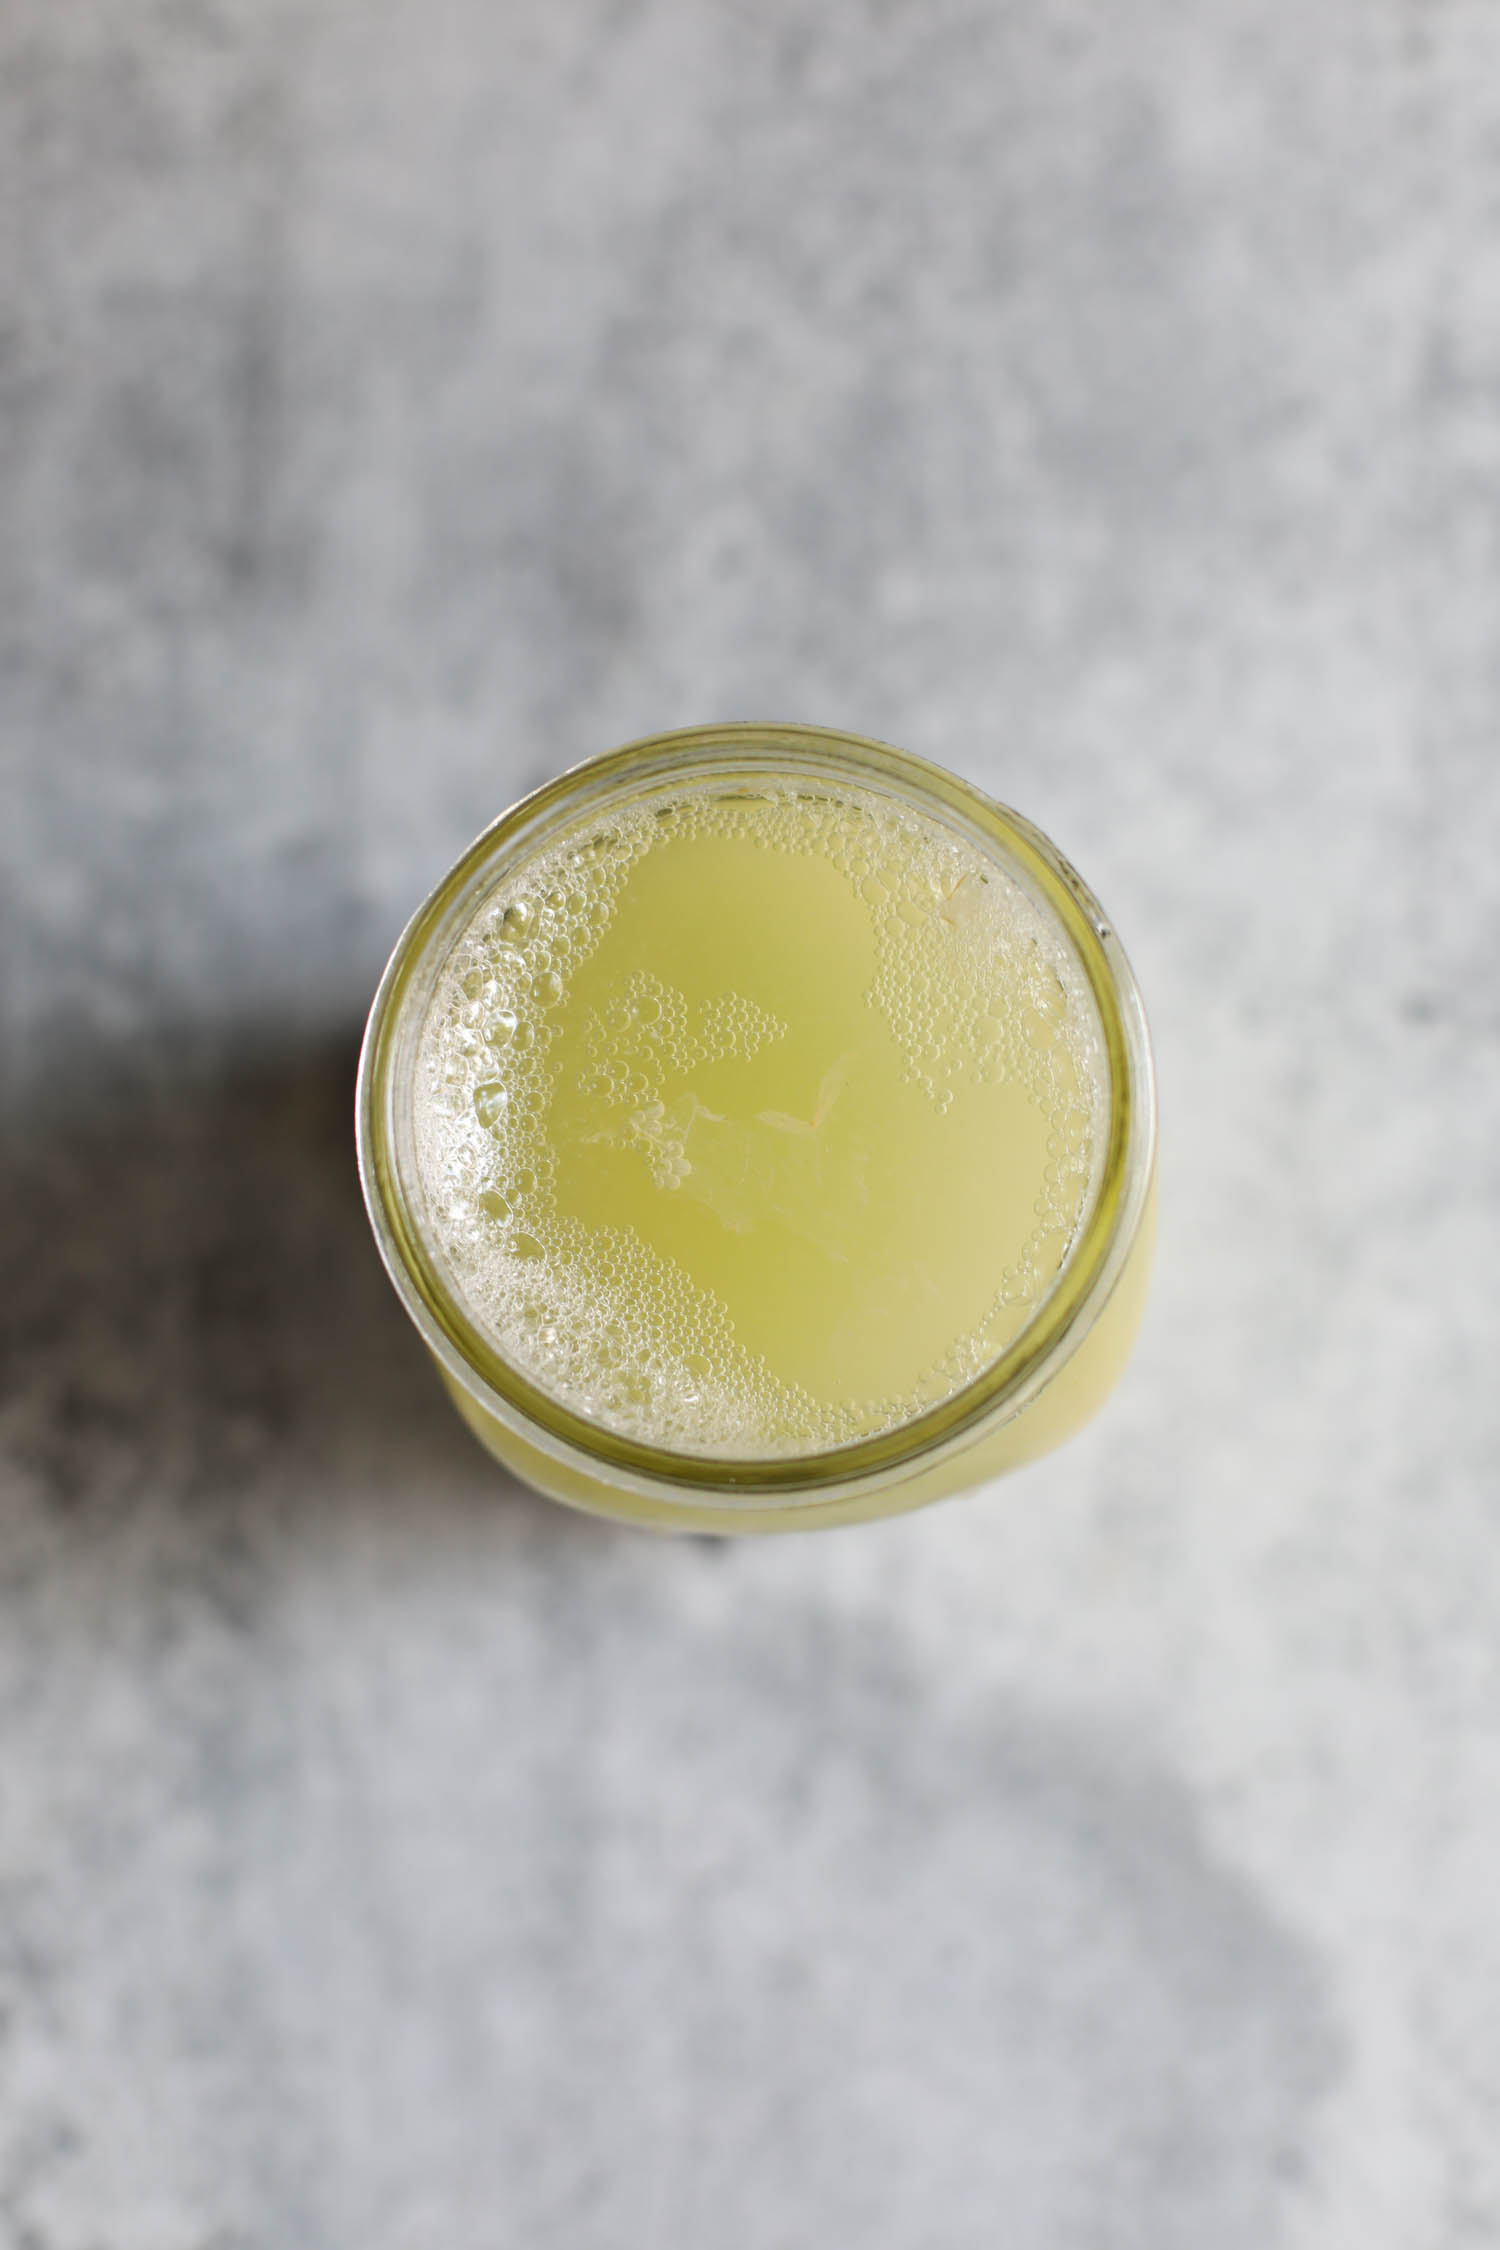
- After roughly two days, you should start to see tiny bubbles forming between the cabbage layers. A few bubbles are fine, but if you see air pockets or notice the brine is not entirely covering the cabbage, carefully remove the lid and zip-top bag and with clean hands, gently press down to release the air bubbles to return everything below the brine.
- Replace the bag and lid and let it do its thing. If your sauerkraut is particularly active or the room is warm, you’ll want to peek at your jar once or twice a day to ensure it doesn’t need to be pressed down. This active fermentation stage usually lasts 2-5 days (longer in colder temperatures).

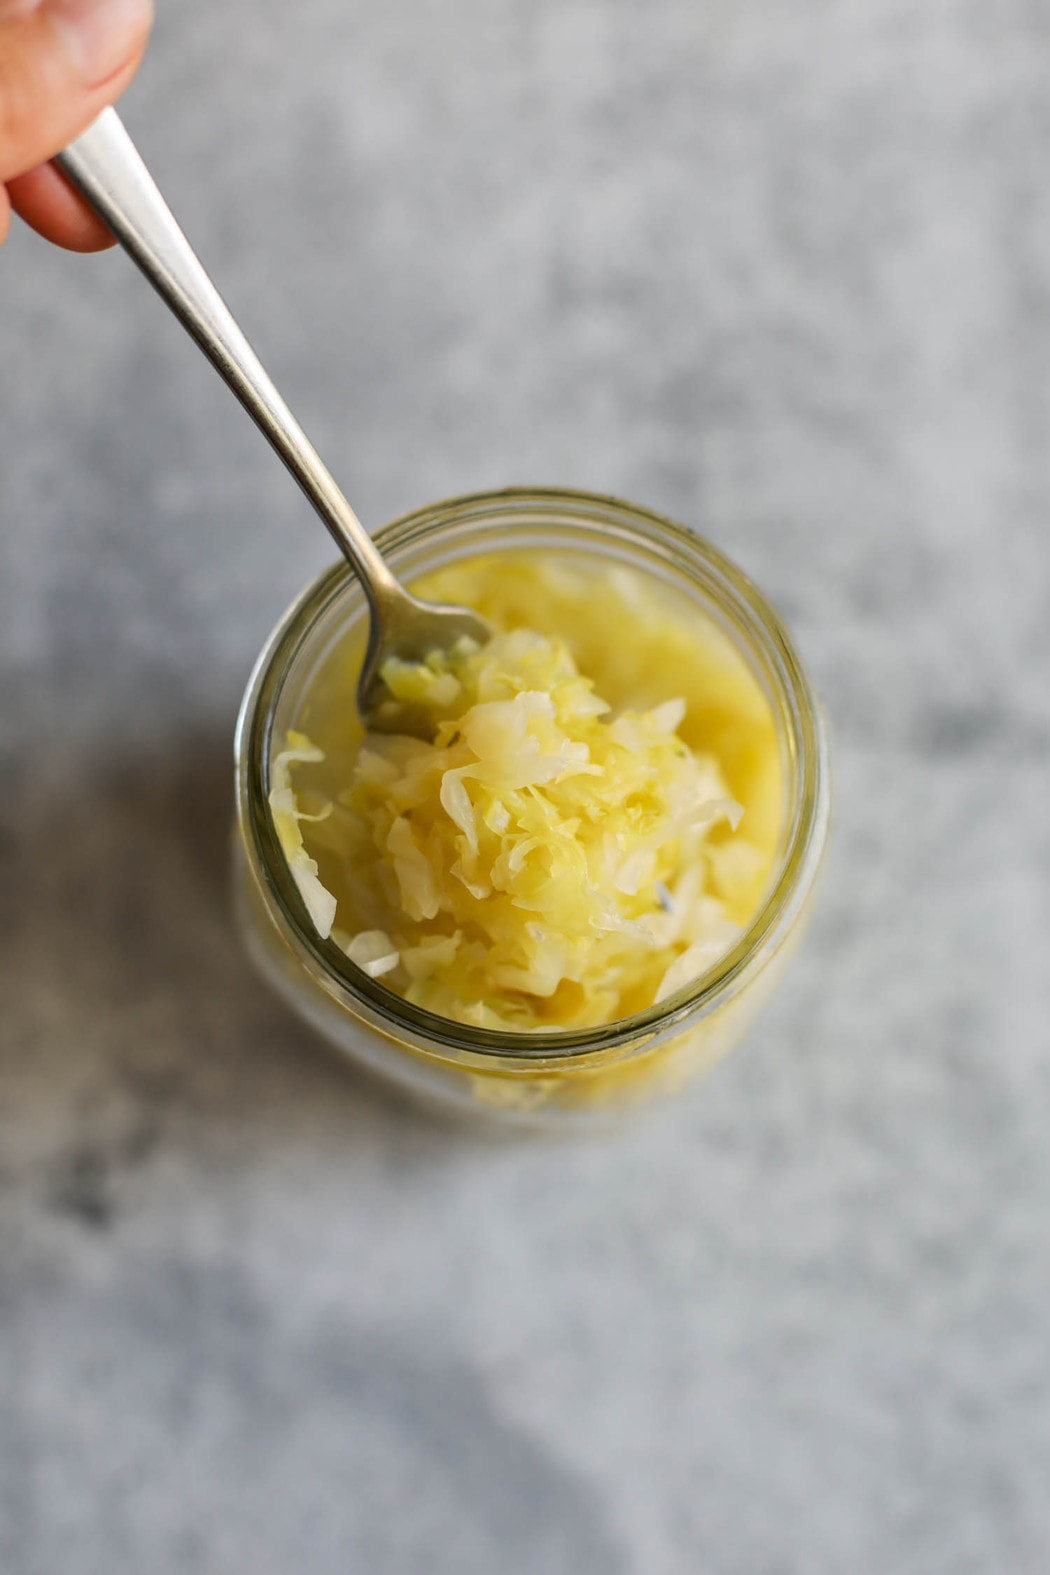
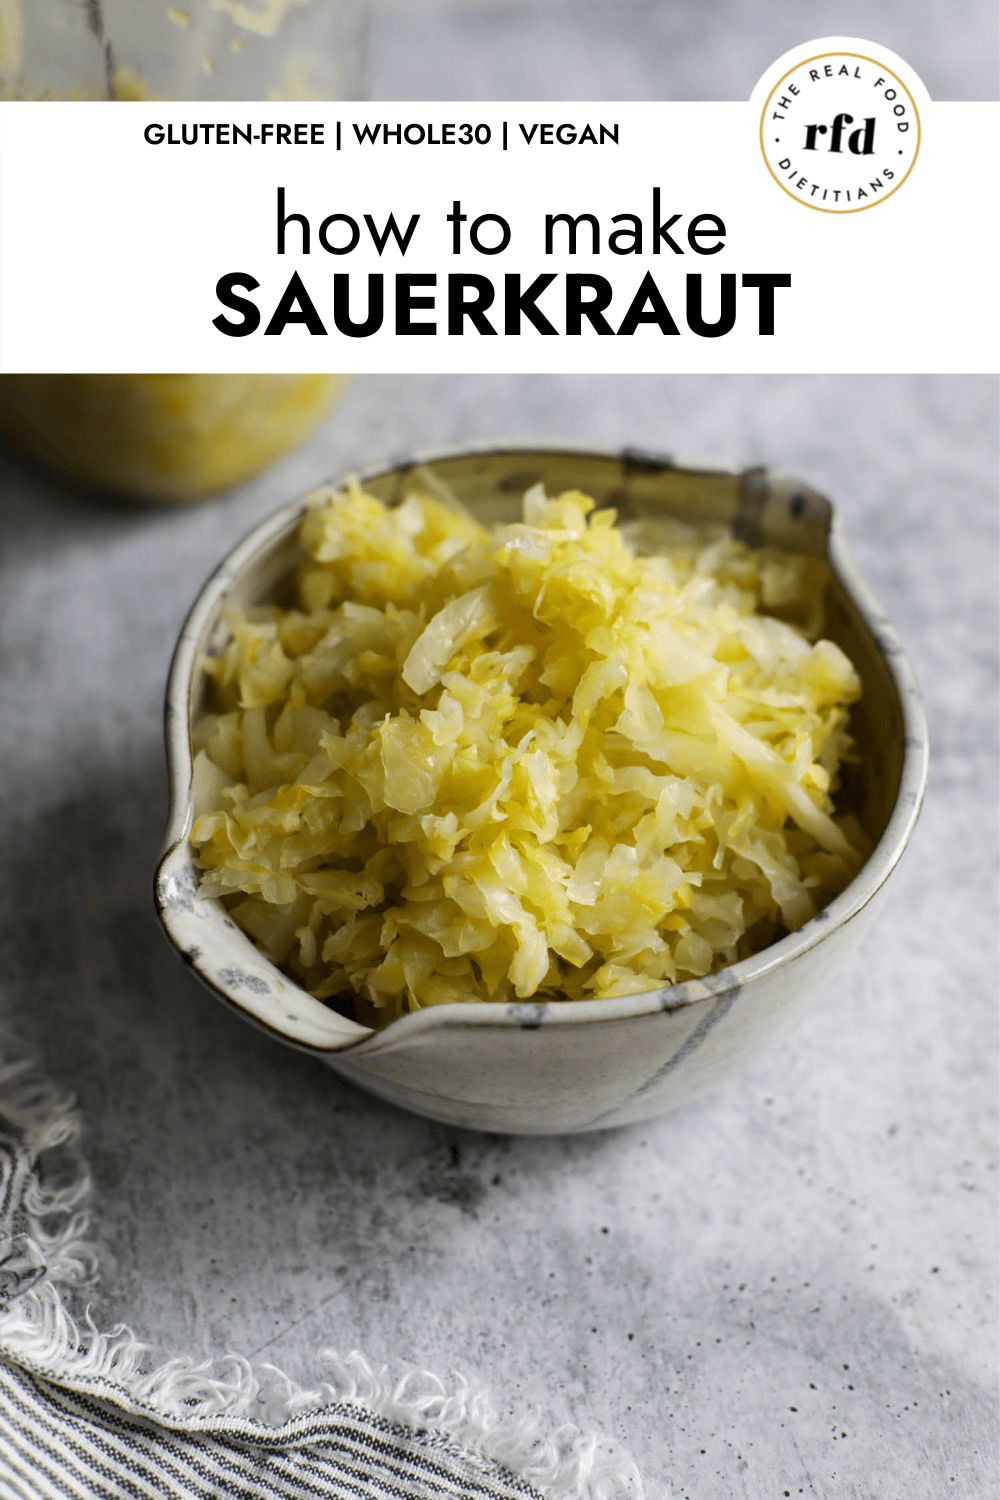
6. Taste test
- Taste test your kraut starting on Day 4. Carefully remove the bag with clean hands and use clean fingers or a utensil to gently push the cabbage leaf aside and pull a small taste.
- You’ll know it’s ready when:
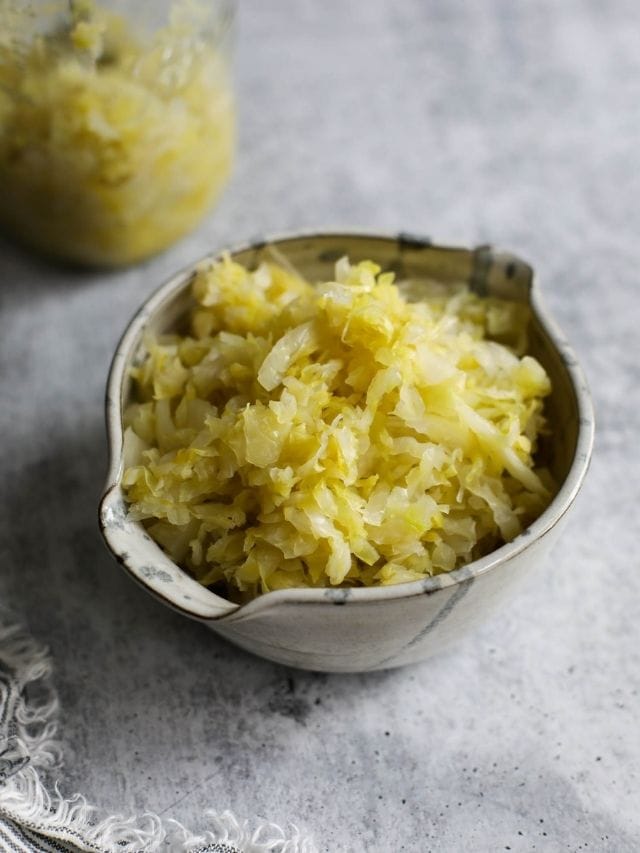
- It has a pleasing pickle-y flavor without the strong acidity of vinegar. It should not taste overly salty, just pleasantly salty. Like pickles but without the garlic and dill.
- The cabbage has softened a bit but retains some crunch.
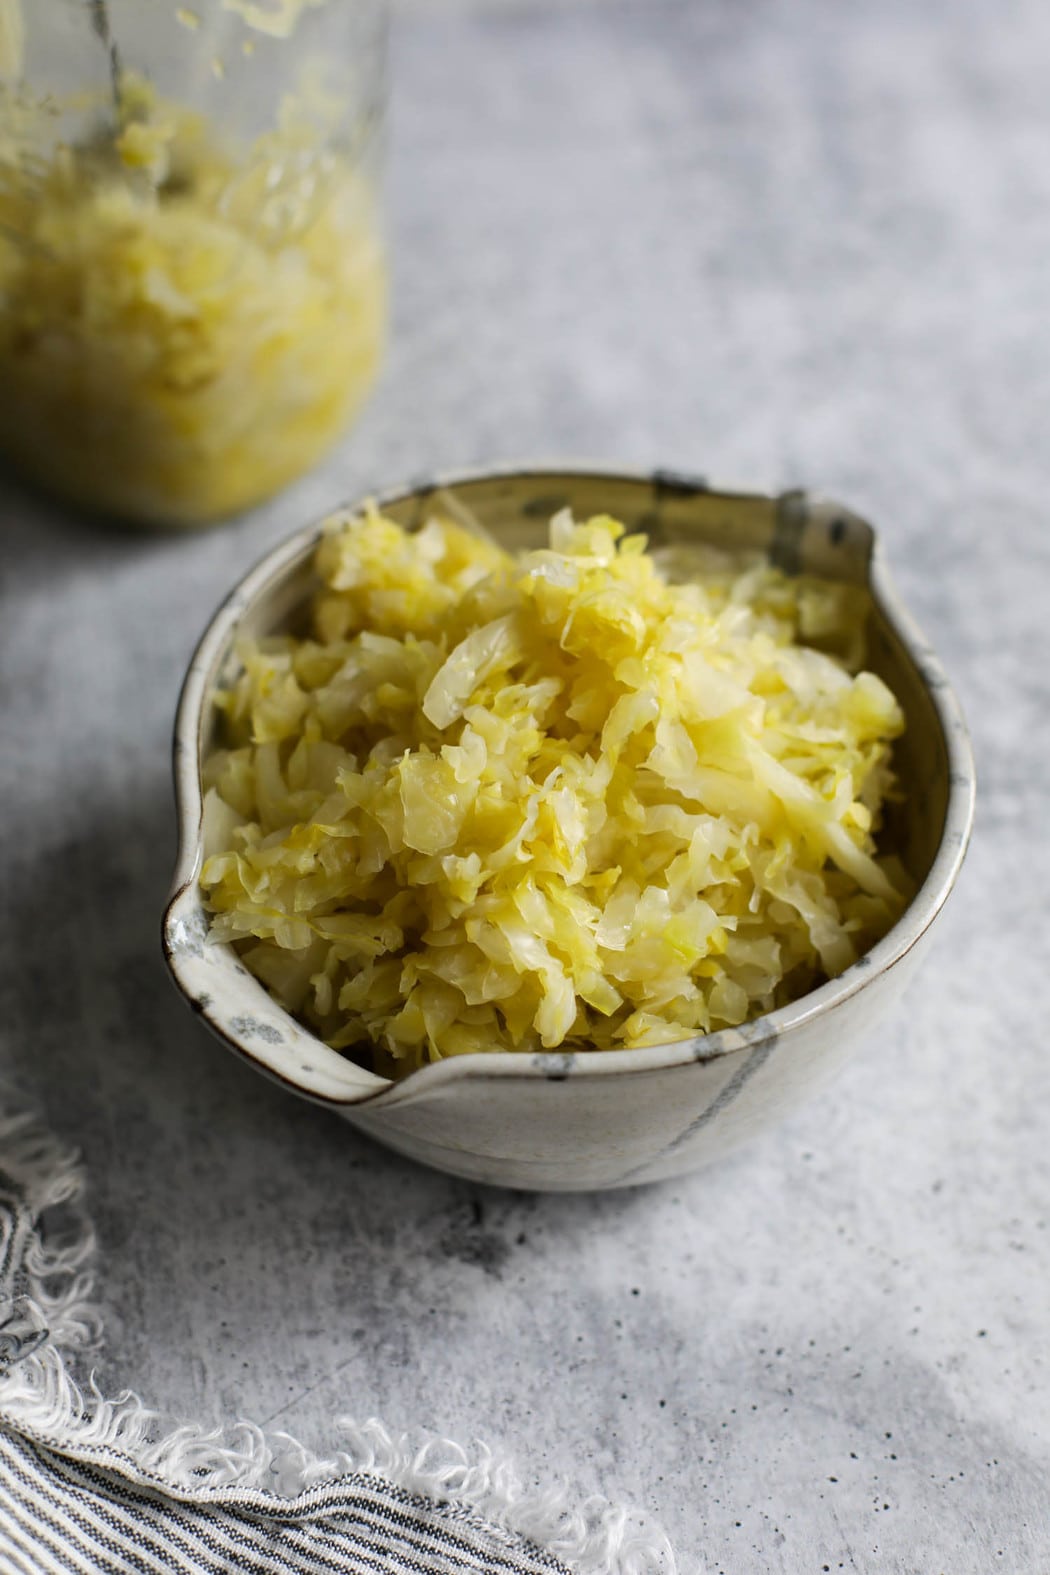
- The cabbage is more yellow than green and slightly translucent, like it’s been cooked. This can happen anywhere from 4-14 days, depending on the room’s temperature.
- If the sauerkraut is not ready, rinse the bag under cool running water and carefully place it back in the jar. Make sure all of the cabbage is below the brine. Wait another day or two, then taste again to see what you think.
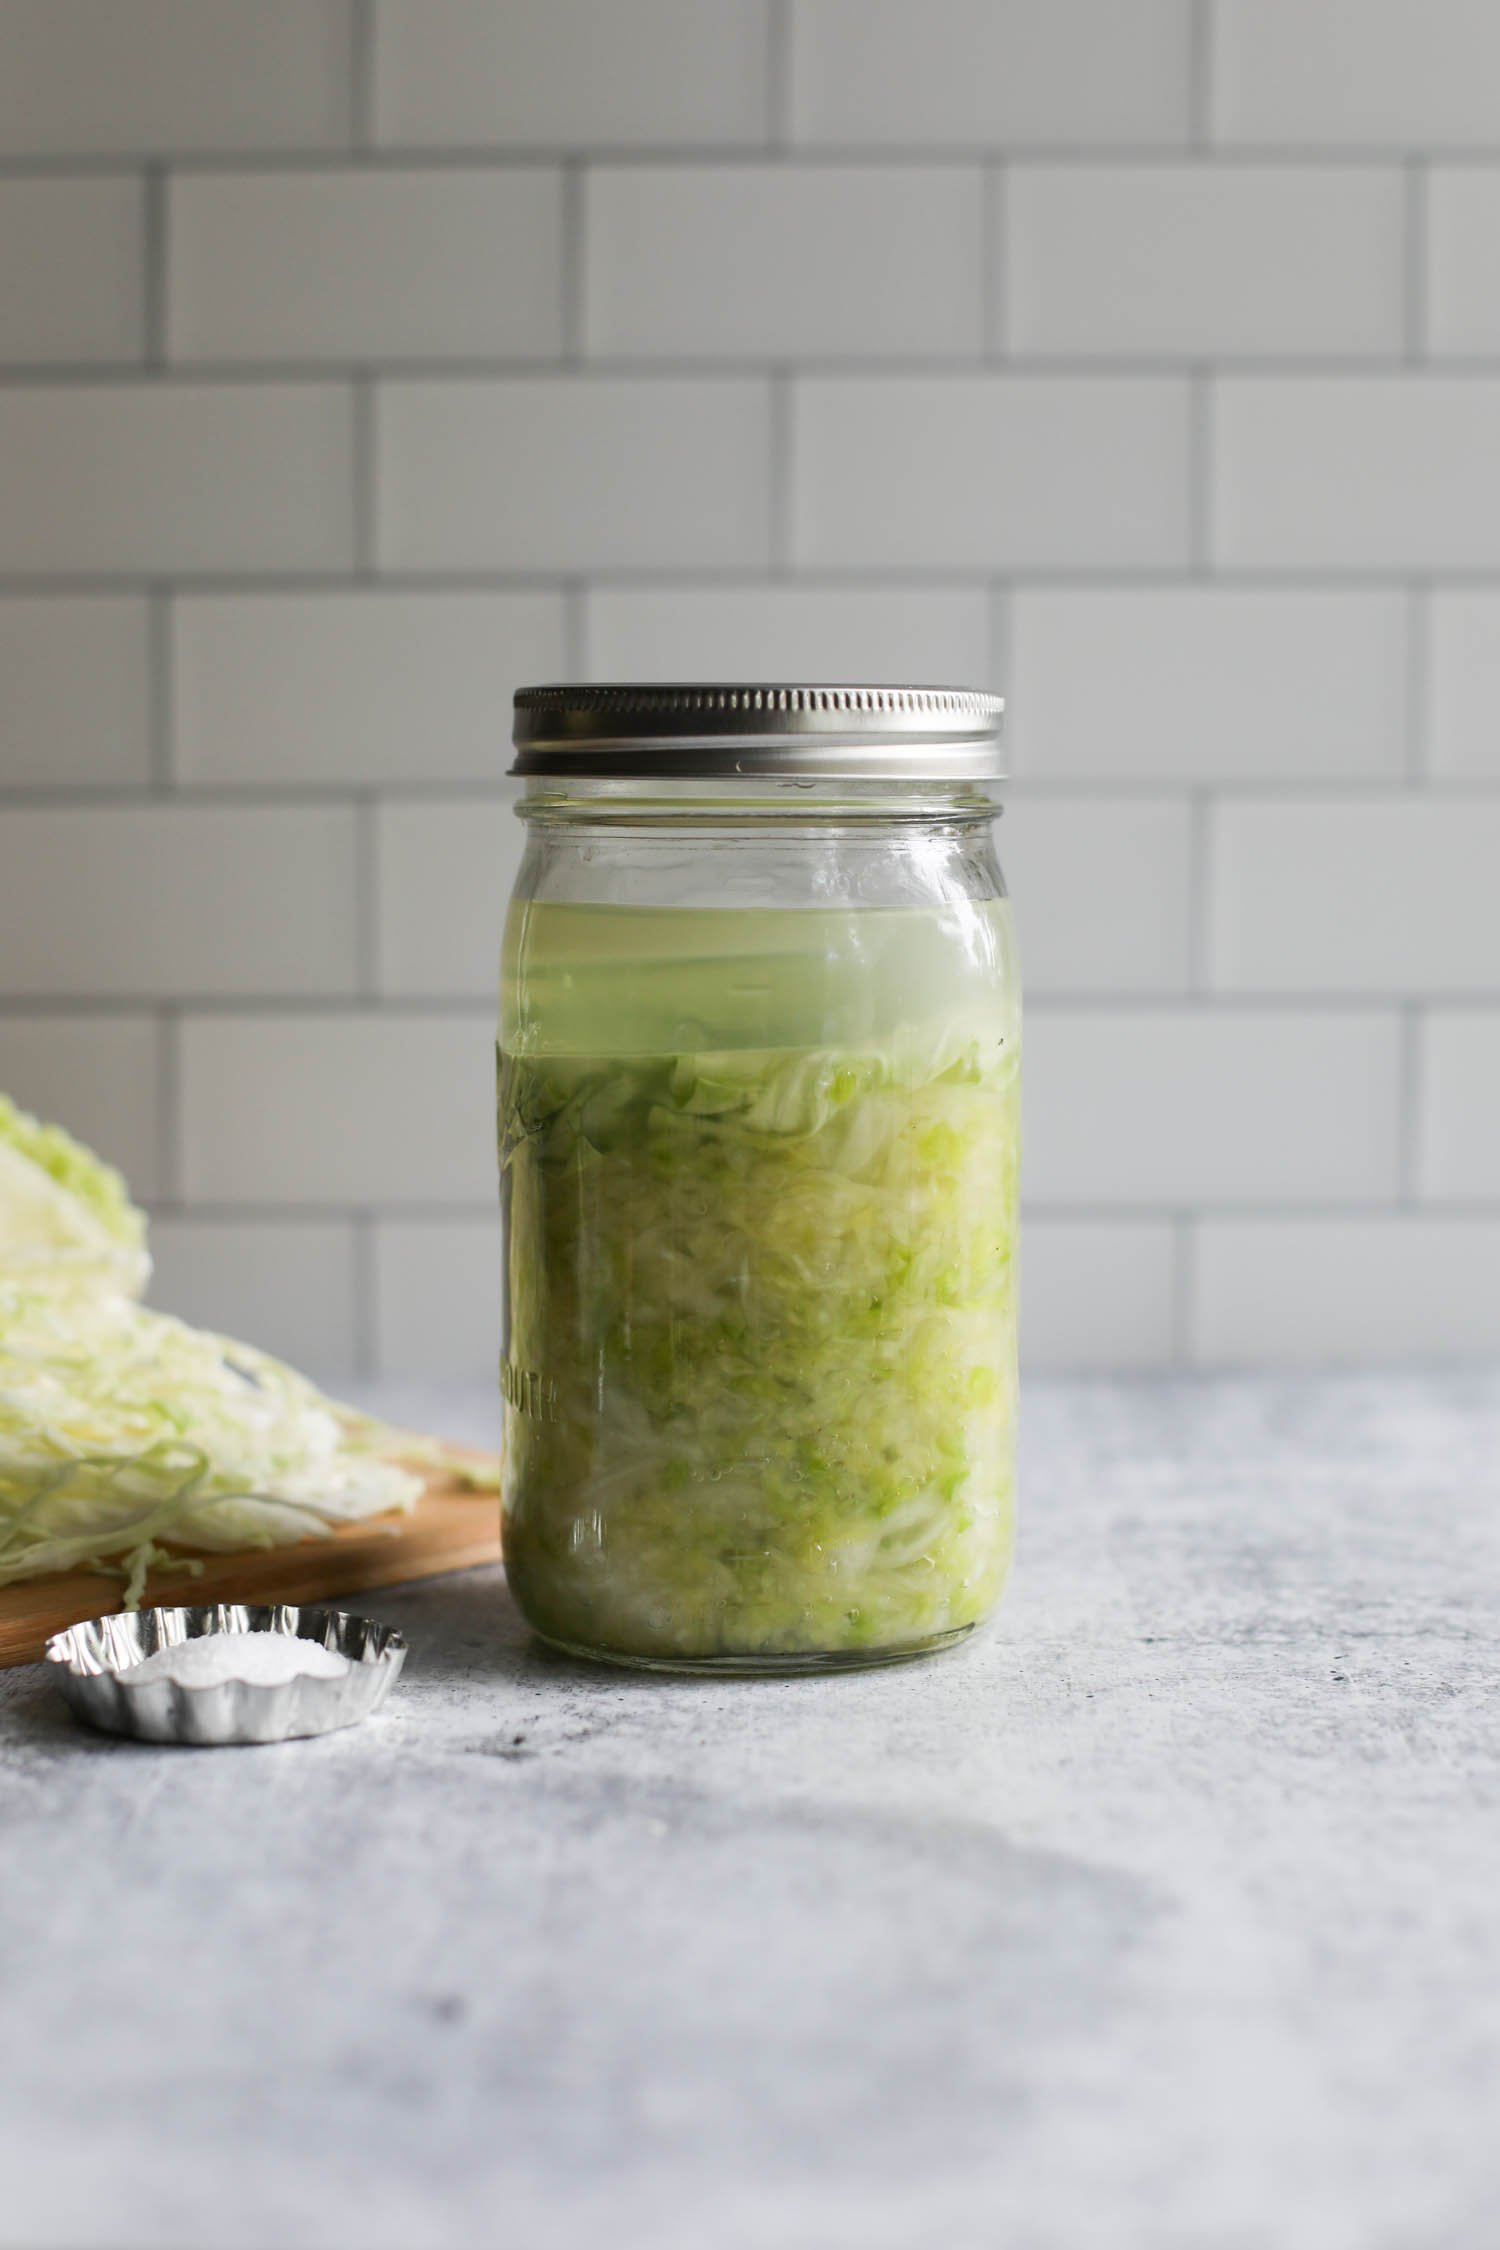
When your sauerkraut tastes the way you like it, store it in the refrigerator. Your homemade sauerkraut is ready to eat when it’s pleasing to your taste bud. The flavor should be tart, tangy and mildly salty; then it’s done. If you like your sauerkraut more sour, feel free to let it ferment a little longer. Check in on it daily, as it can quickly go from just ripe to overly fermented or even develop mold.
You can use this same process with a food processor and additional pounds of cabbage to make bigger batches of sauerkraut.
Frequently Asked Questions
You can cook sauerkraut or eat it raw! Heating the sauerkraut may cause it to lose some probiotic benefits, but we love it both ways.
Your homemade sauerkraut can be kept in the refrigerator for up to 6 months.
Yes! If you have good digestion and regularly consume a fiber-rich diet with fermented foods such as yogurt, kombucha, kefir, kimchi, miso, etc. then it’s perfectly okay to consume 1-2 tablespoons of sauerkraut with a meal twice a day.
If you are new to eating fermented foods or eat them infrequently, we recommend starting out with 1 tablespoon one time per day with a meal working your way slowly up to 1-2 tablespoons twice a day with a meal over the course of a month. Starting with too much too soon can cause uncomfortable symptoms such as gas and bloating.
If you have a sensitive gut or are suffering from digestive issues, we recommend starting very slowly with just a sip or two of sauerkraut brine each day for a week.
After the first week, if you do not experience worsening of existing symptoms or new onset of gas and bloating, increase your intake to ½ tablespoon (a small forkful) once a day. Increase the amount you eat each week until you are able to comfortably enjoy 1 tablespoon per day.
The typical round-headed cabbage you find in most supermarkets is the cabbage we recommend. Look for heads that are light to medium green in color with tightly-packed leaves and a head that is heavy for its size.
You can also use red or purple cabbage to make sauerkraut. The dark purple-red color indicates that it’s high in anthocyanins which act as antioxidants and may reduce inflammation in the body. We do not recommend using savoy cabbage as it makes a very soft sauerkraut.
According to the United States Department of Agriculture (USDA) FoodData Central database, 1 cup of drained sauerkraut contains 6 grams of carbohydrate. That means that 1 tablespoon of sauerkraut has less than 0.5 grams of carbohydrates.
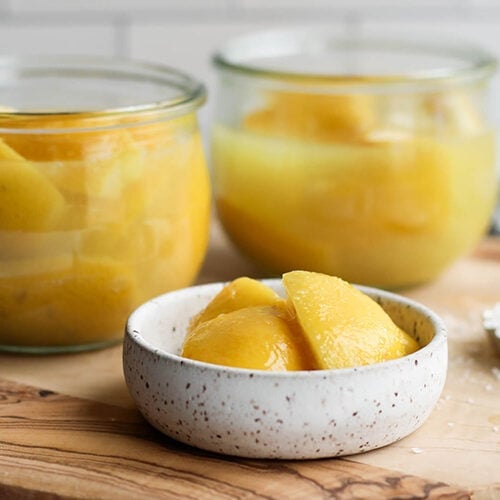
Other Fermented Recipes to Try
After you’ve got this simple sauerkraut recipe down, you can try playing with the recipe using your own unique additives, like beets or red cabbage. For a traditional German sauerkraut recipe, you’ll need juniper berries, caraway seeds, and mustard seeds. Dill is also a delicious addition to sauerkraut. Love fermenting as much as we do? Try some of our other recipes for fermenting veggies and lemons!
More Pickled Recipes to Try
All Condiment Recipes
Want to save this recipe?
Enter your email below & we’ll send it straight to your inbox. Plus you’ll get great new recipes from us every week!
How to Make Sauerkraut
Making your own healthy and delicious sauerkraut at home is easy and cost-efficient. Using a jar rather than a crock allows you to see the transformation from cabbage to kraut, making this a perfect recipe for beginners monitoring the process.
Ingredients
- 1½ – 2 pounds fresh cabbage, coarse outer leaves removed and rinsed
- 1½ – 2 teaspoons sea salt (may also use pickling salt or Redmond’s Real Salt)
Instructions
- Rinse the cabbage in cool water.
- Remove the coarse outer leaves and discard them.
- Remove and rinse a few unblemished leaves and set them aside for later.
- Pat cabbage dry with a clean kitchen towel or paper towel.
- With a large knife, slice the cabbage to quarters on a cutting board. Use the knife to carefully cut away the core.
- Thinly slice the cabbage and transfer the cabbage to a large bowl.
- Add 1 teaspoon of salt.
- With your hands, massage salt into the cabbage until it starts to look wet and shiny.
- Taste the cabbage — you want to taste the salt without it being overwhelming. Add more salt, a little at a time, to get that ‘salty but not too salty’ taste.
- Continue to massage for 3-5 minutes until the cabbage becomes wet and limp, and liquid, (brine), begins to pool in the bottom of the bowl. You want to be able to squeeze the cabbage in your hands so the brine runs freely into the bowl. If you’ve put in a good effort and don’t have much brine, cover the bowl and let it sit for 45 minutes.
- Massage again until the liquid runs freely when squeezing a handful of cabbage in your hands.
- Transfer the cabbage to a clean 1-quart mason jar a few handfuls at a time. Press the cabbage into the bottom of the jar using your hand to work out any air pockets before you add more cabbage.
- Repeat until all of the cabbage has been packed tightly into the jar. You should have 2-3 inches of headspace and some brine on top of the cabbage once it’s all been pressed into the jar. If you have too much cabbage, place some in another clean jar following the same process.
- Top the packed cabbage with 1 or 2 of the reserved leaves, gently tucking them down along the sides to keep little bits of cabbage under the brine. Bits of cabbage floating in the brine should be picked out to the best of your ability to avoid developing mold.
- Place a zip-top freezer bag, or sub with a weight, into the jar, using your fingers to spread it out so that it covers as much of the cabbage leaf as possible.
- Fill with cool filtered water, sealing and pressing out as much air as possible. Tuck the top of the bag into the jar and very loosely screw the lid on the jar, or cover with a clean kitchen towel. If using a lid with an airlock, follow the directions for your particular lid.
- Store the jar out of direct sunlight in a cool place (55-75 F) to ferment for 4-14 days. Dark is best, but don’t forget about it. If you keep your jar on the kitchen counter, cover with a kitchen towel.
- After about two days, check for air pockets in the cabbage and that the brine is still completely covering the cabbage. If you notice these, use clean hands to remove the bag and gently press down to release the air bubbles. Return everything to below the brine.
- Replace the bag and lid and let it do its thing. If your sauerkraut is particularly active or the room is warm, repeat this process as needed for the next 2-3 days.
- Begin taste-testing your kraut on day 4 by carefully removing the bag and pushing the cabbage leaf aside with clean hands or a utensil. The kraut is ready when it exhibits a pleasant pickle flavor without strong vinegar acidity and has softened yet crunchy cabbage that appears more yellow and translucent. This typically happens between 4 and 14 days, depending on room temperature.
- If the sauerkraut is not ready, rinse the bag under running water. Carefully place it back in the jar making sure the cabbage is below the brine. Wait another day or two to taste again and see what you think.
- Store the sauerkraut in the refrigerator when it’s to your liking.
Last Step! Please leave a review and rating letting us know how you liked this recipe! This helps our business thrive so we can continue providing free recipes and high-quality content for you.
Nutrition Information
- Serving Size: 2 tablespoons
- Calories: 5
- Fat: 0 g
- (Sat Fat: 0 g)
- Sodium: 155 mg
- Carbohydrate: 1 g
- (Fiber: 1 g
- Sugar: 0 g)
- Protein: 0 g
- Cholesterol: 0 mg
Dietary
Pin it now & Make it later!
All photos and content are copyright protected. Please do not use our photos without prior written permission. If you wish to republish this recipe, please rewrite the recipe in your own unique words. Link back to the source recipe here on The Real Food Dietitians. Thank you!


If you accidentally used iodine salt, what happens?
Generally, we recommend avoiding iodized salt because it often contains chemical anti-caking agents (often labeled as sodium aluminosilicate or ‘anti-caking agent’). These agents can interfere with the fermentation process. If the salt you used does not contain anti-caking agents then it should be fine.
Perfect result!
Great Susan! Thanks for the 5-star review!
Can you waterbath this or pressure can for shelf stability? And if so, how long is it shelf stable for?
I do not recommend water bath canning or pressure canning this sauerkraut as it would kill the beneficial bacteria that form during the lactofermentation process. For canning, I’d recommend using a vinegar-based kraut recipe instead.
Sounds very tasty and possible to make right.
Thanks, Kathleen!
So easy and so delicious! Grew up loathing canned sauerkraut; what an eye-opener to try “real” sauerkraut. I’ve used your recipe for the past several years, and it always turns out perfectly. Thank you!
You are very welcome, Chris! Thanks for the 5-star review!