I love how a cool, crunchy, and perfectly crisp pickle can elevate a burger or sandwich. Or, if I’m being honest, it’s also the perfect snack straight from the jar. A bite of a soggy, bland pickle is a total letdown, though, and that is exactly what I try to avoid. Perfect homemade spears every time are surprisingly simple with this recipe for refrigerator pickles. I’ve perfected a version that takes only about 20 minutes of hands-on time, and it stays naturally gluten-free. After 24 hours in the refrigerator, these pickles reach that ideal crisp, tangy bite that never lasts long once I start snacking.
Why I Love Making These
No canning required: I love that this recipe skips all the fuss of traditional canning. No special equipment, no boiling water bath, no long processing time. A clean jar and a refrigerator do all the work!
Fast hands-on prep: It only takes about 20 minutes of active time to pull everything together. Once the cucumbers are sliced and the brine is mixed, most of the “work” is just waiting for the fridge to do its thing.
Consistently crisp results: I appreciate how reliable the texture is with this method. The quick brine helps keep the cucumbers crunchy and fresh-tasting, especially when using smaller varieties like Kirby or Persian cucumbers.
Flexible and customizable: I like that I can adjust the flavor. More garlic, extra dill, a pinch of spice, or even a few jalapeño slices all work well without changing the base recipe.
Health Benefits
Cucumbers themselves provide nutrients like vitamin K, vitamin A, vitamin C, potassium, and a small amount of calcium. When picked at peak ripeness, especially from a garden or farmer’s market, they offer the best flavor and nutritional quality before being preserved.Once pickled, they become an easy, flavorful way to add a small nutritional boost to meals or snacks. These refrigerator pickles are also low in calories and carbohydrates, with about 20 calories and 4 grams of carbs per ¼ cup serving. They are higher in sodium due to the brine, but remain a simple, satisfying option when a crunchy, savory bite is the goal.
Ingredient Notes And Substitutions
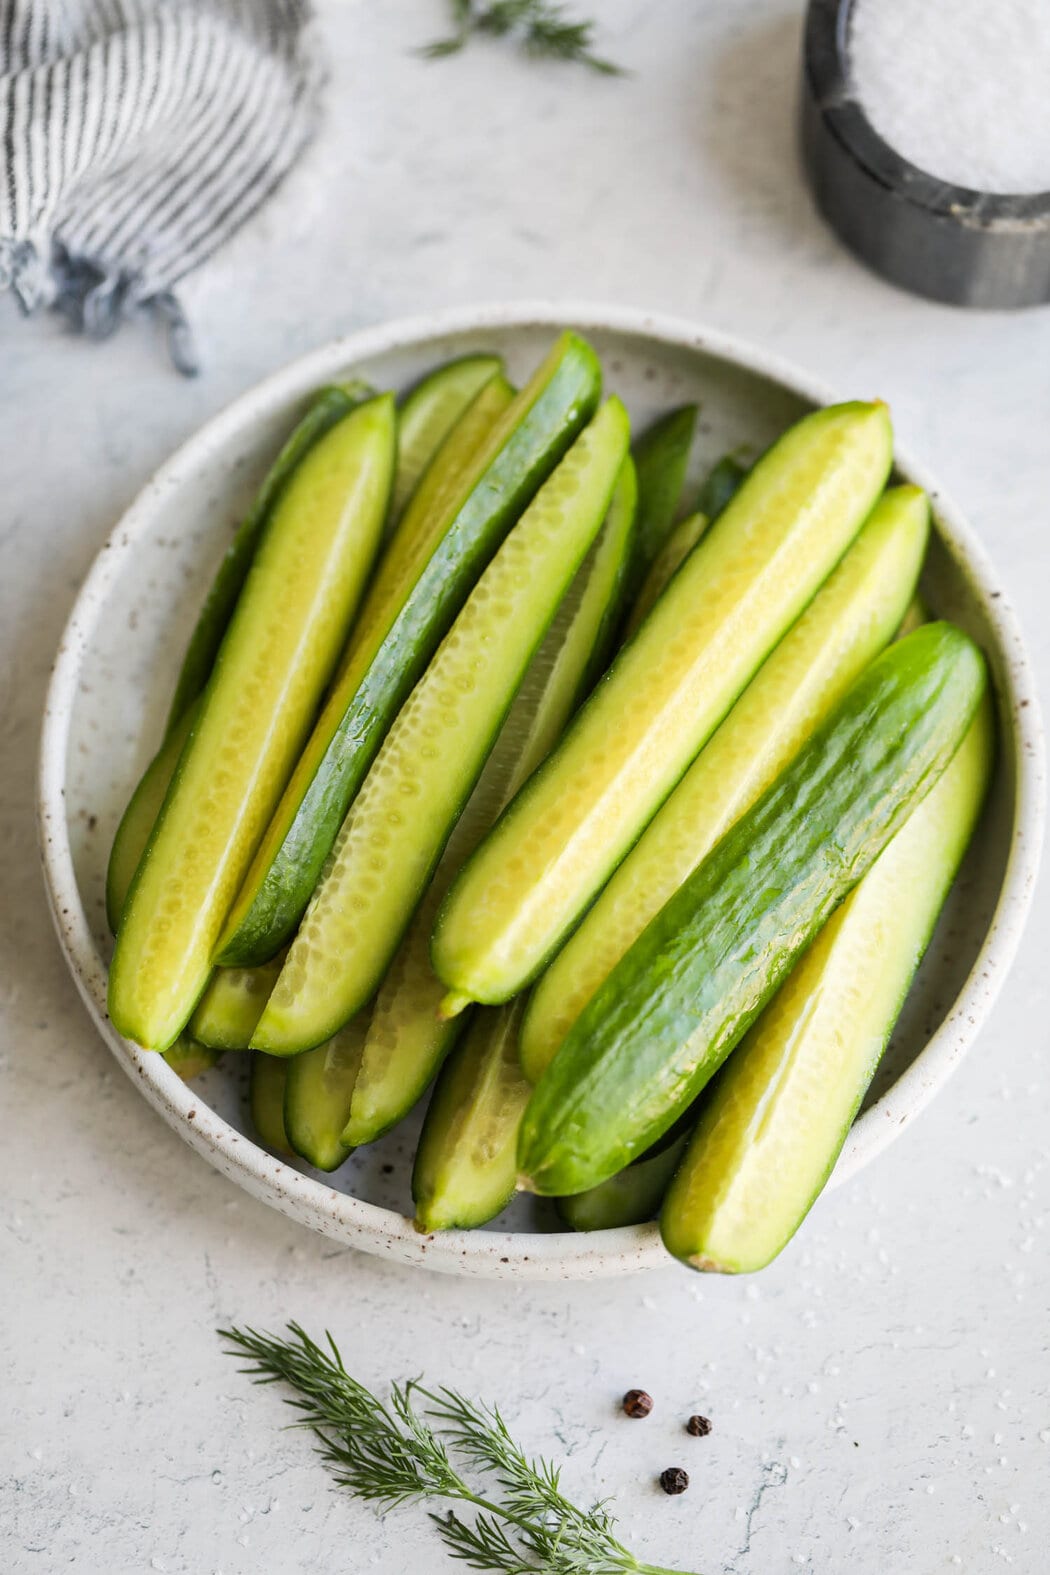
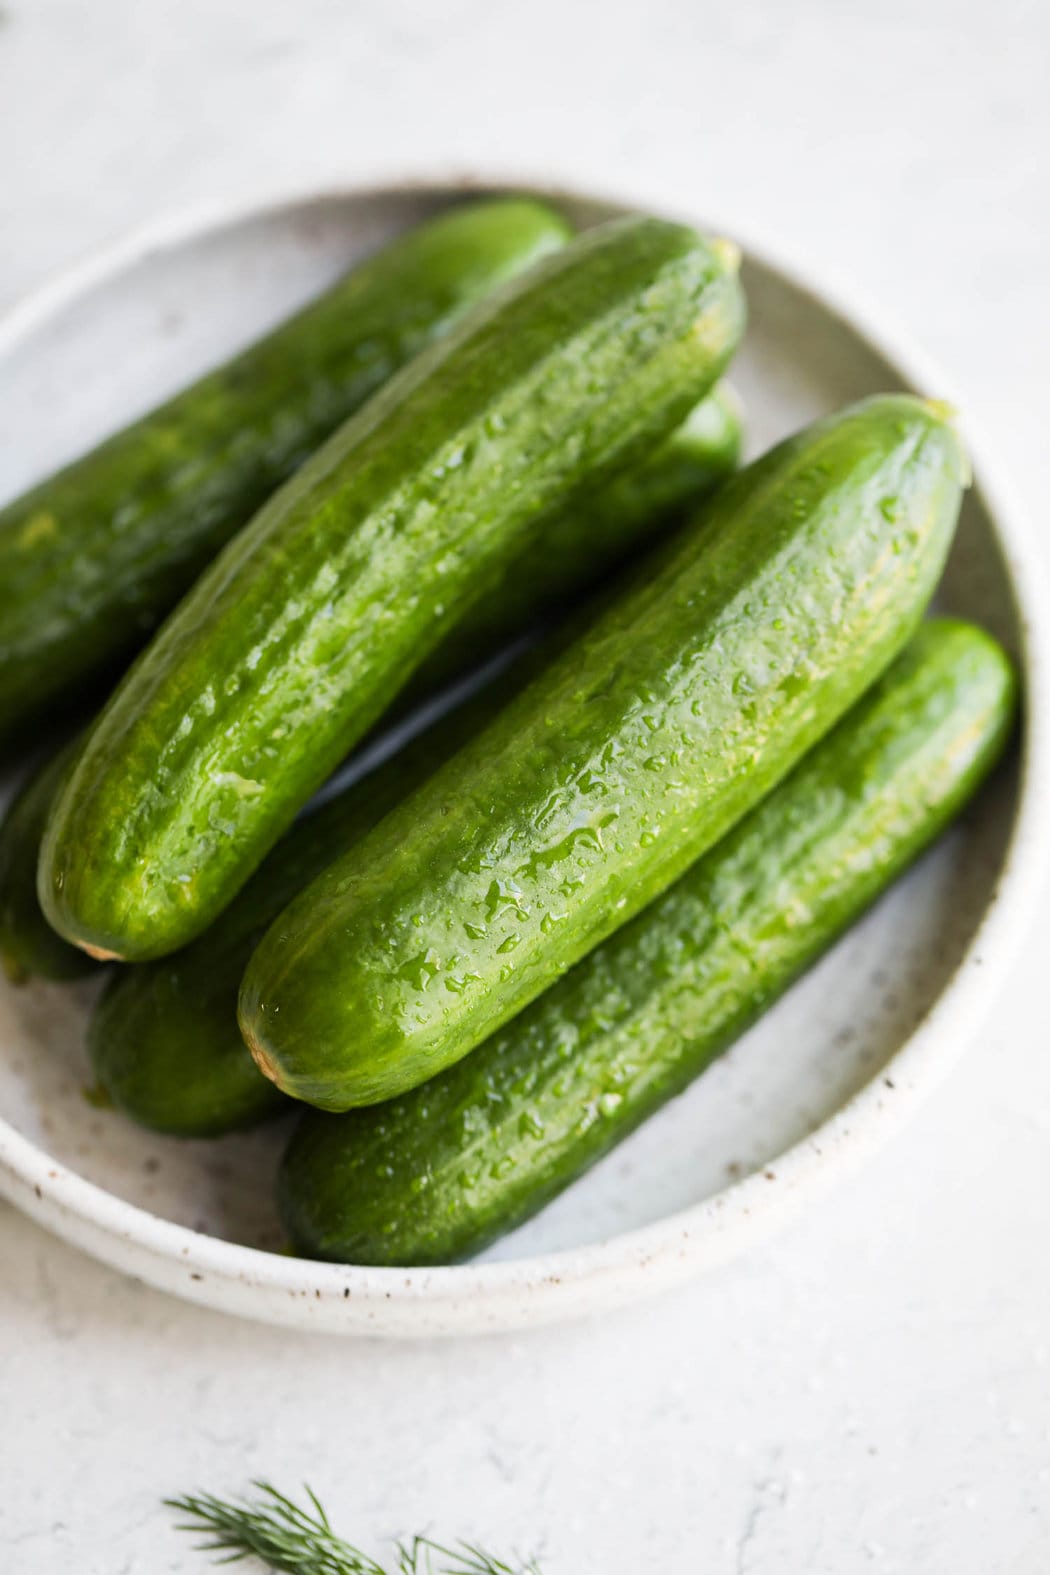
- Cucumbers: I prefer using smaller varieties like Persian or Kirby cucumbers because they have fewer seeds, thinner skins, and don’t need any trimming to fit into a quart-sized jar. When those aren’t available, I’ll use smaller slicing cucumbers or English cucumbers and simply cut them into spears or rounds.
- Water: Water is simply part of the brine mixture and gets combined with the vinegar, salt, and spices. I use cold water when adding it to the brine after heating.
- Distilled white vinegar: Distilled white vinegar over apple cider vinegar is my go-to for that classic tangy pickle taste. I like that it’s clean and sharp without adding extra flavor to pickling cucumbers.
- Kosher salt: I use kosher salt because it dissolves well and doesn’t contain iodine, which can affect flavor. If I only have fine sea salt on hand, I reduce the amount slightly since the grains are smaller.
- Cane sugar (optional): I find that a small amount of cane sugar helps balance the acidity of the vinegar without making overly-sweet pickles. I prefer cane sugar over granulated sugar for this recipe for a slightly cleaner flavor. For bread and butter pickles, adding more sugar results in sweeter pickles.
- Garlic: Fresh garlic cloves over dried or granulated garlic add the best flavor. I adjust the amount depending on how strong I want that garlicky bite to come through. If we’re making these for a garlic-forward recipe, I may add a clove.
- Peppercorns: Black peppercorns are my usual choice, but pink or green can work, too. Sometimes I add mustard seeds for a bit of zing.
- Fresh dill: I always reach for fresh dill when possible, though dried dill weed can work in a pinch. Dill seed doesn’t give quite the same result.
Find the ingredient list with exact measurements in the recipe card below.
How To Make Refrigerator Pickles (Step-By-Step)
This easy refrigerator pickles recipe comes together in just a few simple steps:
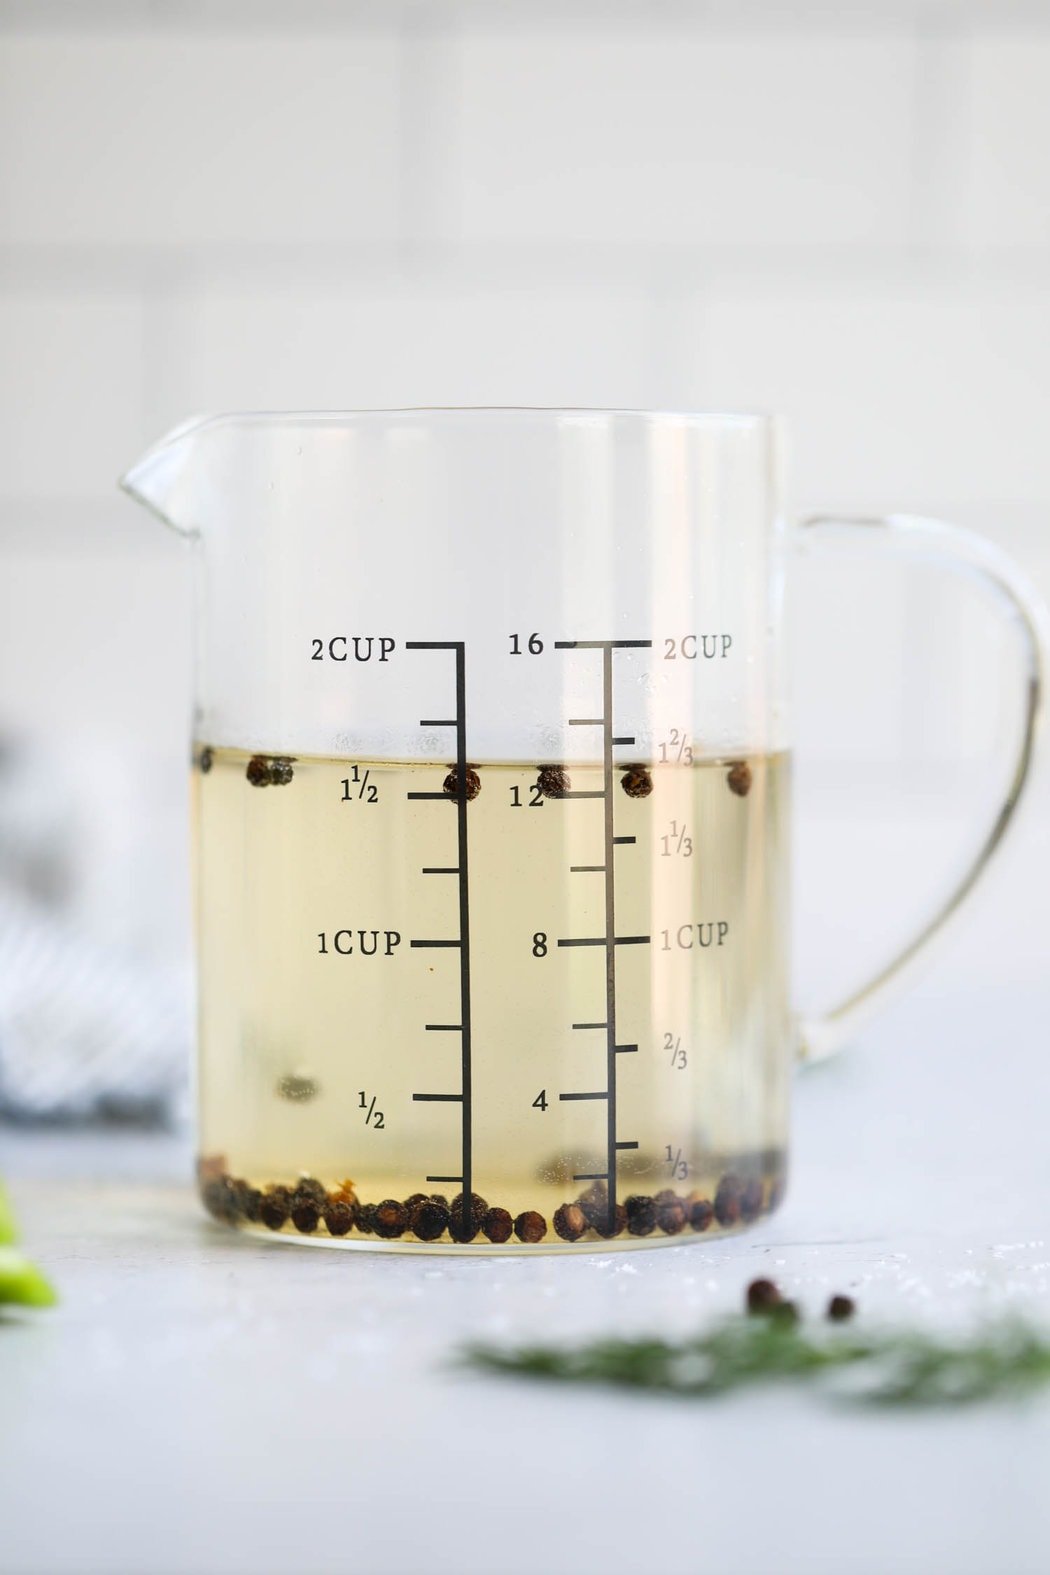
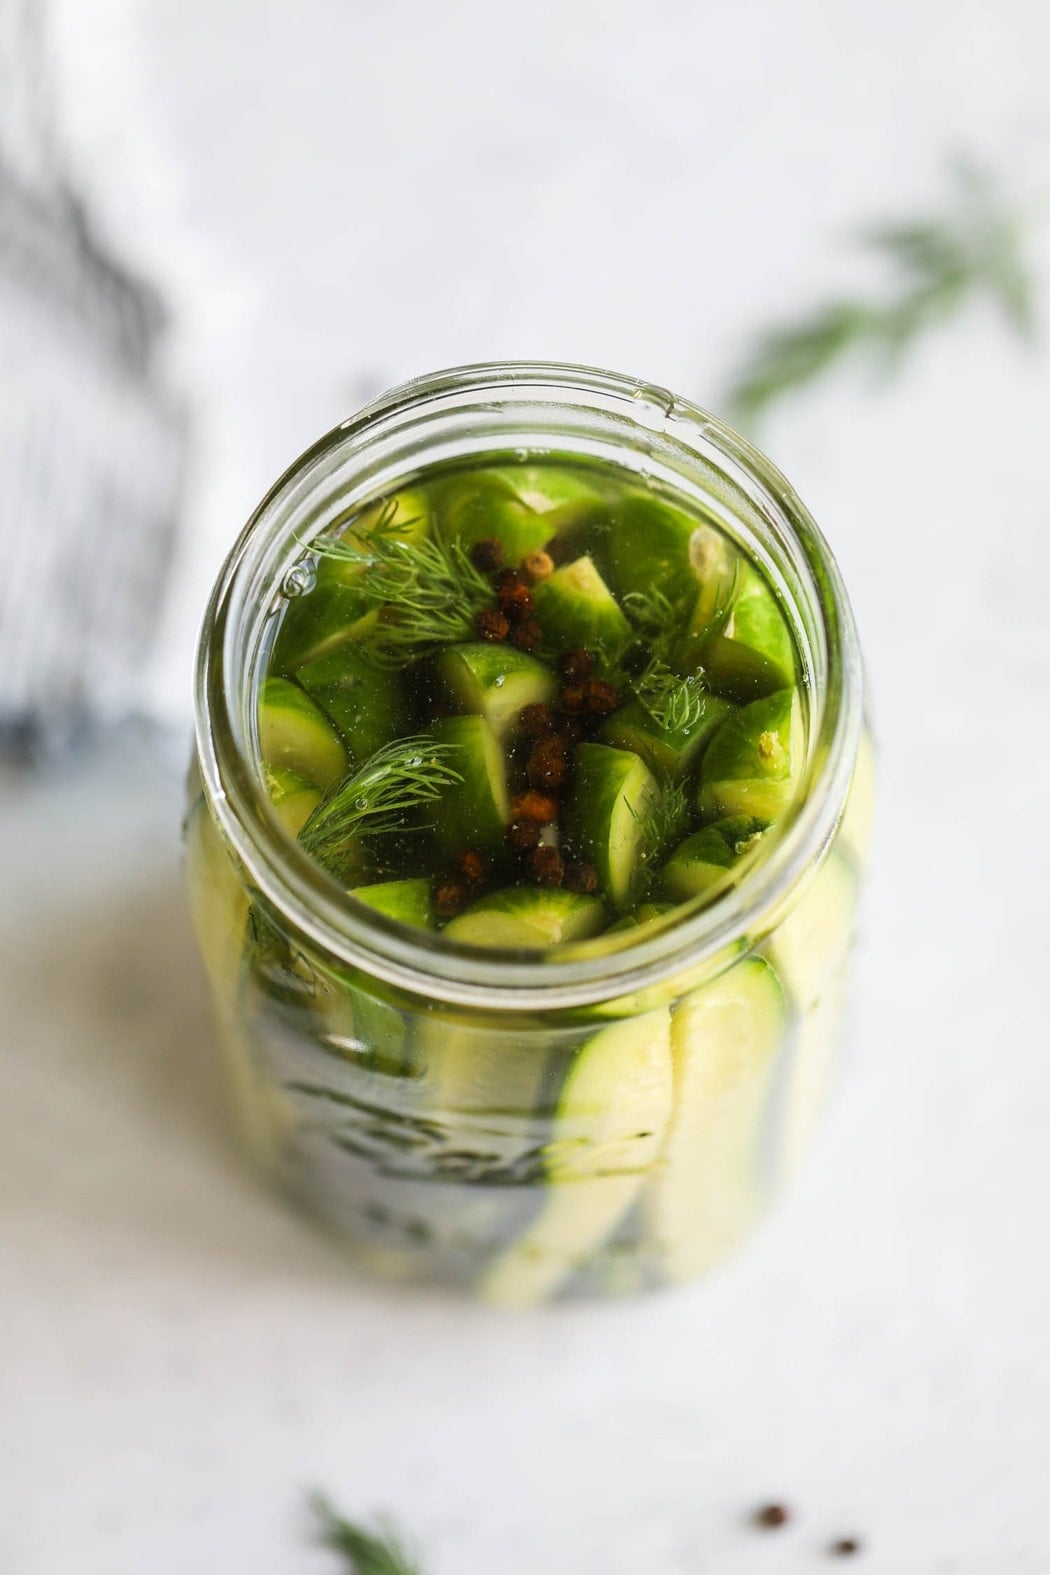
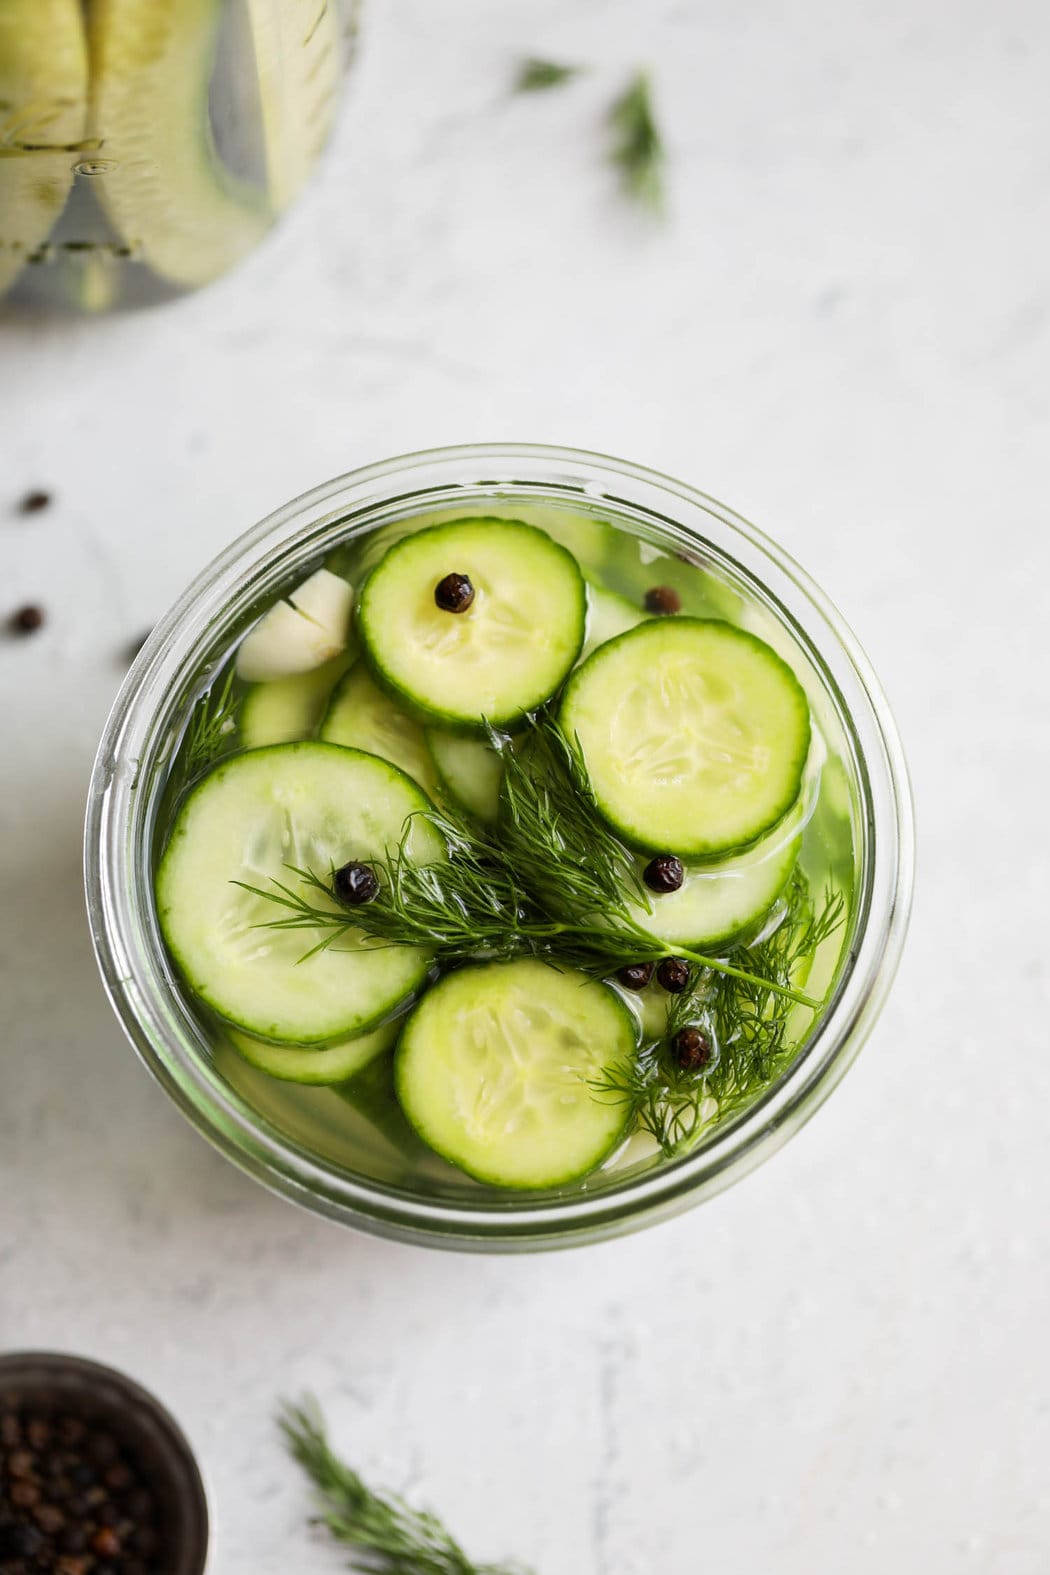
Step 1: Make the brine. I combine vinegar, salt, and sugar (if using) in a small saucepan over medium-high heat. I stir until everything is fully dissolved, bring it to a light simmer, then remove it from the heat and stir in the peppercorns and water.
Step 2: Prep the cucumbers. I wash fresh cucumbers well to remove any waxy coating that is sometimes used to extend shelf life. I also trim off both ends, since the stems can contain enzymes that soften the cucumbers. According to the National Center for Home Food Preservation, removing a 1/16-inch slice from the blossom/stem end helps prevent excessive softening during pickling.
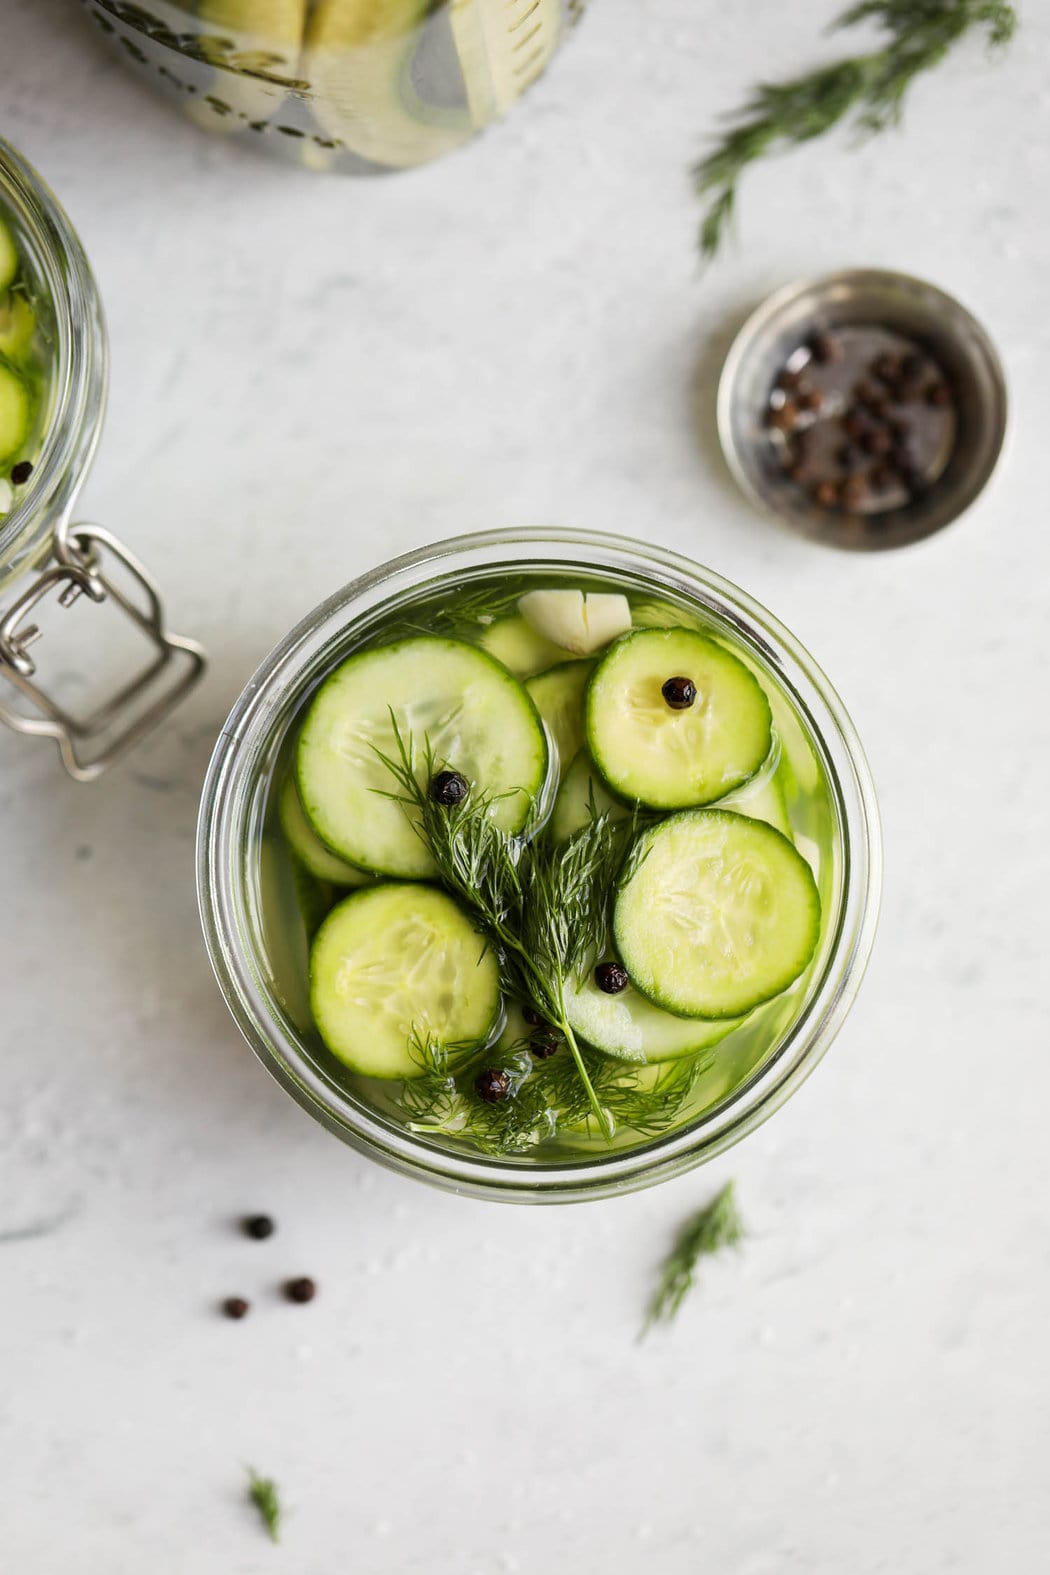
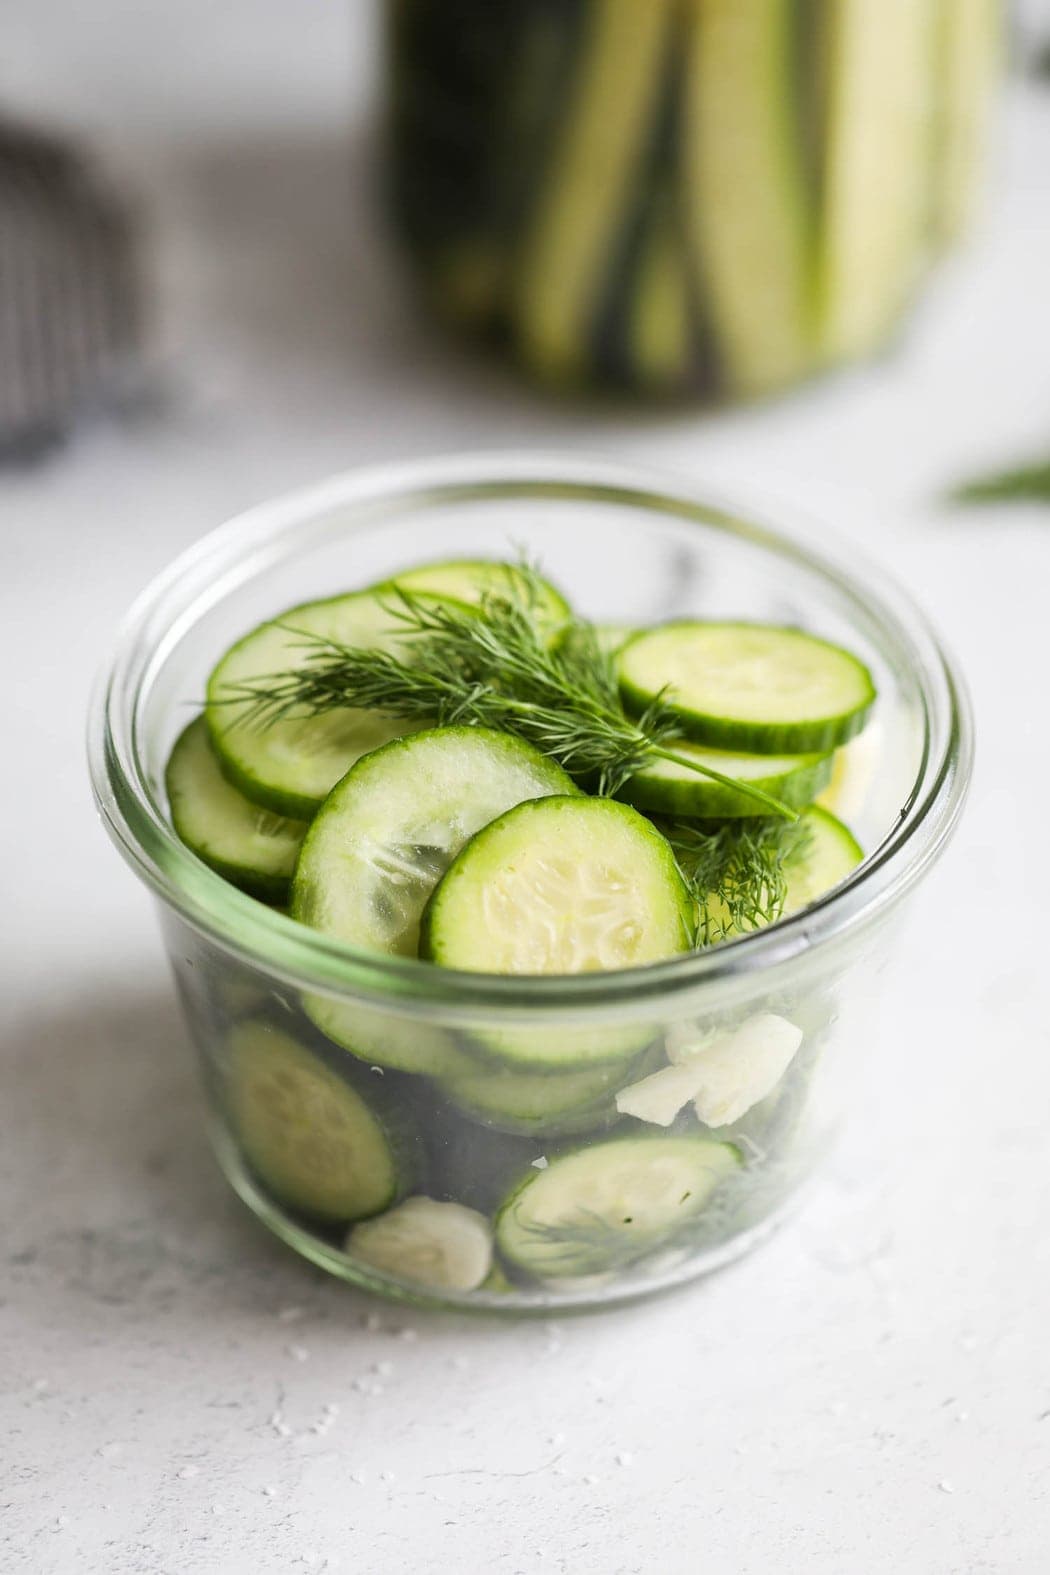
Step 3: Slice the cucumbers. I cut the cucumbers into spears or ¼-inch rounds, keeping pieces as even as possible so they pickle uniformly.
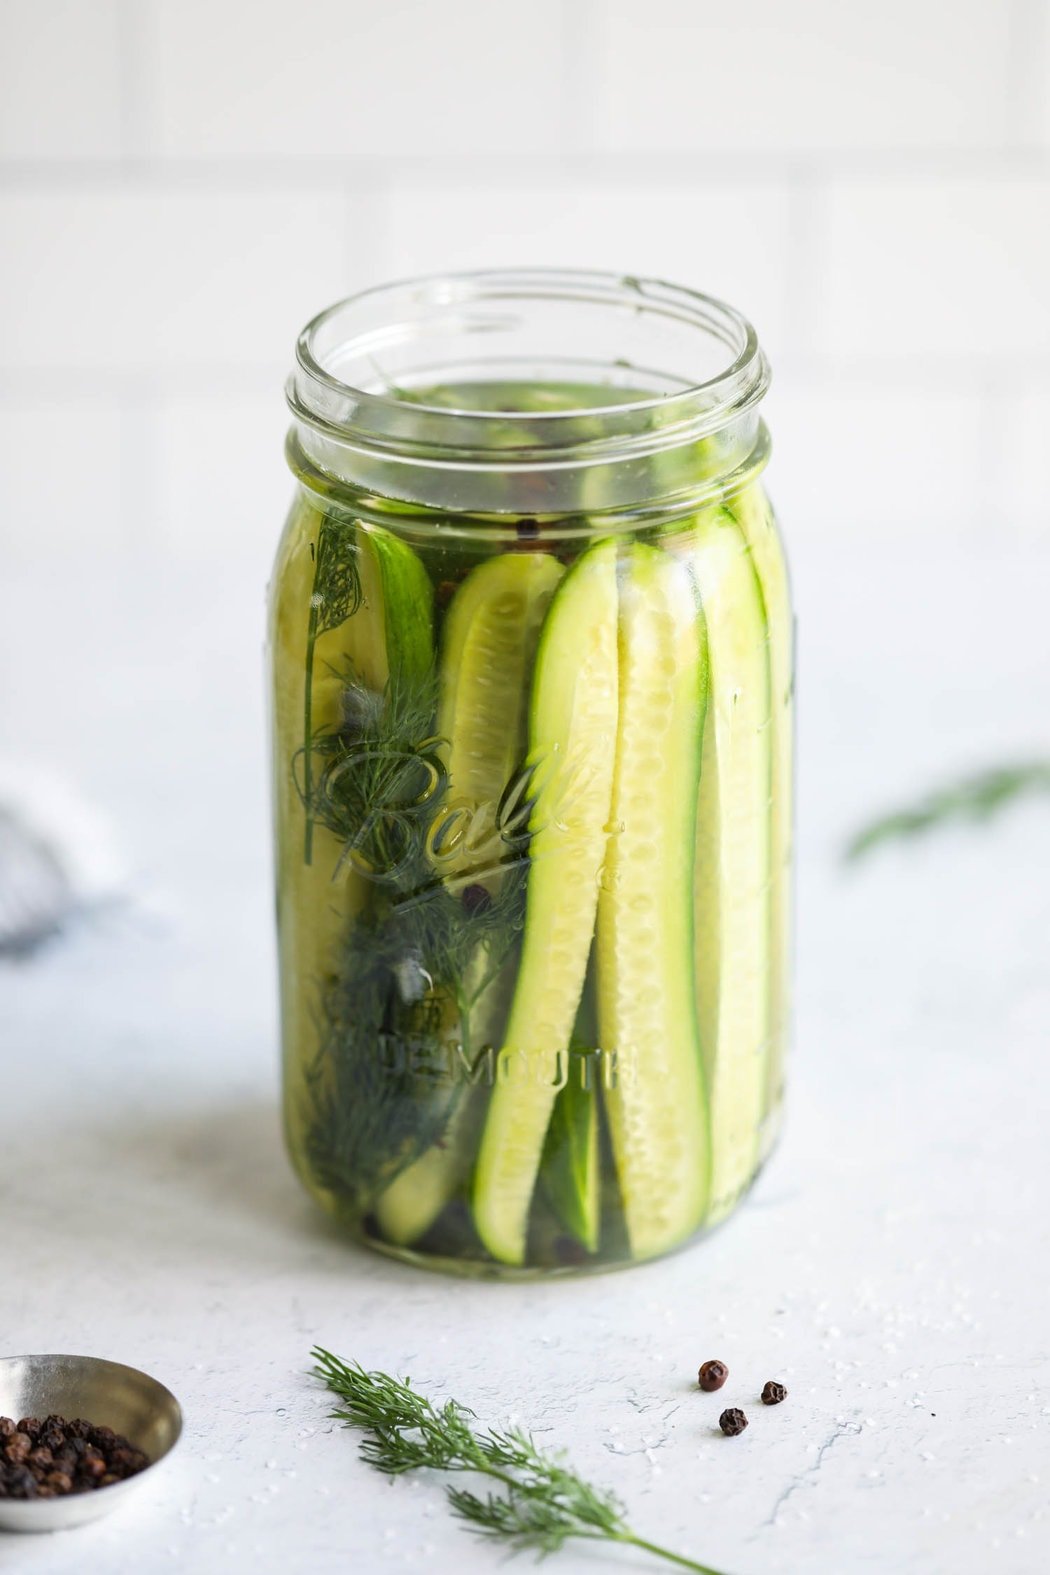
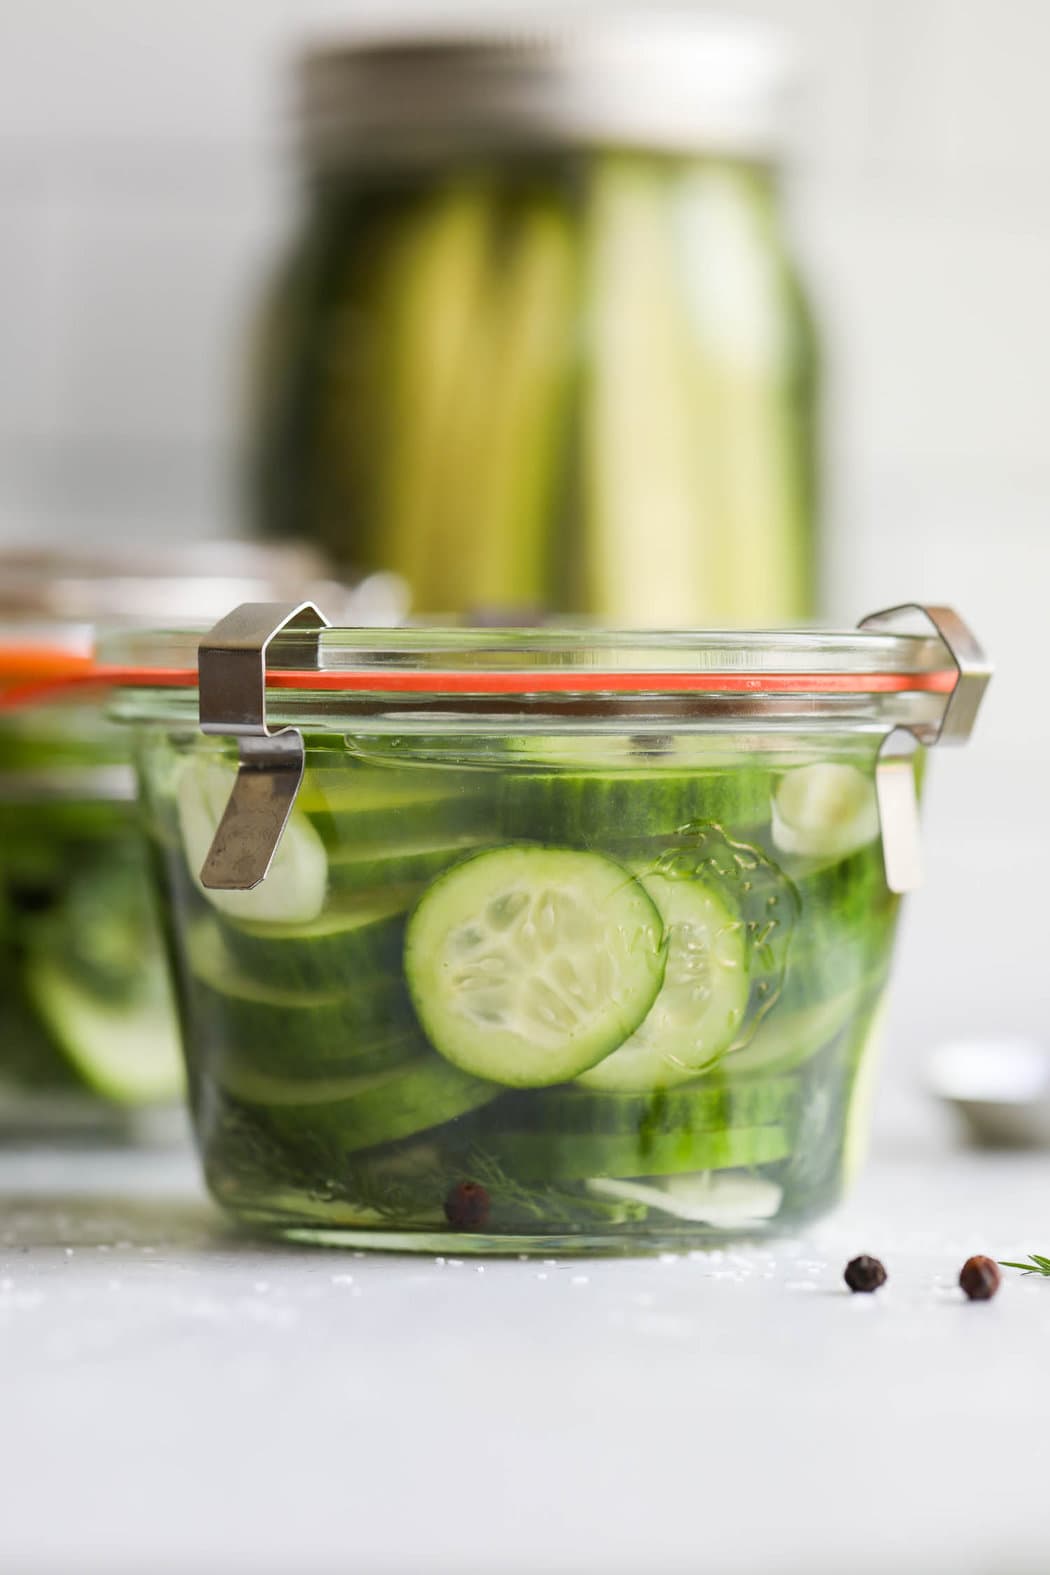
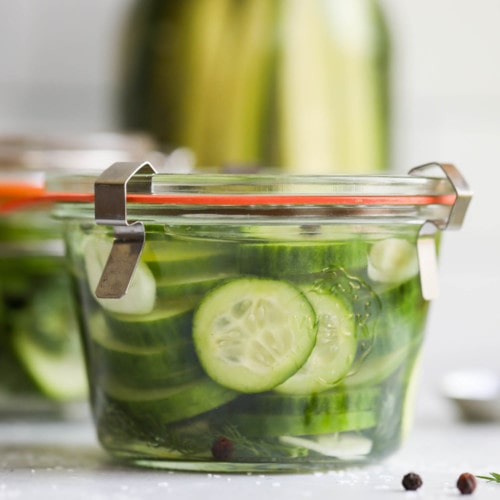
Step 4: Add aromatics to the jar. I place the sliced garlic and fresh dill into a clean wide-mouth jar as the flavor base. A wide-mouth quart-size mason jar or flip-top canning jar works great, but you can use any clean jar.
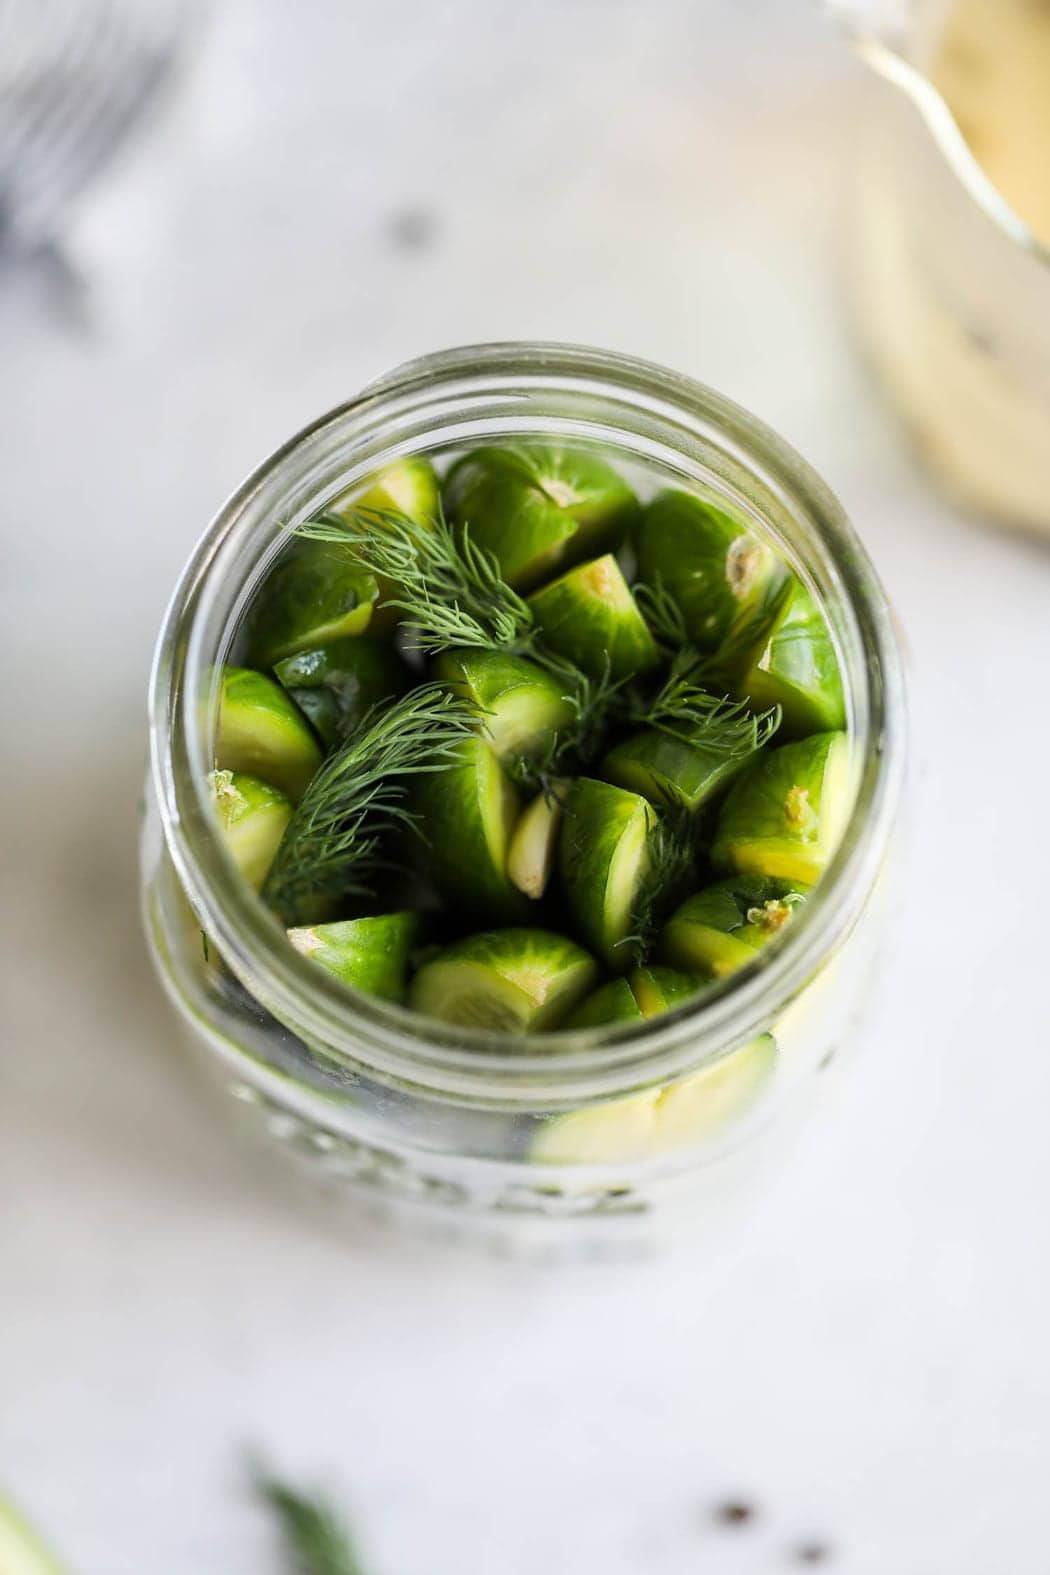
Step 5: Pack the cucumbers. I add the cucumbers into the jar, arranging spears upright or layering for sliced pickles so they fit snugly but still have room for brine. If using pint jars, just split the garlic, dill, and cucumbers between 2 jars.
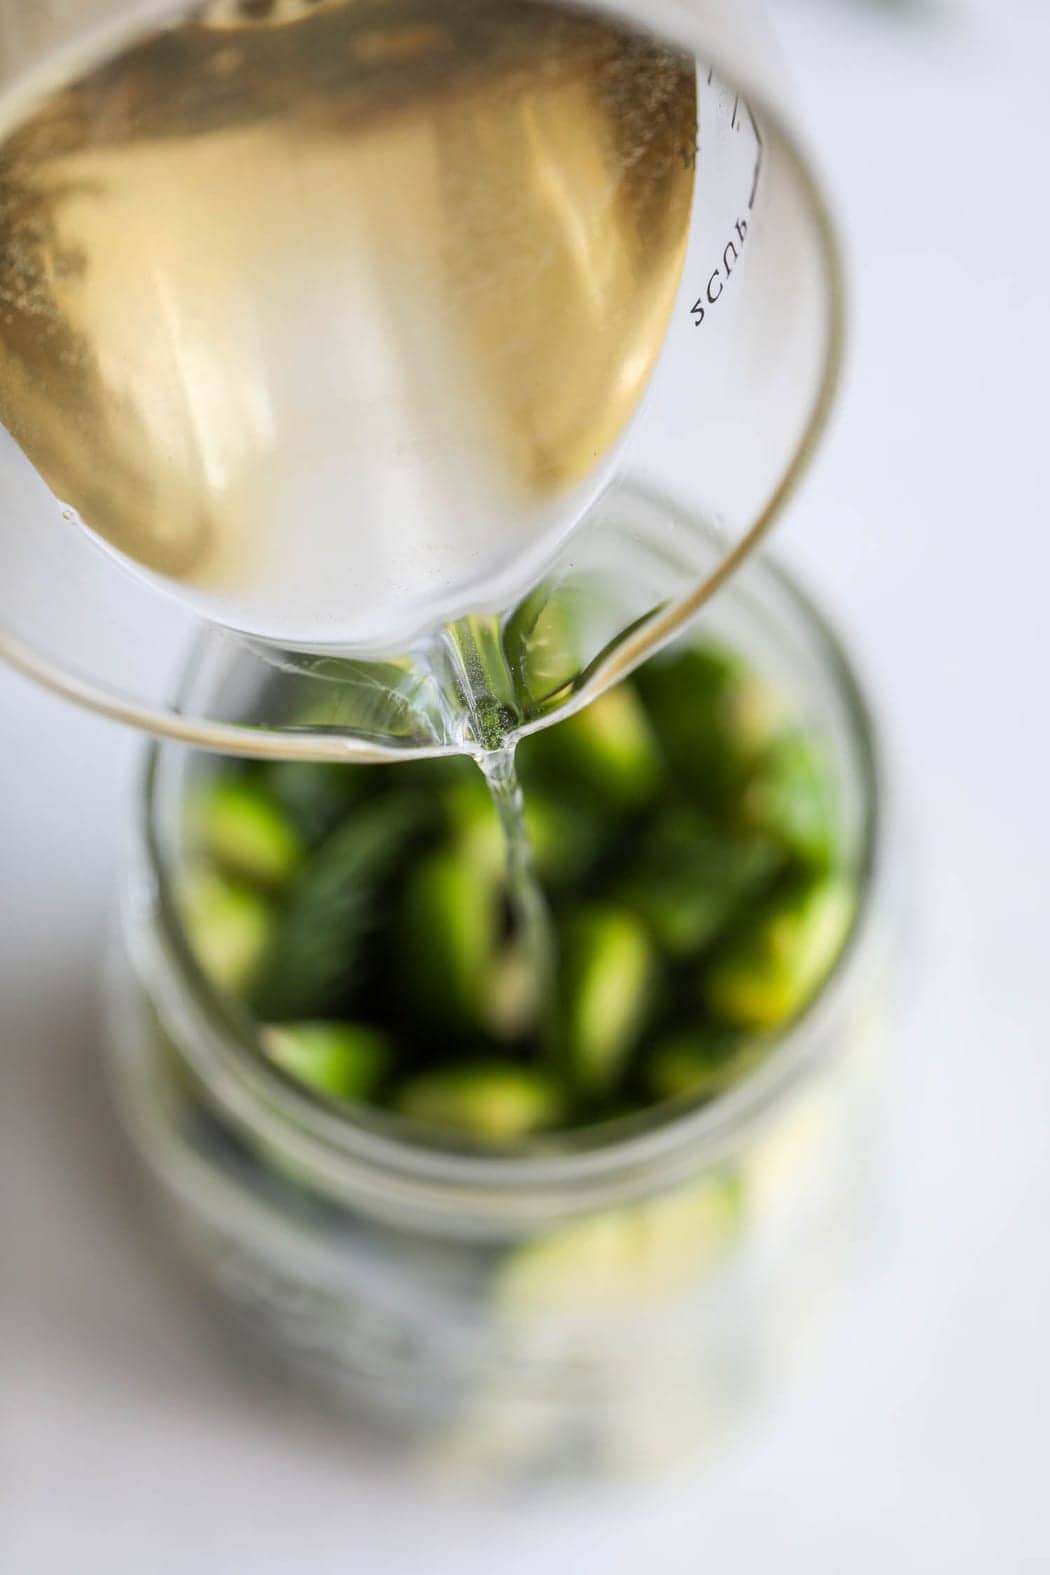
Step 6: Pour in the brine. I pour the warm brine over the cucumbers until they are fully covered. If needed, I top it off with a little cold water.
Step 7: Chill and wait. I seal the jar and refrigerate it for at least 24 hours before eating. The flavor continues to develop over the next few days, and the pickles keep well for up to a month.
For serving size and the complete directions and ingredient amounts, scroll down to the recipe card below. All of our recipes include the nutrition analysis, listing calories (kcals), protein, carbohydrates/carb, fiber, sugar, sodium, cholesterol, and more per serving.
Make Spicy Pickles
It is easy to add a little heat to this recipe. I like tossing in a few slices of fresh jalapeño or a pinch of red pepper flakes to give the pickles a subtle kick. For even more flavor, I sometimes use a pickling spice blend or create my own with ingredients like bay leaves, coriander seeds, celery seeds, and a clove or two. It is a simple way to change the flavor profile and play with new recipes without changing the base.
Make These Sugar-Free
It is easy to make these refrigerator pickles sugar-free by simply omitting the ½ teaspoon of cane sugar. I find the sugar helps round out the acidity of the vinegar, but it is not essential for the pickling process, so the pickles still turn out crisp and flavorful without it.
One Of Our 5-Star Reviews ⭐⭐⭐⭐⭐
“Best pickles I’ve ever made. Tastes like the Firehouse Subs pickle! Coveted at our house! Thanks for this great recipe!”
– Julie
Enjoy Plain Or Serve With Favorite Recipes
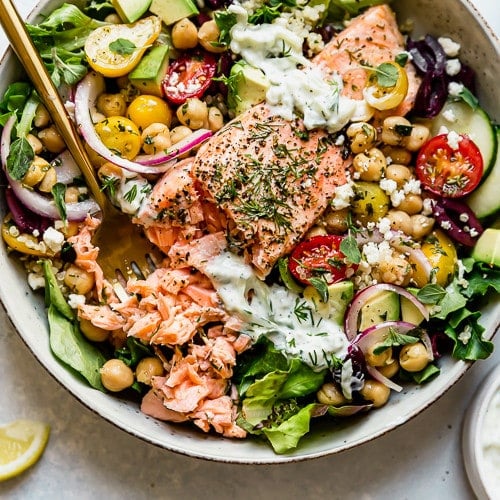
I often snack on these straight from the jar because the crunch and tang are hard to beat on their own. They also make a great topping for my burger bowl with special sauce, adding that classic pickle bite without any extra effort.
When I need something quick but satisfying, I like adding them to my 5-minute salmon salad for a little brightness and texture, or using them as the base in my dill pickle chicken salad. They also work well alongside sandwiches, wraps, or simple lunches in your meal prep, where something crisp and briny brings everything together.
How Long They’ll Last
These homemade refrigerator pickles will keep well in the refrigerator for up to one month. Over time, the cucumbers may lose a bit of their crispy texture, but the flavor remains delicious, and they are still safe to eat. Since they come together so quickly and last for weeks, I often make a double batch so there is always a jar on hand for snacking, sandwiches, or easy sides.
Frequently Asked Questions
Fermented pickles are made with a saltwater brine and develop their tang through natural bacteria over time. Depending on storage temperature, it can take 3-6 weeks for them to ferment.
Quick pickles, like those in this homemade dill pickle recipe, use a vinegar-based brine and are ready to enjoy after about 24 hours. Other veggies can be pickled this way, too, like red onions, sweet onions, and green beans, for an easy side dish.
Fermented pickles offer probiotic benefits and other anti-inflammatory effects, but quick pickles are a lot faster and more convenient. To try fermenting at home, see my fermented carrots with dill or homemade sauerkraut.
While cucumbers are the most common vegetable associated with pickling, the word “pickle” actually refers to the preservation method, not the vegetable itself. In everyday language, though, “pickles” have come to mean cucumbers that have sat in a brine recipe and flavored until tangy and crisp.
Many other vegetables can be quick-pickled using the same method, including carrots, green beans, red onions, and beets. Each one absorbs the brine differently, creating a variety of flavors and textures beyond the classic cucumber pickle.
These pickles are not designed for canning. There is not enough vinegar in the recipe to achieve the low pH required to safely can them. They should be stored in the refrigerator and enjoyed within about one month.
A water bath is not recommended for these pickles. For fermented pickles, a water bath can soften them and destroy the beneficial bacteria created during fermentation. For quick pickles, it is simply not necessary since they are meant to be refrigerated.
Pickling solution is actually a type of metal treatment to remove surface impurities and oxidation. This solution is not related to refrigerator pickling liquid and should not be confused with pickle brine.
Want to save this recipe?
Enter your email below & we’ll send it straight to your inbox. Plus you’ll get great new recipes from us every week!
Refrigerator Pickle Recipe
These easy refrigerator pickles are crisp, tangy, and made with just 8 simple ingredients. With only 20 minutes of hands-on time, the hardest part is waiting 24 hours before digging in.
Ingredients
- 1 pound small cucumbers, about 6–7 (such as Persian or Kirby)
- ½ cup distilled white vinegar
- 1 tablespoon kosher salt (may substitute 1 ½ teaspoons fine sea salt)
- ½ teaspoon cane sugar (optional)*
- ½ teaspoon black peppercorns
- 1 cup cold water
- 2–3 garlic cloves, peeled and sliced
Instructions
Make the brine.
- Place a small saucepan over medium-high heat.
- Add vinegar, salt, and sugar (if using). Stir.
- Heat the mixture, stirring occasionally, just until the salt and sugar are completely dissolved.
- Remove the pan from heat. Stir in peppercorns and water.
- Set aside or transfer to a jar with a tight-fitting lid and refrigerate until ready to use (up to 4 days).
Prep the pickles.
- Wash the cucumbers and pat dry.
- Using a knife, slice the cucumbers lengthwise into spears (or slice into ¼-inch thick rounds for pickle chips).
- Add the garlic and dill to the bottom of a wide-mouth quart-size mason jar.
- Add the cucumber spears or slices to the jar.
- Pour the brine over the cucumbers. It should cover them completely, but if not, add a bit of cold water to the top until they are covered.
- Place the lid on the jar and refrigerate for 24 hours. Pickles will keep in the refrigerator for up to 1 month.
Last Step! Please leave a review and rating letting us know how you liked this recipe! This helps our business thrive so we can continue providing free recipes and high-quality content for you.
Notes
For extra crunch, I always follow guidance from the National Center for Home Food Preservation and trim a 1/16-inch slice from the blossom/stem end of each cucumber. This helps prevent enzymes in the blossom end from softening the pickles too much.
To make these pickles spicy, I like adding sliced jalapeños or a pinch of red pepper flakes directly into the jar. A jar of pickling spice can also be used, or a custom blend with bay leaves, coriander seeds, or even a clove for deeper heat and flavor.
*To make a lower-sugar or sugar-free version, I simply leave out the cane sugar. The brine still works without it, and the pickles remain crisp and tangy, just a little sharper in flavor.
Nutrition Information
- Serving Size: Per spear
- Calories: 3
- Fat: 0 g
- (Sat Fat: 0 g)
- Sodium: 140 mg
- Carbohydrate: 1 g
- (Fiber: 0 g
- Sugar: 0 g)
- Protein: 0 g
- Cholesterol: 0 mg
Dietary
For ultimate success, we highly recommend reading the tips in the full blog post above. All photos and content are copyright-protected. Please do not use our photos without prior written permission. If you wish to republish a recipe, please rewrite the recipe in your own unique words. Link back to the source recipe here on The Real Food Dietitians. Thank you!

I haven’t tried yet but your blogs haven’t failed me! I just have a question: my brine didn’t completely cover my cucumbers (I cut down a large cucumber instead of using mini). There’s about 1/2 inch of cucumber not covered. Should I make more bribe to cover it?
Since you are not fermenting these it’s not crucial that they are covered in brine. However, the parts that are uncovered will just be cucumbers while the submerged parts become pickles. I would just open the jar and give them a good shove down into the brine now that the bottom parts of the cucumber should be a bit softer after having been in the brine for a day or so.
I made them and they tasted just like grillos pickles and I continue making them
We love it, Emma! Thanks for the feedback and 5-star review!