Say Goodbye to Plain Ol’ Carrot Sticks and say Hello to these Snappy, Probiotic-rich Beauties
These carrots get a healthy boost of gut-friendly probiotics with just a little salt, water and time.
Fermented foods are all the rage right now. And for good reason! They’re delicious and packed with gut-friendly lactobacillus bacteria that can boost your immune system, improve your digestion and may even help you curb cravings and lose weight. Wow! A superfood, indeed.
Fermented foods are just what they sound like – fermented. Through the process of adding salted water to fresh vegetables, the lactic acid bacteria that is normally present on the surface of food (and also naturally found on our skin and in our gastrointestinal and urinary and reproductive tracts) is allowed to multiply and flourish creating an acidic environment that prevents spoilage. We wrote a post all about the health benefits of fermented foods that you don’t want to miss.
Keeping the vegetables below the brine (or salted water) creates an anaerobic environment that lactic acid bacteria love. This also means that potentially harmful or pathogenic bacteria, many of which need air to survive, essentially get crowded out and thus preserves the vegetables rather than allowing them to simply rot.
Lactofermentation, as it’s commonly referred to, does not require the use of any lactose or dairy products though whey form leftover from cheese or yogurt making can be used as a starter culture to get things going a little faster. I prefer to use just salt for the sake of simplicity and the fact that I have a sensitivity to whey protein.
If you like pickles, you’re going to love these
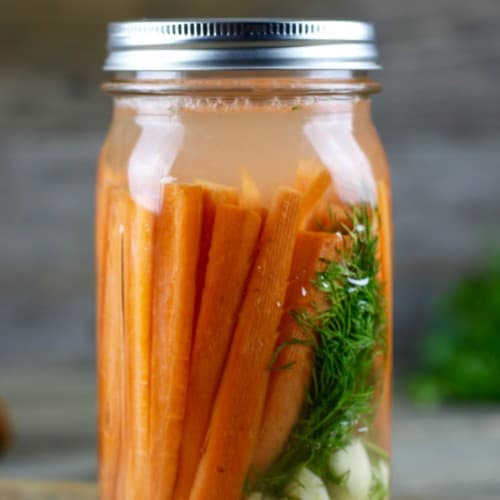
As an avid fermented food consumer and producer, and a Registered Dietitian Nutritionist specializing in digestive disorders, I routinely recommend fermented foods to be on every plate at every meal. Many people love sauerkraut or kimchi (spicy fermented Chinese cabbage) and are happy to add these lively, bubbly foods to their diets but some people aren’t quite as excited about cabbage. For those people I always suggest starting with these fermented carrots with dill and garlic. They’ve got the sweetness and crunch of a carrot and the tang and sour of a great dill pickle. Plus, they’re easy to make at home with just 5 ingredients.
And you can make some too!
Roll up your sleeves and gather your supplies. I’m about to make you a fermentista* too and save you a load of cash by making your own fermented carrots with dill at home (because fermented foods are an artisanal product and can be quite pricey when you start eating them regularly. Which you should be for your health’s sake!)
*a term meaning “one who ferments”, a term that I was introduced to by this great book.

Gather your supplies:
What you’ll need
- 1 lb. fresh carrots, with ends trimmed. Peeled if they are less than market-fresh or have a thick, bitter peel
- 1 quart-size mason jar or other jar, with lid
- Garlic, 3 large cloves peeled and smashed
- Fresh or dried dill (or other herbs such as thyme, rosemary, sage or marjoram)
- Unrefined sea salt
- Filtered water
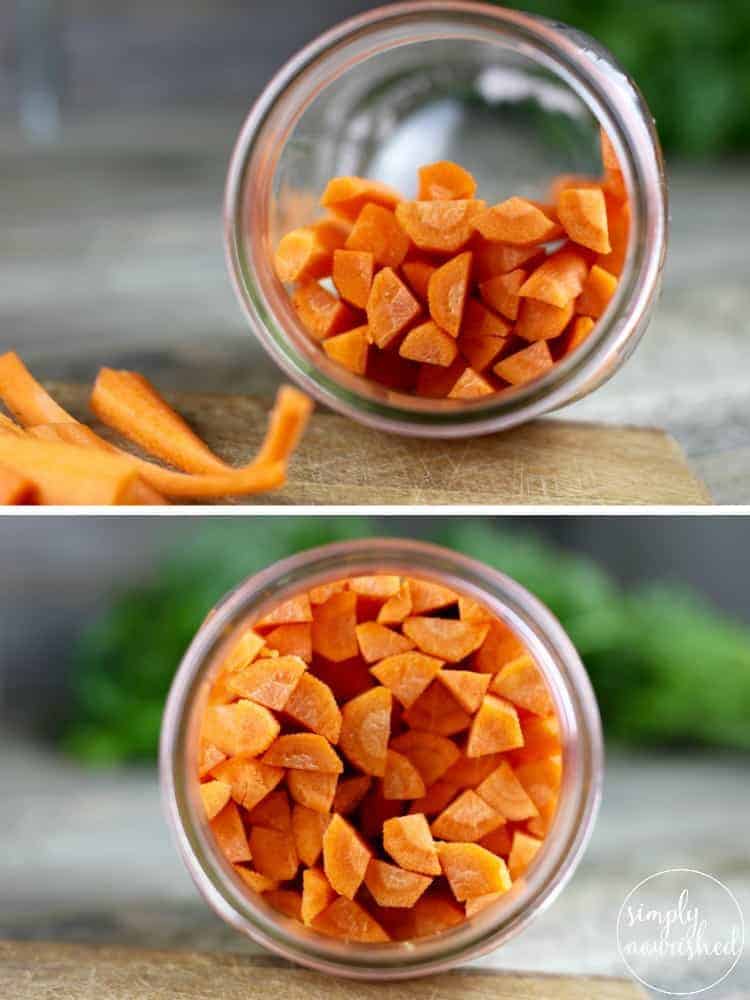
Prepare your carrots: Trim the ends of the carrots, wash under cool running water (no soaps or produces washes) and peel if needed. Slice carrots into thin sticks, keeping them all about the same size and thickness
Fermentista Tip: Stand a carrot stick up inside your jar to determine how long your sticks should be cut in order to give you 2 inches of ‘headspace’ (i.e. the amount of room between the top of the food and the top of the jar). Then cut to size and use this as your ‘ruler’ as you cut the rest. In carpentry we say “Measure twice, cut once” but here it’s “Measure once, cut many times”.
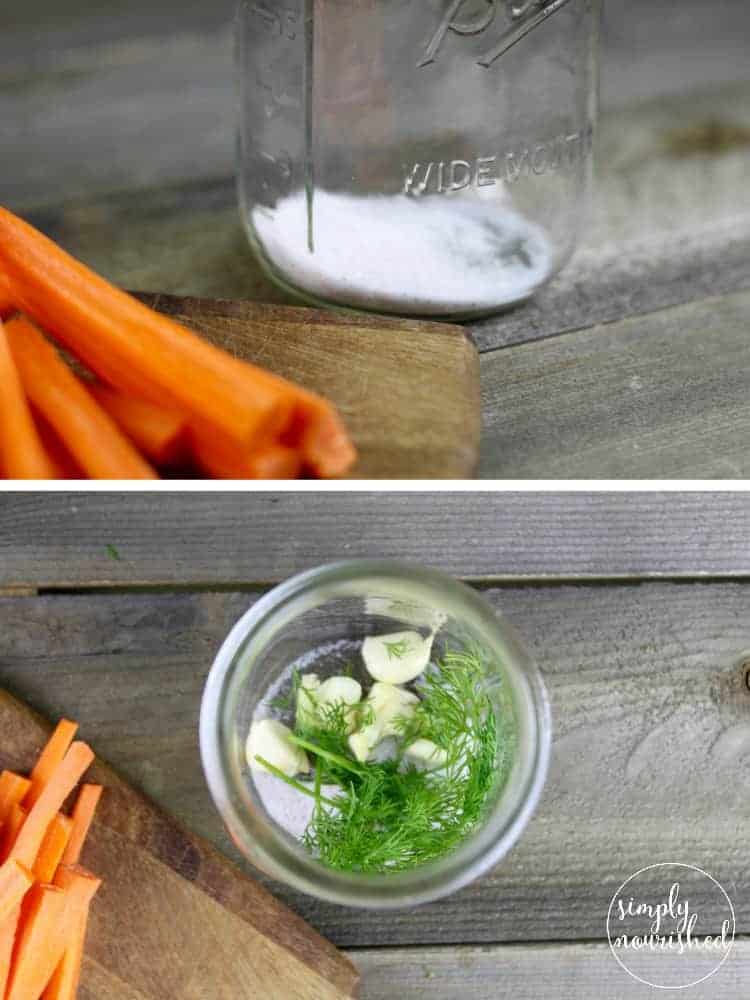
Add salt and flavorings: Pour 1 tablespoon of unrefined, non-iodized sea salt into the bottom of the quart jar. Add smashed garlic and dill or any other flavorings you like. I particularly like fresh rosemary and thyme but lemon and ginger (used in place of the garlic) is a refreshing variation that goes great with Asian-inspired dishes or salads.
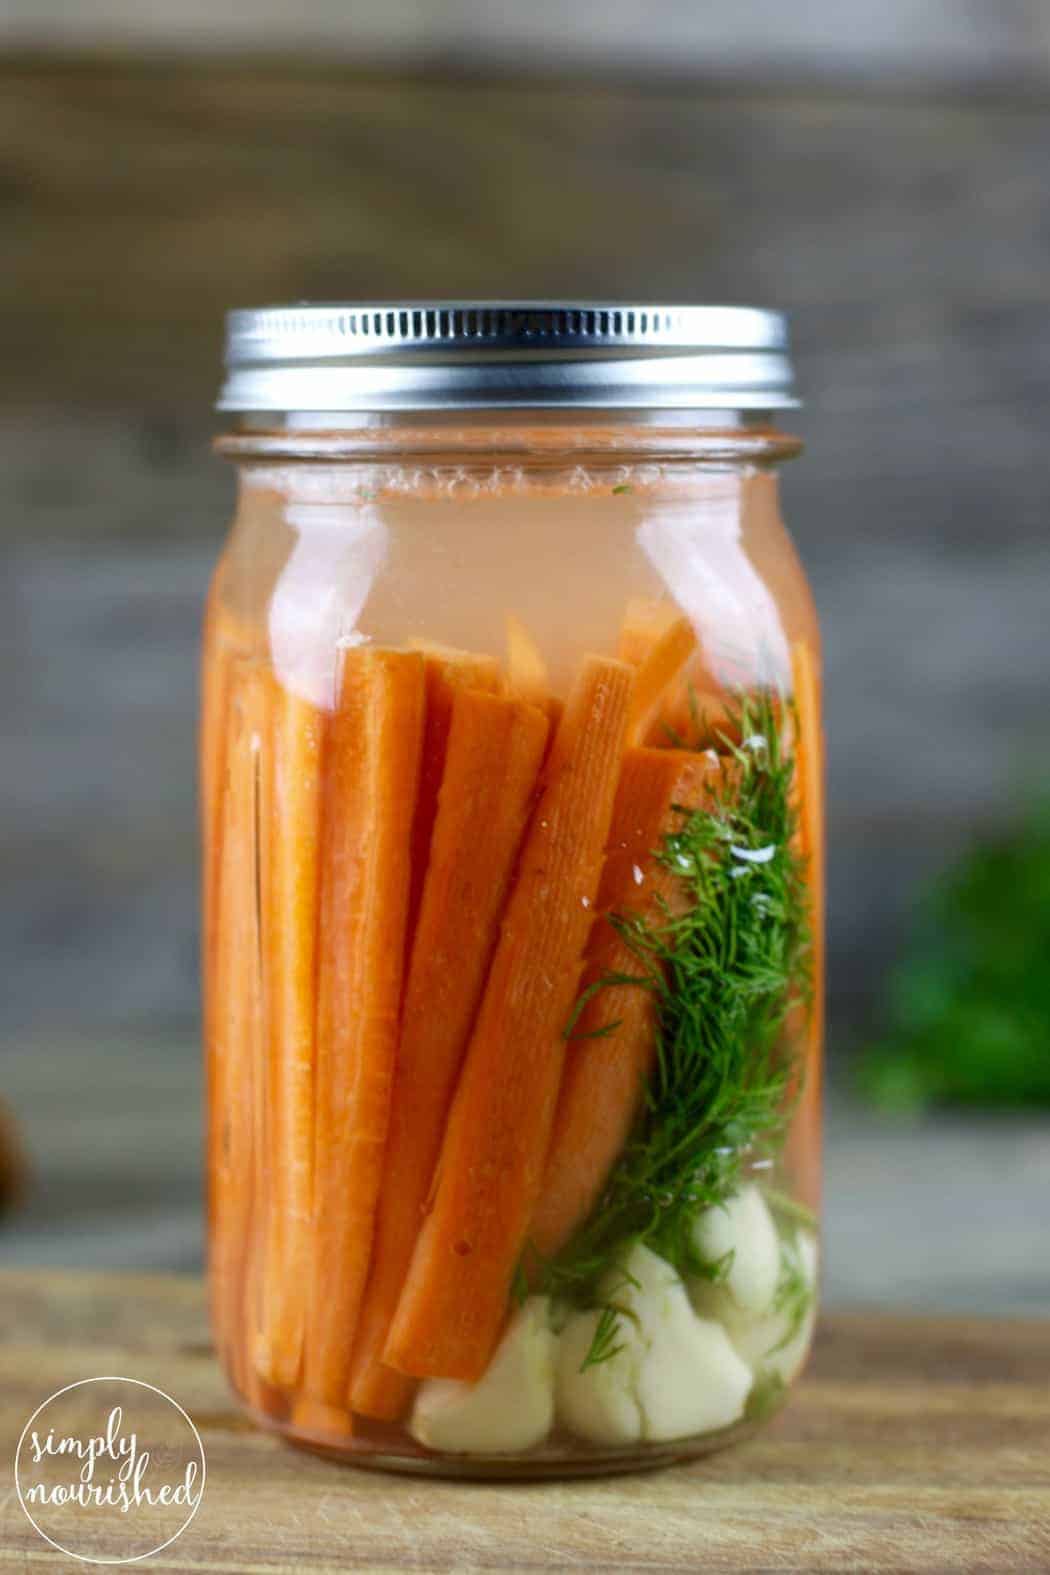
Pack them in tightly: I like to lay the jar on it’s side and carefully place the carrot sticks inside, packing them in as tightly as possible so that when the brine is added they won’t float to the top. Alternating the thick and thin ends of the carrot sticks helps you really pack them in there.
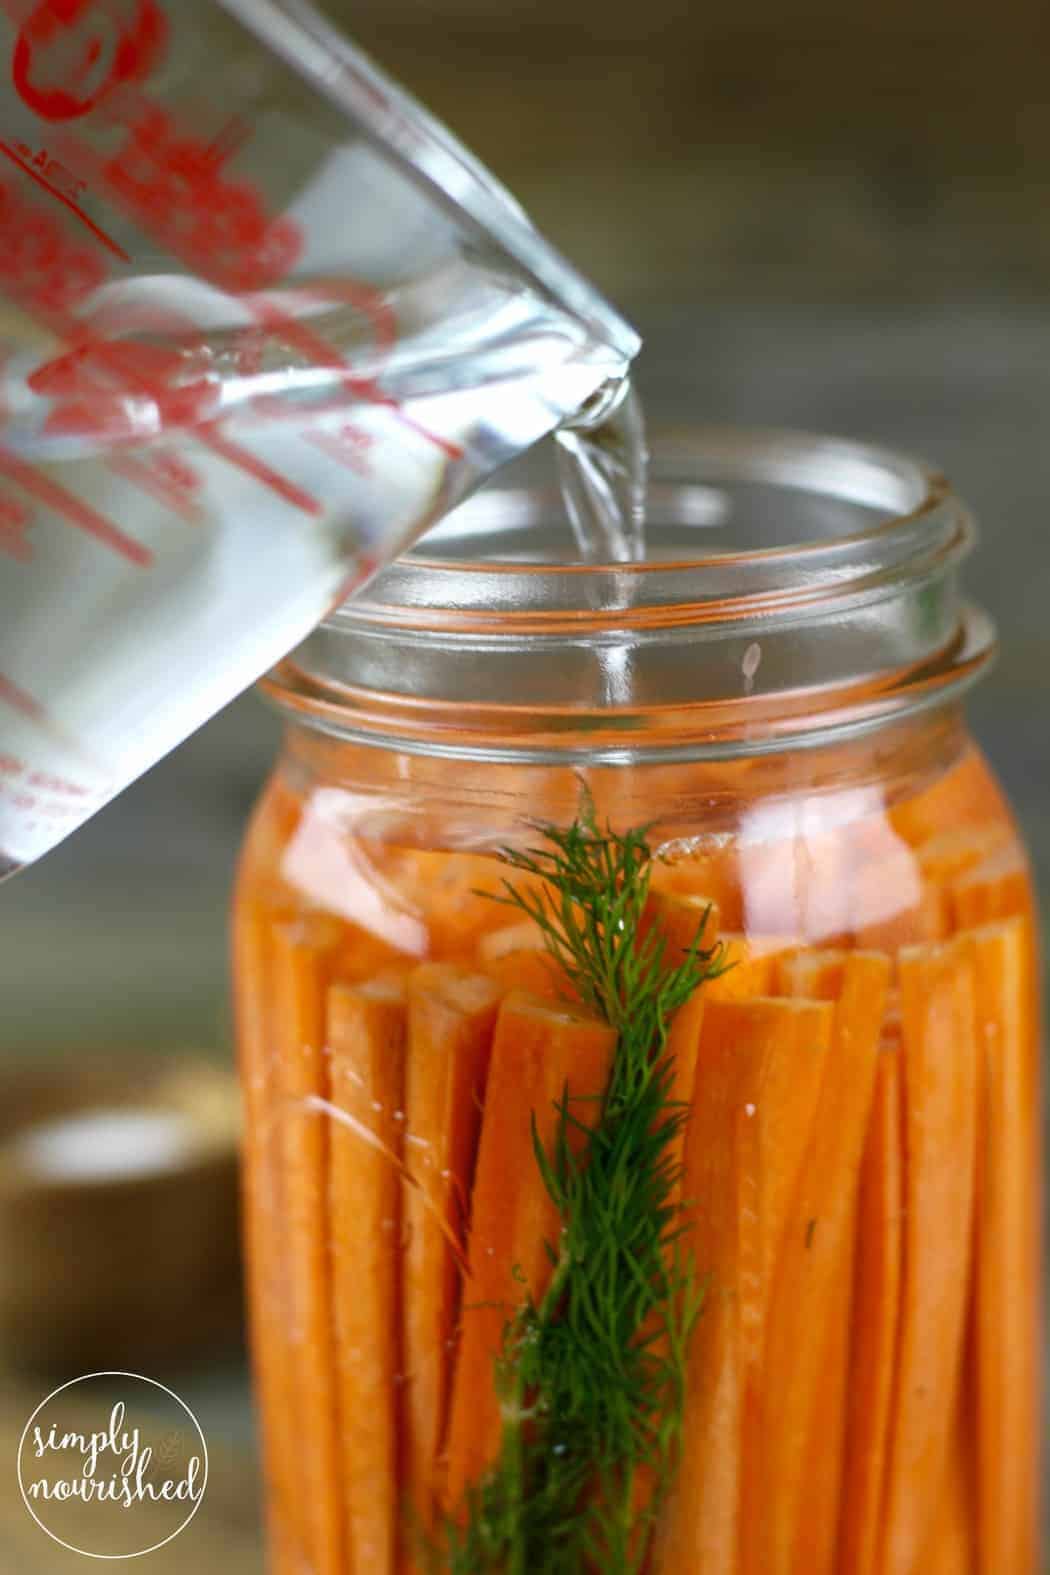
Add water: Add filtered water to within 1 inch of the top of jar, this would be the little lip just below the threads that catch the lid when you screw it on.
Filtered, non-chlorinated water is a must here because you don’t want to kill off any of the naturally present bacteria with the chlorine in the water. If you don’t have a filter on your tap or fridge water dispenser that removes chlorine, purchase bottled spring water (not distilled).
You’re almost done!
Now put on the lid and tighten it just barely. Less than “fingertip” tight. You really just want the lid to be held in place, not tightened down. As the lactic acid bacteria present on the vegetables start to multiply and consume the sugars in the garlic and carrots, they’ll start to produce carbon dioxide. You may start to see the tiny bubbles and hear a little fizzing after 1-2 days of sitting on the counter at room temperature. How exciting! They’re truly alive!
Place the jar inside of glass baking dish (in case it bubbles over) and set the jar on the counter out of direct sunlight. Don’t be tempted to place it in a closet or pantry where you may forget to check on it. As you learn to ferment it’s helpful to check in daily to observe the small changes in color, activity, smell and taste.
But is it safe to leave them at room temperature?
You may be wondering if it’s okay to just leave these out on the counter for the better part of the week and I’m here to say that not only is it safe, it’s totally necessary for the fermentation to happen. Lactic acid bacteria thrive in a temperature range of 60-70°F (15-20°C). Lower than that and they can’t really get started. Higher than that, they’ll multiply more rapidly which means you’ll need to keep a closer eye on your jar because your carrots will be done sooner.
Fizz and scum: When to worry
Fizz and scum are a normal part of fermentation as both bacteria and yeast are hard at work preserving your vegetables. After just 24 hours you’ll notice that the water has turned cloudy and you may even see some tiny bubbles rising to the surface. After 2-3 days, depending on how warm your kitchen is, if you remove the lid you’ll probably see some white scum. This is completely harmless and normal. By days 3-4 you’ll also notice a slight sour or acidic smell. Not vinegar-y, just slightly sour. Now do a taste test by using a clean stainless steel utensil (not aluminum) to remove a carrot stick from the jar. If it’s pleasingly sour and tangy to you and you like the amount of crunch, then it’s ready. If you prefer them tangier and less crunchy, replace the lid and check again the following day.
When you find your ‘bliss’ point of sour/tangy/crunchy then tightly cap with the lid and store in the fridge for up to 6 months. They will continue to ferment albeit at a much slower rate so be careful when removing the lid on a jar that’s been stored awhile so that it doesn’t spray all over.
If see red or pink mold, black scum or the smell is unmistakably putrid and you have a slimy brine then it’s time to pull the plug and toss your carrots. This is a sign that something went wrong and your carrots have spoiled. But fear not, in all of my years of fermenting I’ve had only a handful of ferments go bad and it’s never been a jar of carrots.
Want to save this recipe?
Enter your email below & we’ll send it straight to your inbox. Plus you’ll get great new recipes from us every week!
Fermented Dilly Carrots
Ingredients
- 1 lb. carrots, peeled and cut into sticks of similar size (or enough to tightly pack the jar)
- 1 Tbsp. unrefined, non-iodized fine sea salt
- ½ tsp. dried dill or 1 sprig fresh dill
- 3 cloves garlic, peeled and smashed
- Filtered water
Instructions
- Place the garlic, dill and salt into a quart-size mason jar.
- Pack carrot sticks, standing on end, into the jar as tightly as you can. This will prevent them from floating up the surface which increases your risk for spoilage. You want to keep them covered with liquid at all times during fermentation.
- Fill jar to within one inch of the top with filtered water, screw on the lid tightly and shake gently to mix.
- Remove the lid to check that all of your carrots are still submerged, then screw the lid back onto the jar very loosely and allow the jar to sit at room temperature (70 degrees F) for 3-5 days; try them at 3 days and see if you like their texture and sourness. If not, let them go another day and check again tomorrow and possibly the next. If your kitchen is warm (75-85 degrees F), you may only need to ferment the carrots for 3 days so keep an eye on them.
- Once you find your “bliss point” of crunch and sour, screw the lid on tightly and store in the refrigerator for up to 6 months.
Last Step! Please leave a review and rating letting us know how you liked this recipe! This helps our business thrive so we can continue providing free recipes and high-quality content for you.
Notes
All photos and content are copyright protected. Please do not use our photos without prior written permission. If you wish to republish this recipe, please rewrite the recipe in your own unique words and link back to the source recipe here on Simply Nourished Recipes so credit is given where credit is due. Thank you!
Nutrition Information
- Serving Size: 3 carrots
- Calories: 10
- Fat: 0 g
- Sodium: 220 mg
- Carbohydrate: 3 g
- (Fiber: 0 g
- Sugar: 1 g)
- Protein: 0 g
Dietary
Pin it!

Are you new to fermenting or an old pro? We’d love to hear what you think, if you’re ready to give it a try or what you’ve got bubbling on your counter right now. Leave us a comment – we love hearing from you!
This post may contain affiliate links which won’t change your price but will share some commission.

Easy and delicious! A great one to try if you’re new to fermenting. Used up the last of my garden carrots on this.
Awesome! What a great way to use up the last carrots of the season!
I just made some carrots similar to your recipe with raddish chillie and garlic cloves, 90% was carrot.
I dissolved 30 grams salt in hot bottled water, and then when cool, filled the jar up with water.
You didnt seem to really measure the salt amount in this recipe.
I have just pulled one out after 10 days, its tangy spicy and I suppose just right.
Now into the fridge.
I like your simple easy to read answers to the questions, so well done Jessica!
Thanks, Mark – I love the addition of chile. We do specify 1 tablespoon of salt per quart of carrots. Glad you found this post helpful!
Mmmmmm just made a couple jars with your recipe. IF I remember I’ll come back and let you know how they turn out.
Hi Jessica
I followed your recipe and had my carrots in a Weck jar with an airlock on the bench. they have been there for about 5 months. I pull a carrot out every now and then and they are well and truly done but for some reason I never put them in the fridge. Are they still okay to eat? They taste and smell fine but I have never tasted fermented carrots before, so have nothing to compare the taste to. There is no mold, slime or off taste – in fact they taste pretty good. I am located in Australia where it is pretty hot at the moment (36+ deg celsius).
Thanks for your help.
Cheers
Sue
Hi Sue,
Hmmm. That’s a good question. I have never left them out on the counter that long but I have stored sauerkraut in a crock in my basement for just about as long and it was fine (albeit under a harmless blanket of fuzzy white mold). So as long as you don’t have any pink, black, or brown mold or slime and they taste fine, then you should be okay. I would, however, transfer them to the refrigerator and if at any time they develop signs of being ‘off’ or spoiled they should be discarded immediately.
Dear Jessica,
I am new to fermenting. I recently started making sauerkraut and I will be starting with carrots next.
Do you know of any remedies for microscopic colitis?
A diet that’s low in fat and fat and restricts or even eliminates dairy, gluten, and sugar is typically recommended for microscopic colitis in addition to therapies prescribed by a healthcare provider.