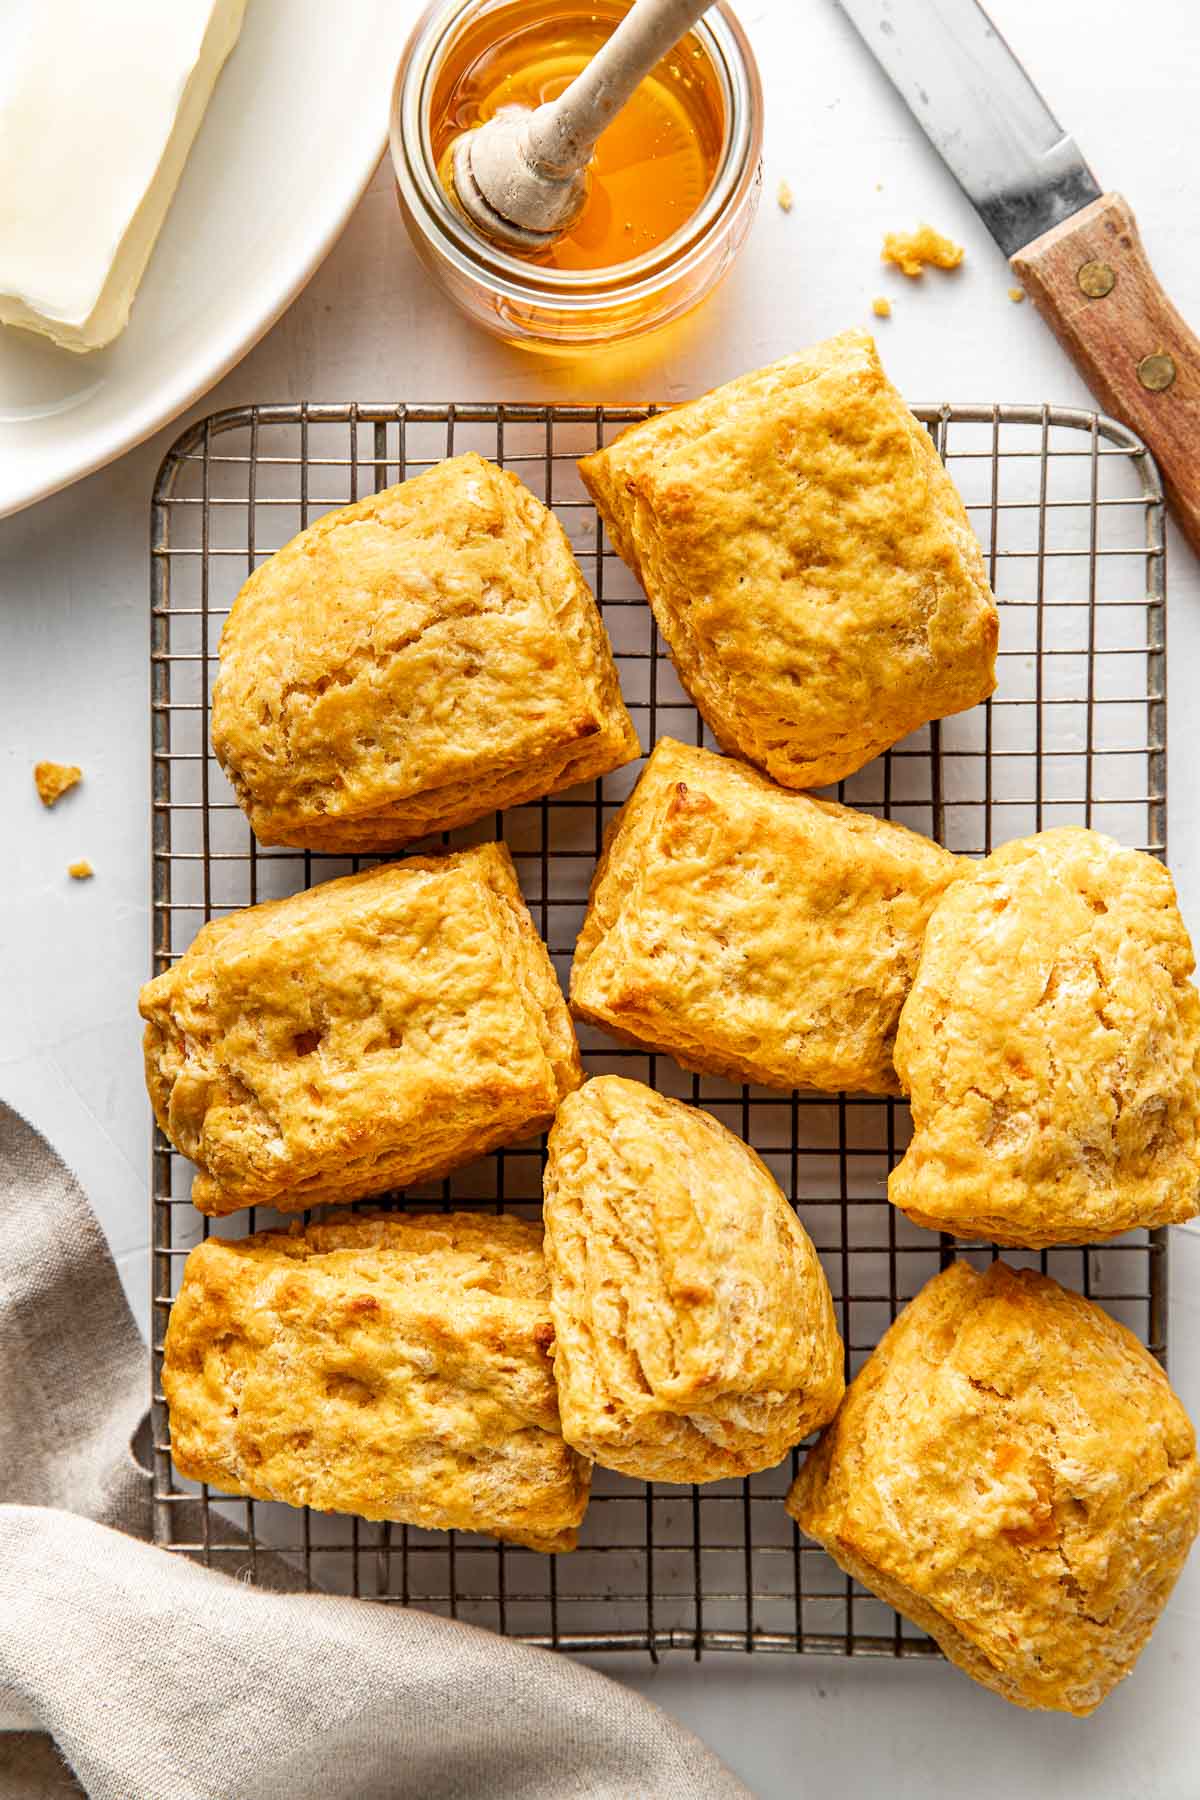
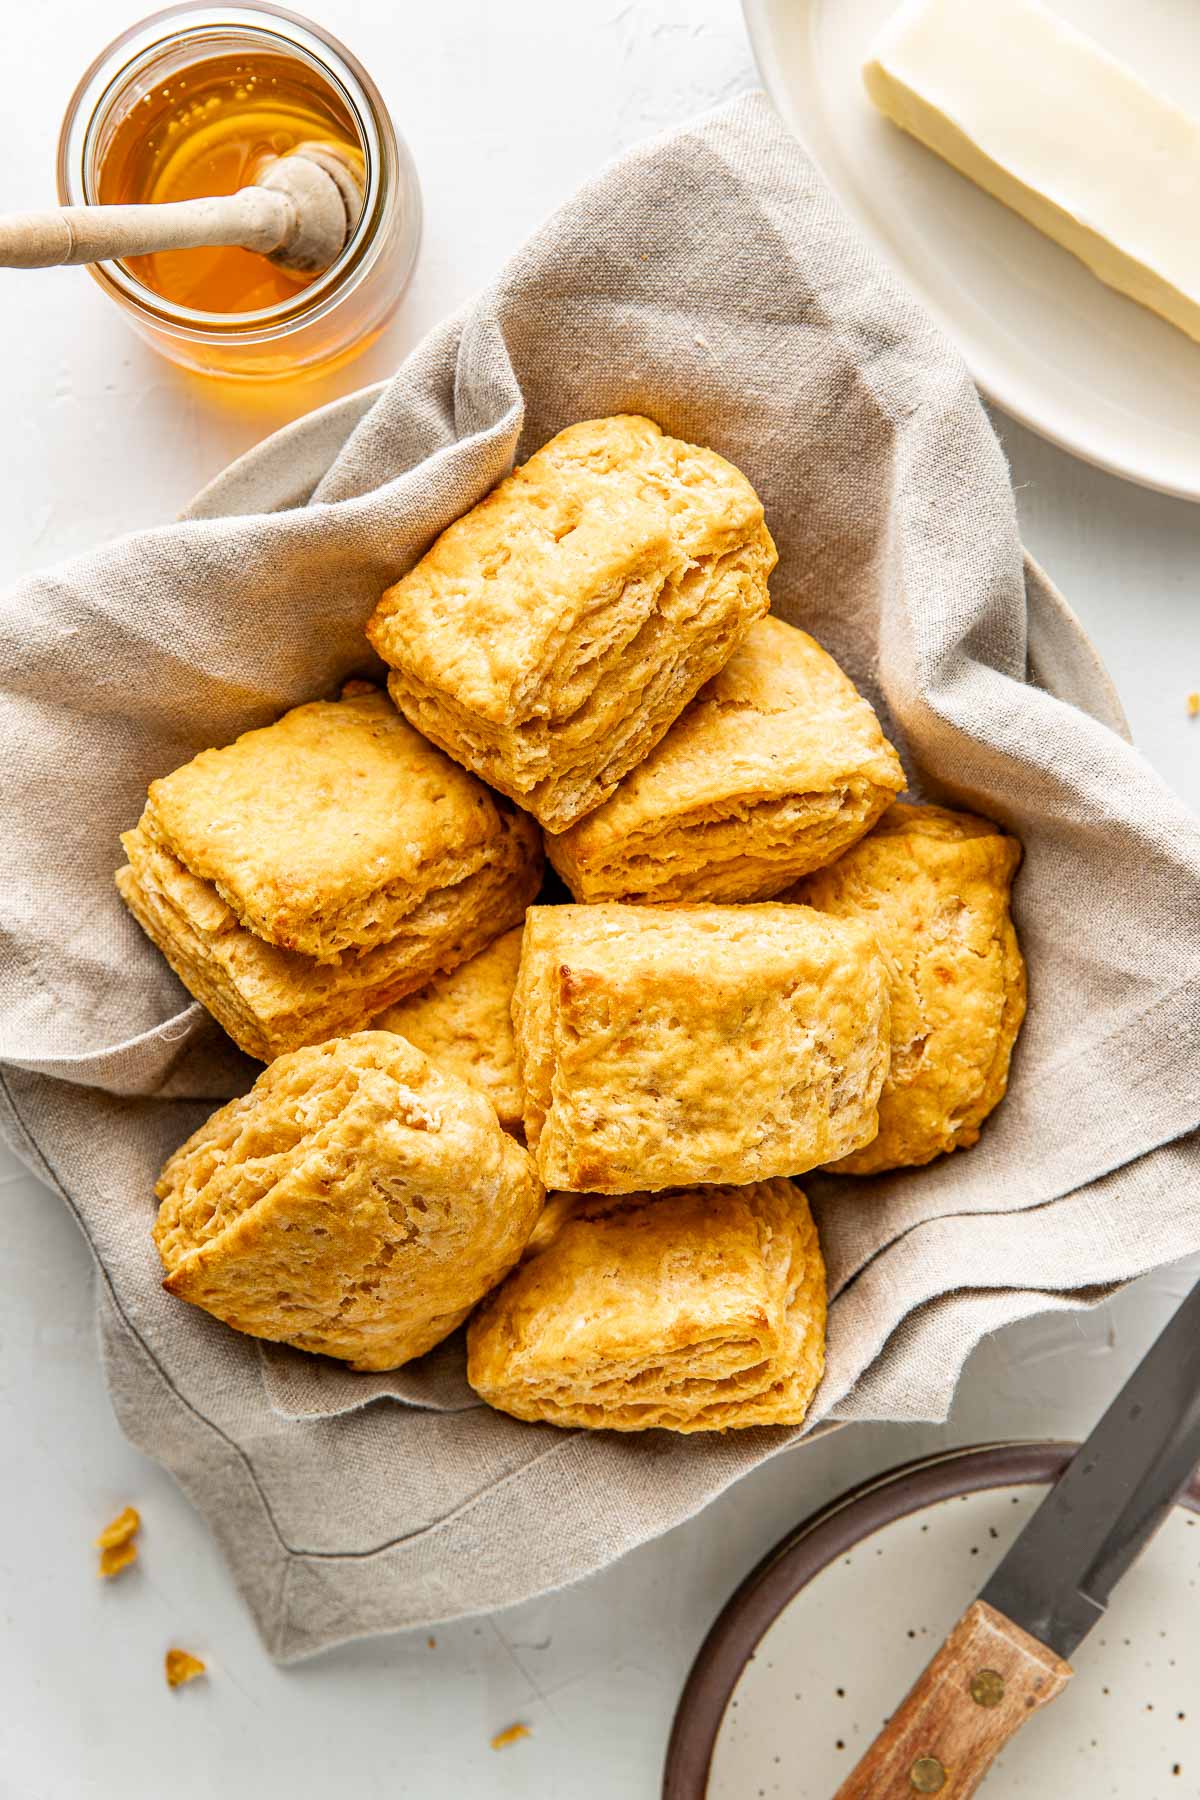
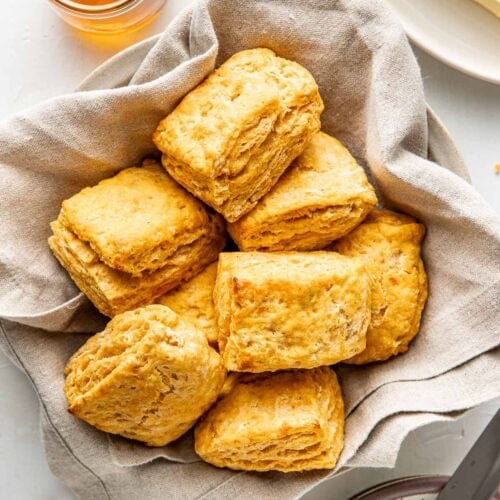
I love a recipe that’s both easy to make and impressive, which is why I’ve been obsessed with making tall flaky biscuits lately. I find them to be the perfect accompaniment to a bowl of soup or stew. And no matter how many times I make them for my family, someone always tells me they are blown away by how good they are. Having perfected the basic biscuit recipe, I wanted to create a cozy winter-inspired version that pairs well with sweet toppings and savory dishes. I’m pretty confident that I nailed it with these gorgeous homemade sweet potato biscuits.
Ingredient Notes And Substitutions
Here are a few notes about the primary ingredients for this sweet potato biscuit recipe.
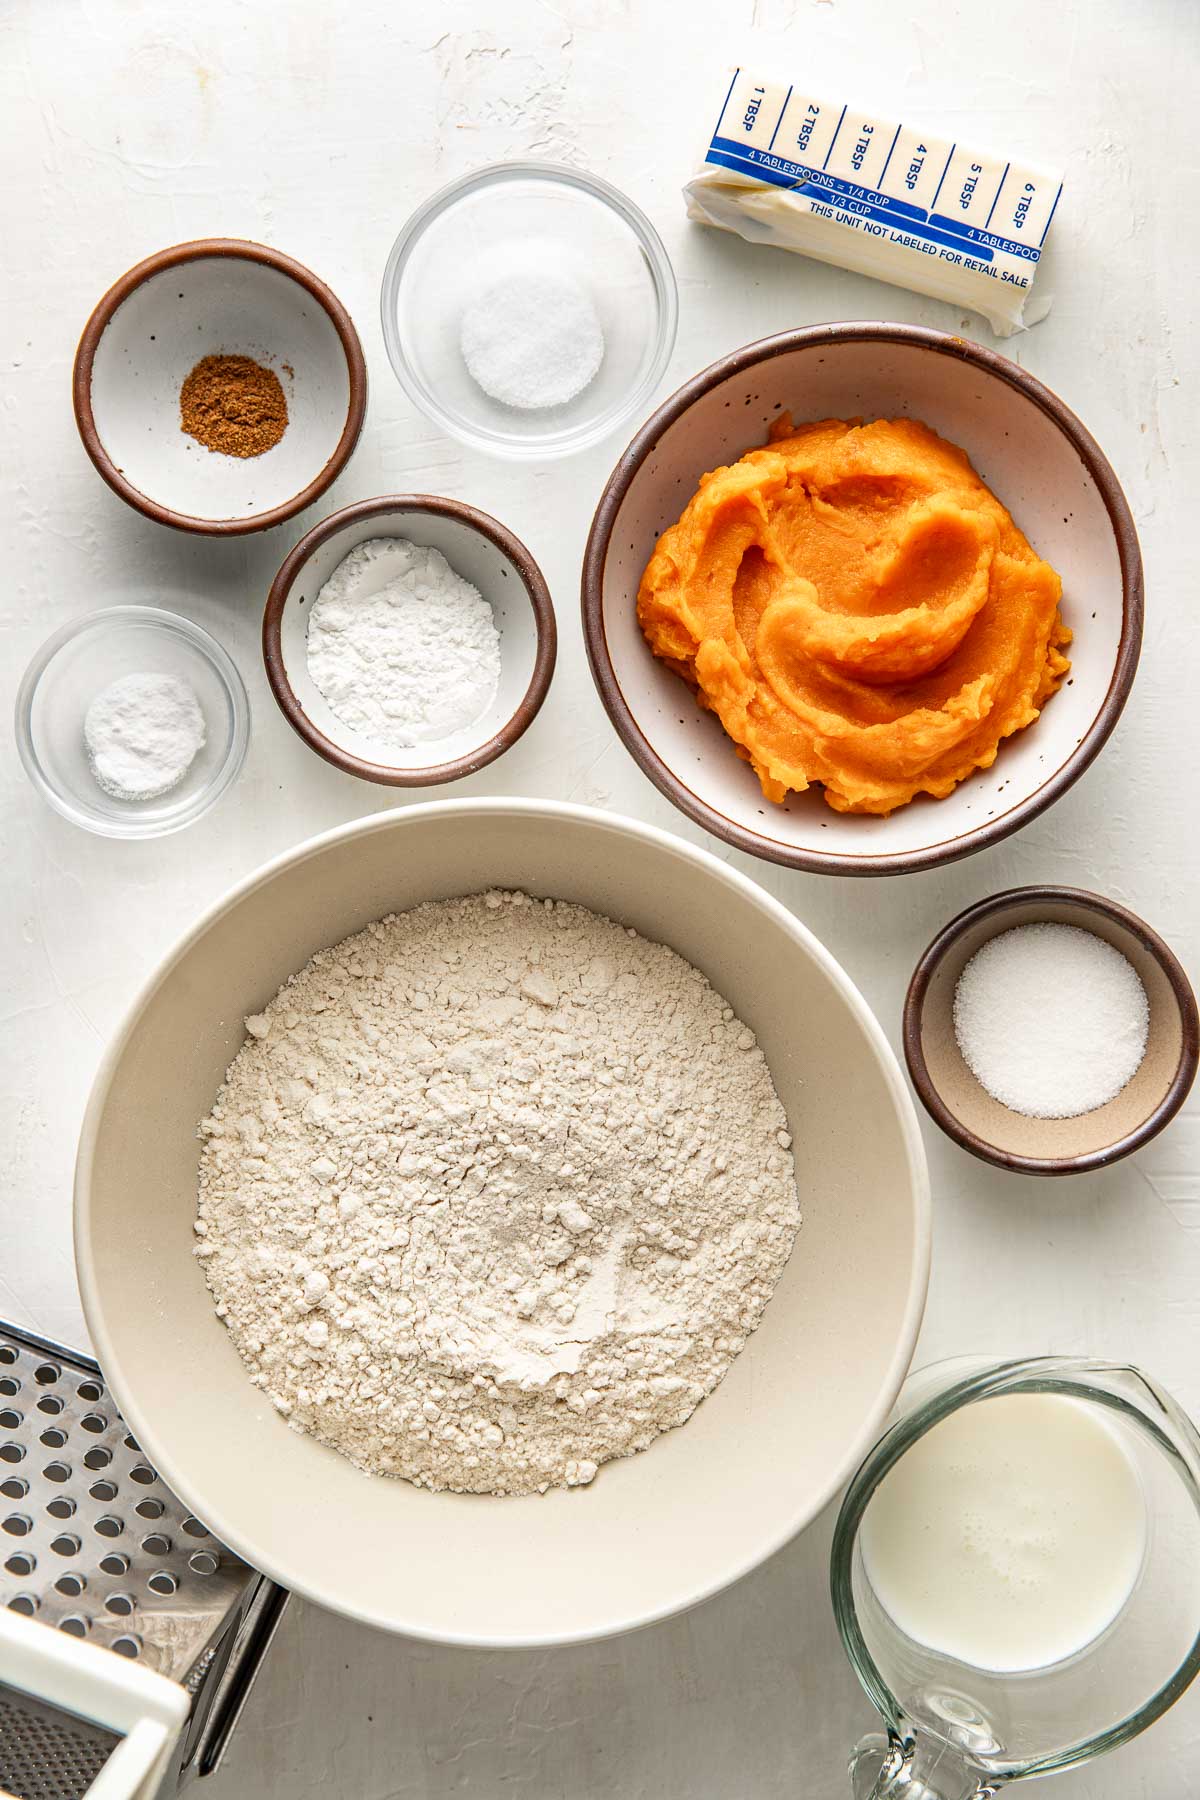
- Sweet potatoes – Sweet potatoes are a good source of many nutrients, including fiber, potassium, calcium, vitamin A, vitamin C, and vitamin B6. This recipe is a great way to use up leftover mashed sweet potatoes, since it uses only ¾ cup. The addition of sweet potatoes give these biscuits a soft, tender crumb and a subtle sweetness that makes them irresistible. Adding sweet potato also is an easy way to give recipes a little boost of nutritional value.
- Butter – I always reach for unsalted butter for baking but salted butter can work, too, by reducing the salt added to the flour mixture by half. I do not recommend using dairy-free or vegan butter due to its higher water content. I have not tested the recipe with shortening, so I cannot recommend its use.
- Flour – I use all-purpose flour to make my biscuits because I love how easy it is to create flaky layers with just a few rounds of patting and folding the dough.
- Buttermilk – Buttermilk helps create fluffy biscuits with a tender crumb because the acidity reacts with a leavening agent (such as baking soda or baking powder) to create carbon dioxide, which causes the dough to rise when placed in the hot oven. Whole milk mixed with a splash of vinegar can be substituted for the buttermilk.
Find the ingredient list with exact measurements in the recipe card below.
Make These Gluten-Free
Gluten-free flour blends such as King Arthur Measure For Measure and Bob’s Red Mill Gluten-Free 1:1 Baking Flour can be used in place of all-purpose wheat flour to make these biscuits gluten free. While developing this recipe I found that, while the measurement of the gluten free flour was the same as that for all-purpose wheat flour, the weight differed (270g vs 235g for all-purpose wheat flour). Increasing the baking time by 1 minute gave me the best results.
As with many gluten-free baked goods, allowing them to cool completely results in the best texture. I recommend reheating them in a toaster oven before enjoying.
Kitchen Equipment To Gather
Here are a few kitchen tools needed to make the best biscuits from scratch.
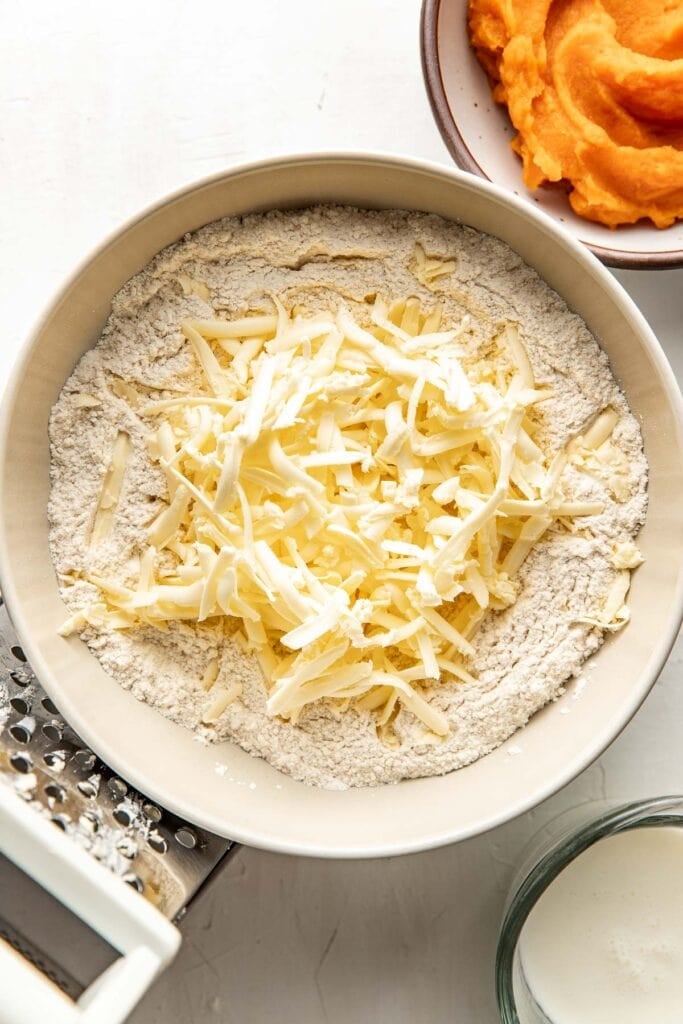
- Box grater – Most often used to shred cheese, this versatile tool is my trick for making extra flaky biscuits. Grating the butter into small shreds makes it easy to incorporate it into the flour mixture before the butter starts to soften.
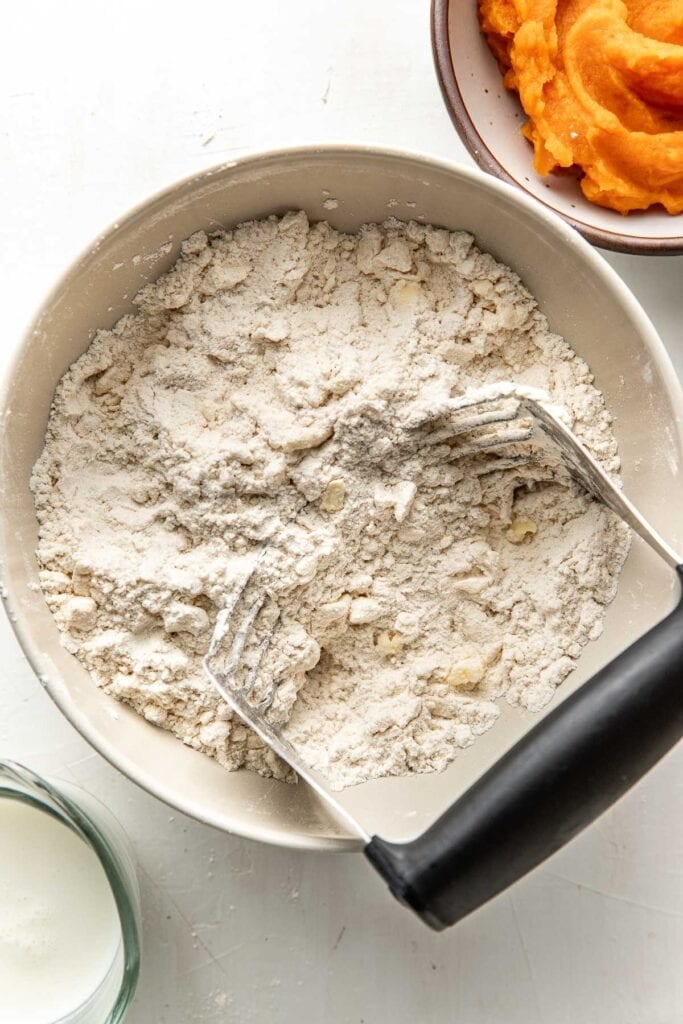
- Pastry blender – Also known as a pastry cutter. This tool is used to cut the butter into very small pieces without using hands, which causes the butter to soften or melt. Alternatively the flour mixture and chilled butter can be pulsed together in a food processor for a few seconds until the mixture resembles coarse sand.
- Medium mixing bowl – When making biscuits I use a medium sized bowl rather than a large mixing bowl so that I’m not chasing the flour and butter all over while cutting the butter into the flour. This 8-cup measuring cup and batter bowl works perfectly for the job.
- Bench scraper – This metal edge tool is not absolutely necessary for making biscuits (I’ve made hundreds of batches without one) but it’s really handy for tidying up jagged edges of dough and cutting the biscuits into squares to be baked.
- Parchment paper – This is helpful for lining the prepared baking sheet and ensures easy removal from the pan without added oil.
Making Sweet Potato Biscuits From Scratch
I really wanted to create a sweet potato biscuits recipe that anyone could make and do so confidently. So I included a step-by-step tutorial on how to make these homemade sweet potato biscuits.
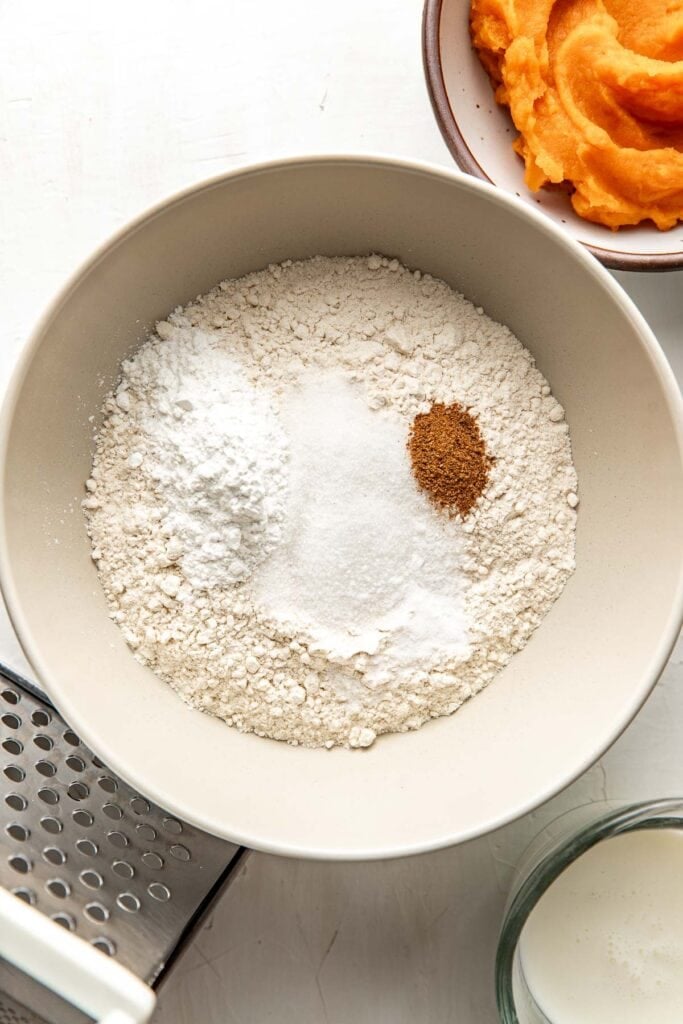
Mix the dry ingredients together in a mixing bowl.
A little advance prep goes a long way
For ultimate success, I recommend reading through the tutorial and the entire recipe before starting, and work quickly to keep the ingredients from getting too warm. Be sure to use mashed sweet potatoes that have been chilled.
When the temperature of the dough increases (from the ambient temperature of the room, the ingredients, or hands) the butter starts to soften, resulting in a biscuit that’s poorly risen and tough.
I like to preheat my oven and prepare my work surface by wiping it clean and gathering everything I’ll need before I even think about scooping flour into measuring cups.
For serving size and the complete directions and ingredient amounts, scroll down to the recipe card below. All of our recipes include the nutrition analysis, listing calories (kcals), protein, carbohydrates/carb, fiber, sugar, sodium, cholesterol, and more per serving.
⭐⭐⭐⭐⭐
“Baking is my least favorite cooking task. But my family likes gluten free and I wanted something yummy to go with chili. These were exactly what I had in mind! Not hard to make. Delicious! My teenagers fought over who got to eat more of them!” ~ Kristin H.
What These Pair Well With
I typically make these sweet potato biscuits to serve with a slow cooked beef stew or a simple yet flavorful soup featuring fragrant Italian sausage and harvest vegetables. Their cheery orange color makes them a fun addition to chicken pot pie soup, too.
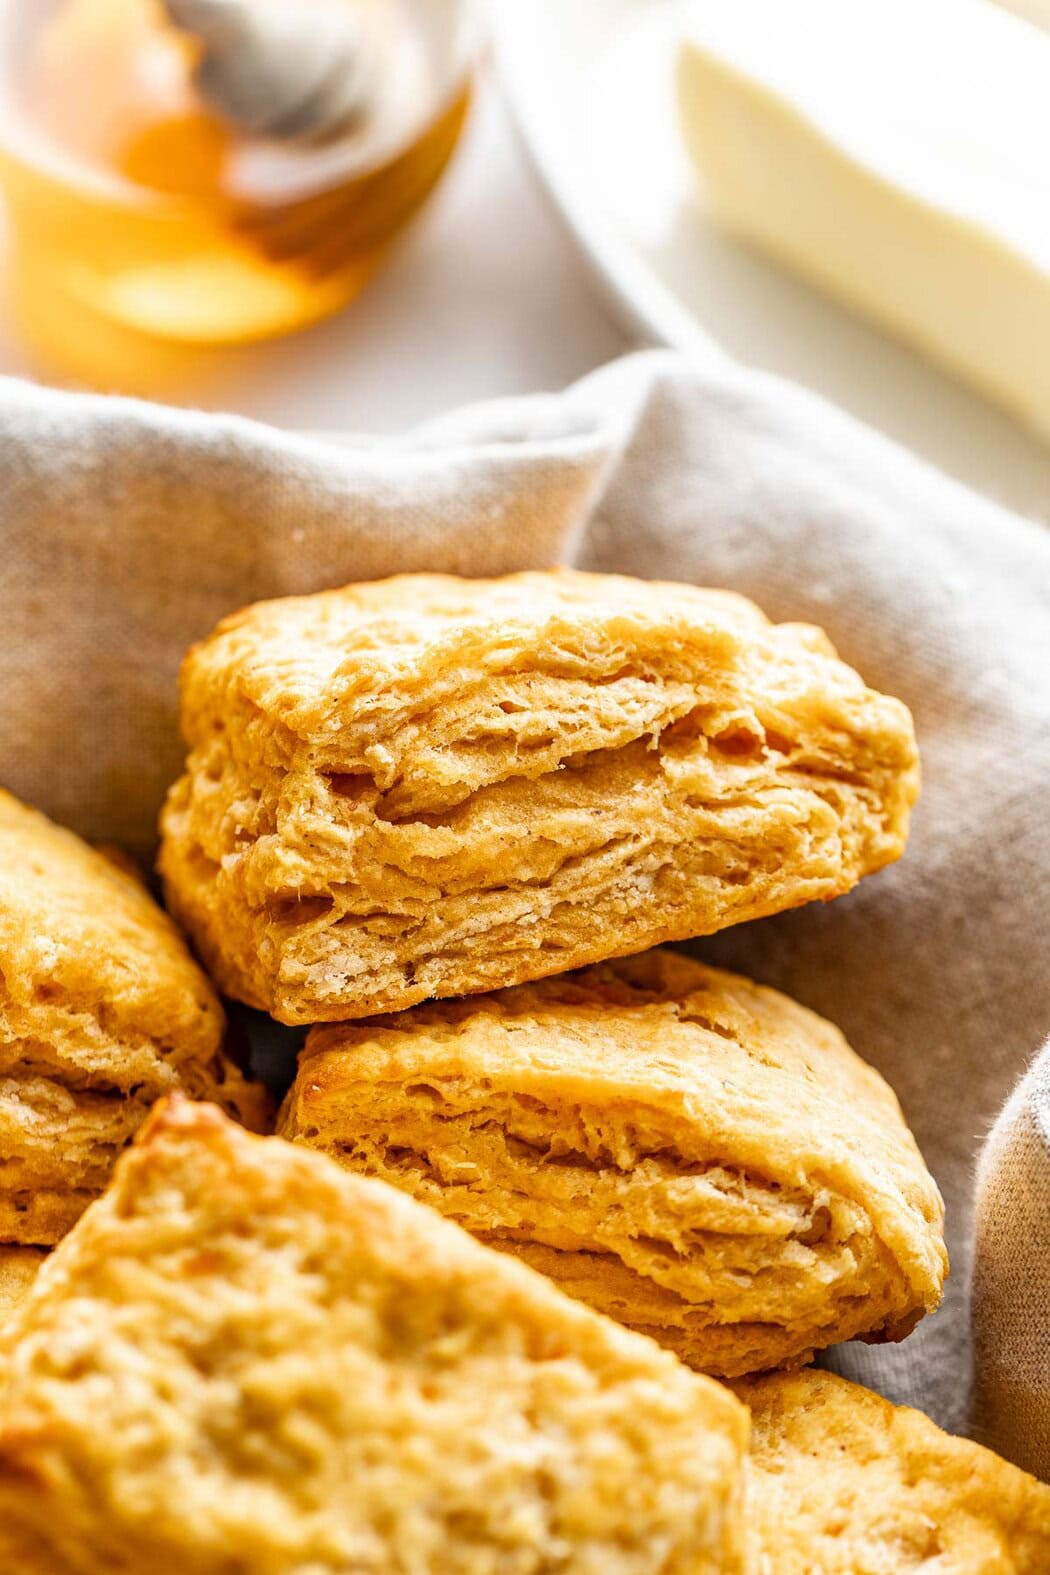
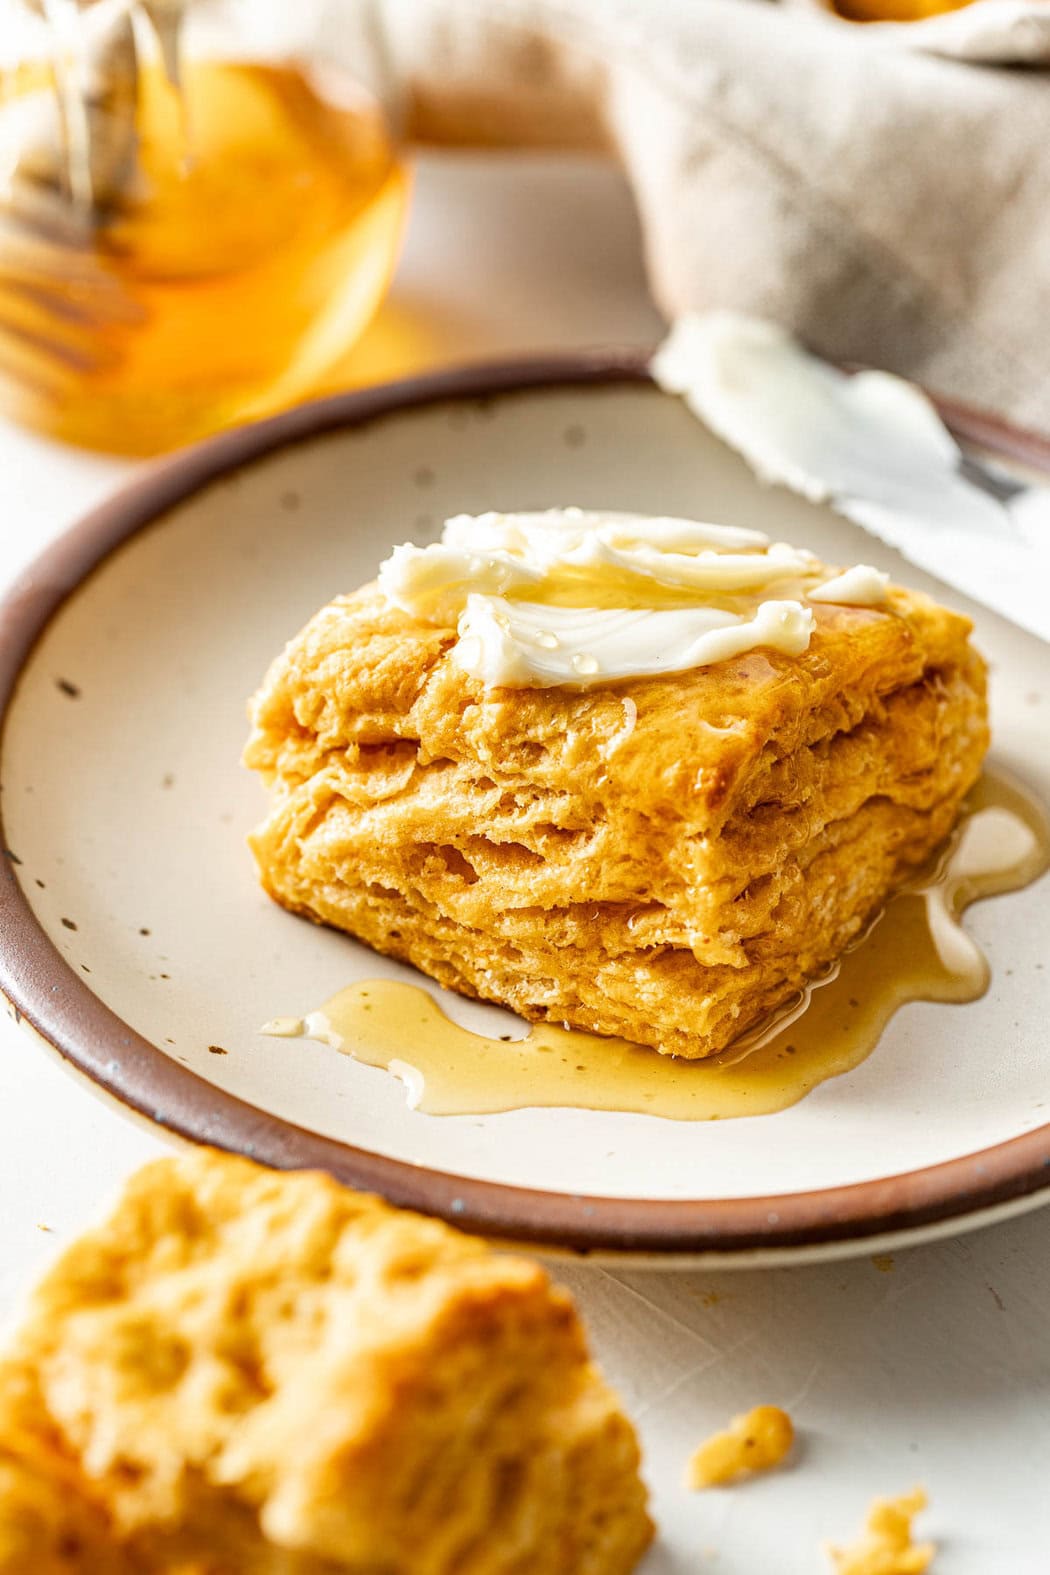
My favorite time to serve them, however, is at Thanksgiving. My family and friends love these flaky jewel-tone biscuits topped with homemade butter or honey butter.
Use these biscuits in place of English muffins when making breakfast sandwiches. Or use them to make a post-Thanksgiving turkey sandwich complete with a dollop of homemade cranberry sauce and a thin slice of havarti cheese.

If I Have Any Leftovers
On the rare occasion I have leftover biscuits, I store them in an airtight container on the counter for up to 3 days. I reheat them for 10-20 seconds in the microwave or warm them in the toaster oven before enjoying.
Leftover biscuits also can be frozen for up to 2 months. Simply thaw at room temperature and reheat in the oven or toaster oven for best results.

Frequently Asked Questions
Canned sweet potato puree or canned pumpkin can be used in place of the mashed sweet potatoes in this recipe. However, they may need to be drained of excess liquid before using to prevent the dough from getting too wet and producing a heavy, gummy biscuit. The amount of liquid will depend on the brand so if it looks wetter than a serving of mashed potatoes then it’s a good idea to drain off some of the liquid.
To drain canned puree, line a fine mesh strainer with 2-3 layers of paper towels then scoop the puree into the strainer. Use the back of the spoon to spread the puree out a bit and allow it to sit for 15 minutes before scraping the puree from the paper towel.
Yes, these biscuits can be made and stored in a covered container on the counter for up to 3 days. To refresh the crumb, I suggest reheating them in a 350℉ oven or toaster oven for 5 minutes or until warm.
They can also be frozen for up to 2 months. Just be sure to fully cool them to room temperature before freezing to reduce the likelihood of freezer burn. I suggest thawing in a covered container on the counter overnight and reheating in the oven or toaster oven before serving. They can also be microwaved for 10-20 seconds or until warm and soft.
Leftover mashed sweet potatoes can be used to make decadently fudgy sweet potato brownies and can also be used in place of canned pumpkin puree in many recipes. If I have enough left over I’ll use them to top mini meatloaves.
More Of My Favorite Sweet Potato Recipes
- One-Dish Chicken Sweet Potato Bake with Broccoli
- Slow Cooker Chunky Beef Chili with Sweet Potatoes
- Instant Pot Chicken Sweet Potato Curry
- Sloppy Joe Bowls
Want to save this recipe?
Enter your email below & we’ll send it straight to your inbox. Plus you’ll get great new recipes from us every week!
Sweet Potato Biscuits
The addition of mashed sweet potatoes gives these biscuits just the slightest hint of sweetness and a gorgeous color. They are the perfect pairing for soups or stews or a stunning stand in for dinner rolls at holiday meals.
Ingredients
- 1 ¾ cups + 2 tablespoons all-purpose flour (235g), plus more for rolling (270g for gluten-free flour)
- 1 tablespoon sugar
- 1 tablespoon baking powder
- ½ teaspoon salt
- ¼ teaspoon baking soda
- ⅛ – ¼ teaspoon ground nutmeg
- 6 tablespoons unsalted butter, cold
- ¾ cup mashed sweet potato, chilled
- ½ cup buttermilk (may substitute ½ cup whole milk + ½ teaspoon white vinegar)
Instructions
- Preheat oven to 425℉. Lightly spray a baking sheet with cooking spray or line with parchment paper and set aside.
- Add flour, sugar, baking powder, salt, baking soda, and nutmeg to a medium bowl and whisk together to combine.
- Using a box grater, grate the cold butter into the flour mixture.
- Use a fork or pastry blender to work the grated butter into the flour mixture until it resembles coarse crumbs. Avoid using your hands as this causes the butter to melt and will not give you the fluffiest biscuits.
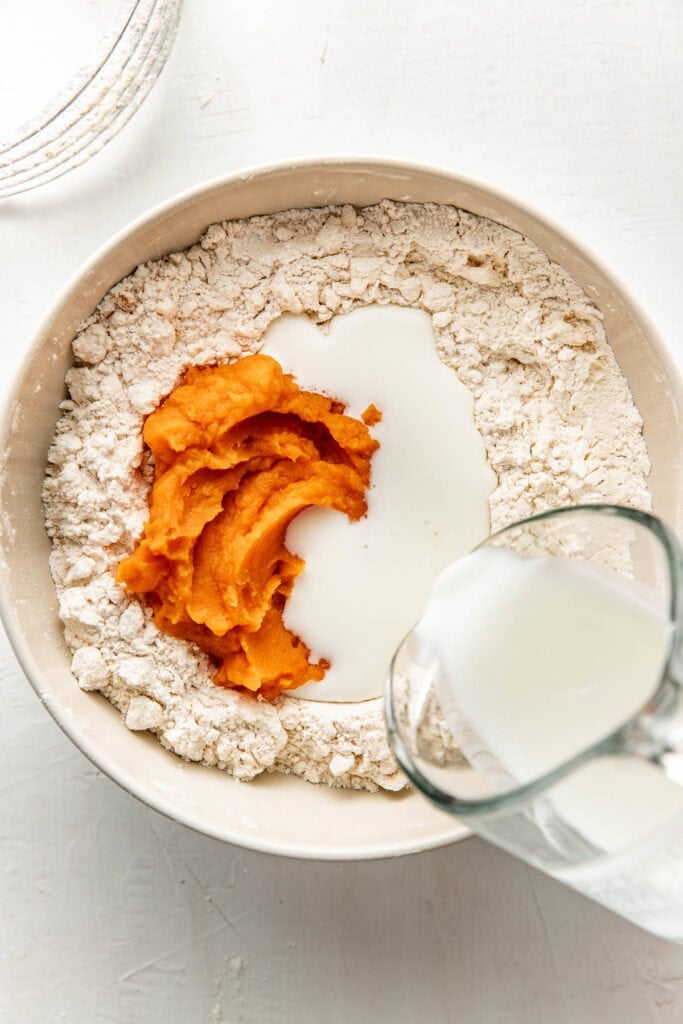
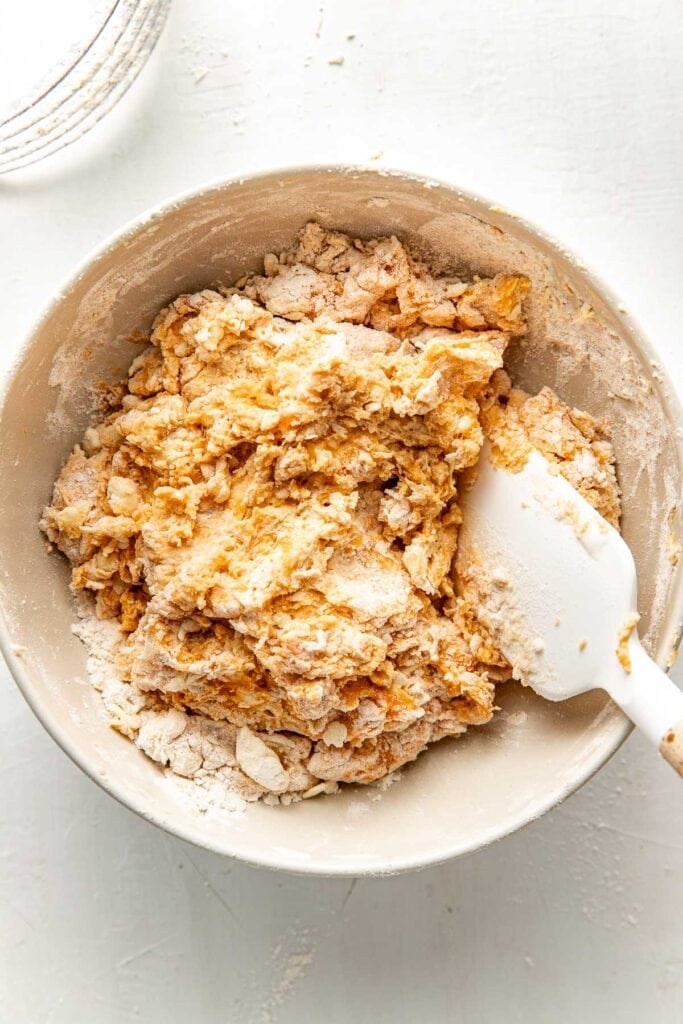
- Make a well in the center of the flour mixture. Add the mashed sweet potato and buttermilk to the well and stir until a soft, craggy dough forms. Almost all of the flour will be incorporated into the dough but some may remain on the edges or bottom of the bowl.
- Turn the dough and any loose bits of flour out onto a lightly floured surface. If the dough is very sticky, lightly dust the surface with flour.
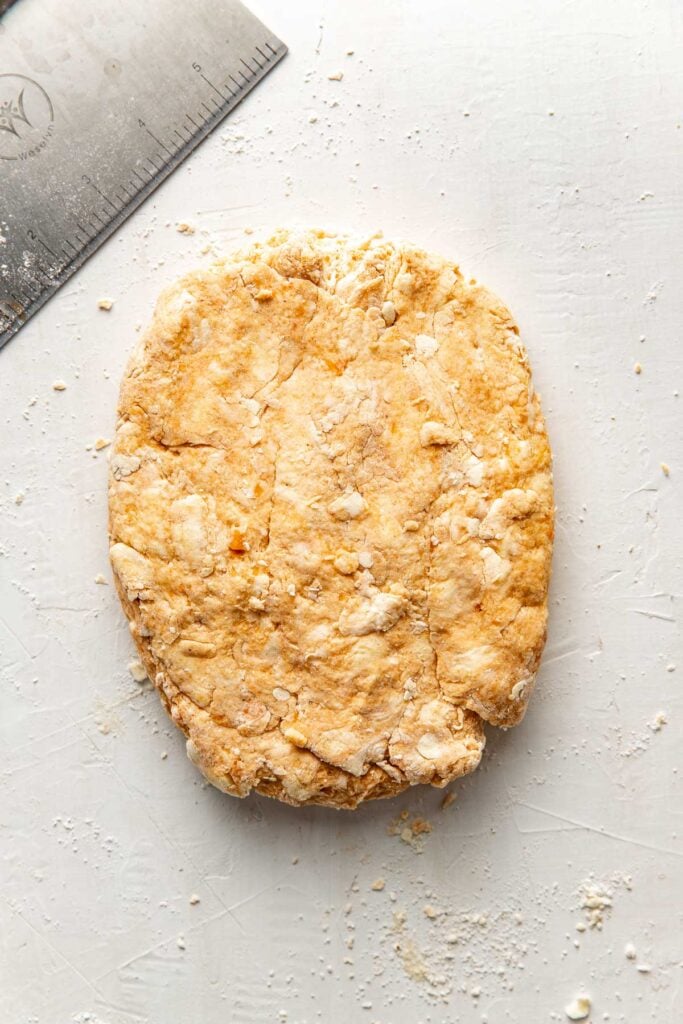
- Use your hands to pat the dough into a rectangle 1-inch thick.
- Working quickly, fold the rectangle of dough in half and then press it into a rectangle again.
- Repeat this fold and press process 3 more times). By now all of the flour should be incorporated into the dough.
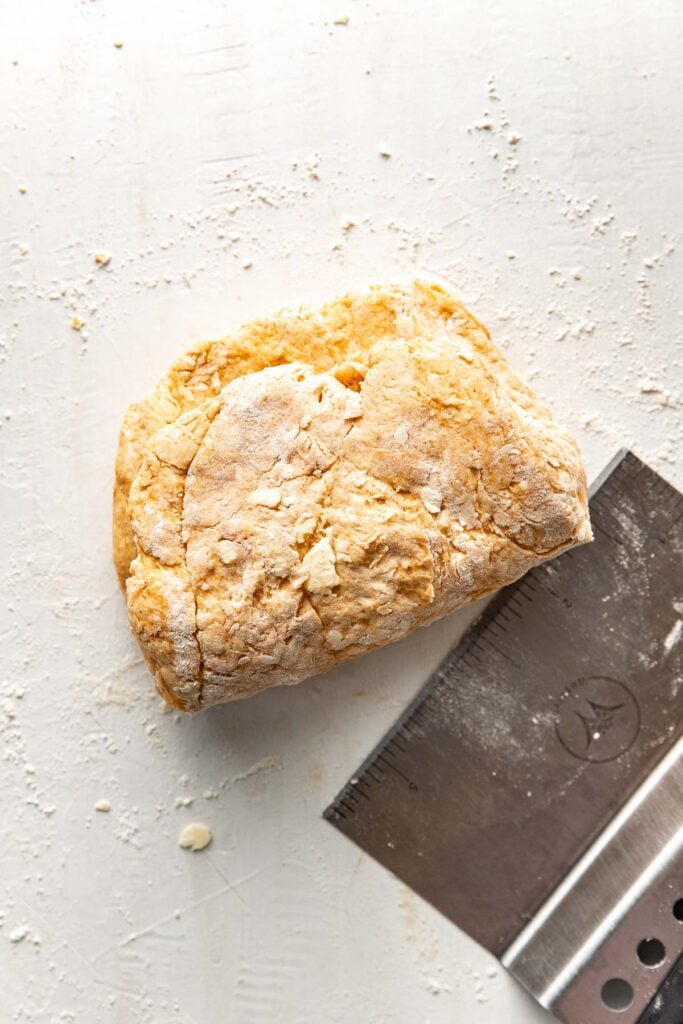
- Without performing another fold, shape the dough into a rectangle ¾-inch thick. Use your hands or a bench scraper to help make the edges tidy.
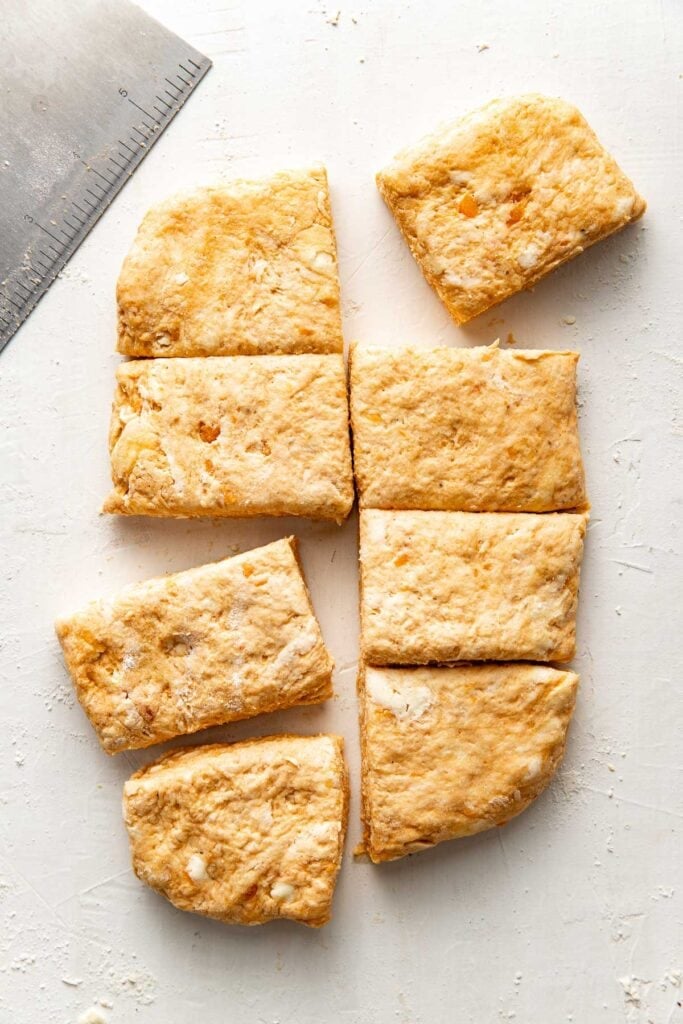
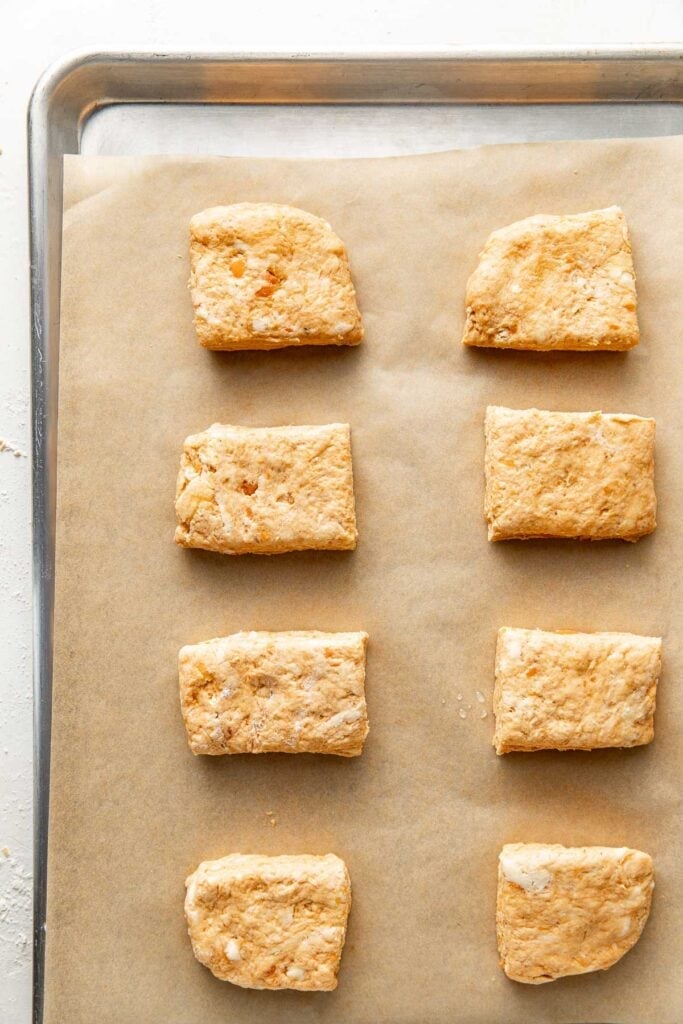
- Use a bench scraper or sharp knife to cut the dough into 8 squares making one cut length wise then 3 cuts width-wise.
- Arrange the biscuits on the baking sheet about 1 inch apart.
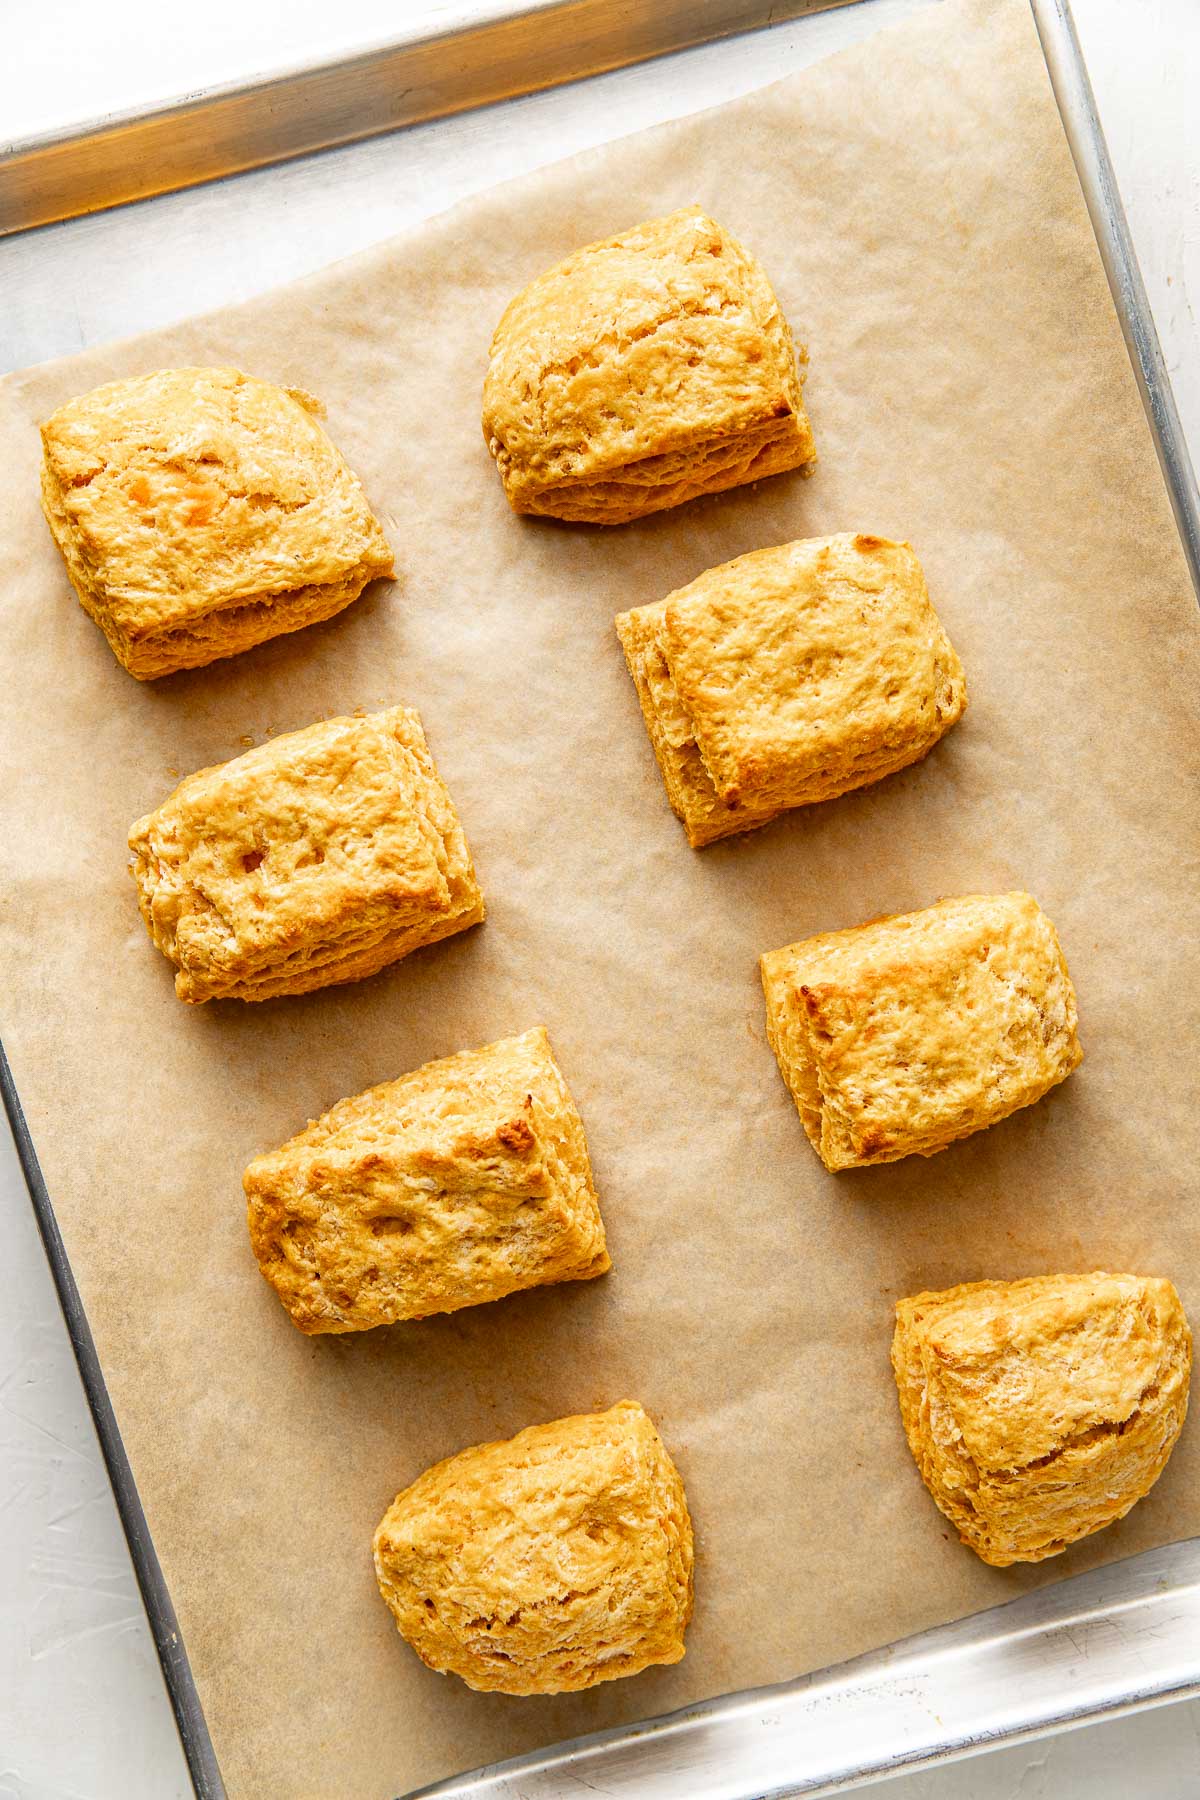
- Bake for 13-15 minutes or until the bottoms are a very light golden brown and the tops have just the slightest amount of browning in places.
- Remove the biscuits from the oven and allow them to cool for 5 minutes on the pan before transferring to a wire rack to cool completely. Warm biscuits can be brushed with melted butter and sprinkled with flaky sea salt if desired.
- Store any leftover biscuits in an airtight container on the counter for up to 3 days. Reheat for 10-20 seconds in the microwave or warm in the toaster oven before enjoying.
Last Step! Please leave a review and rating letting us know how you liked this recipe! This helps our business thrive so we can continue providing free recipes and high-quality content for you.
Notes
- To make these gluten-free I recommend using King Arthur Measure For Measure or Bob’s Red Mill Gluten-Free 1:1 Baking Flour in the amount listed above in the recipe card (note measurement is the same but weight will differ if using a scale).
- To make a homemade buttermilk substitute, mix ½ cup whole milk with ½ teaspoon white vinegar and let sit for 5 minutes before adding to the recipe in place of buttermilk.
- I do not recommend using vegan or dairy-free butter for this recipe. This recipe has not been tested with vegetable shortening.
Nutrition Information
- Serving Size: 1 biscuit
- Calories: 211
- Fat: 9 g
- (Sat Fat: 5 g)
- Sodium: 335 mg
- Carbohydrate: 30 g
- (Fiber: 1 g
- Sugar: 4 g)
- Protein: 5 g
- Cholesterol: 24 mg
Dietary
Recipe Changelog
November 2025: Download the previous version here.
In the ingredients, the new version:
- Uses all-purpose flour instead of Bob’s Red Mill Gluten-Free 1-to-1 flour,
- Adds 1 tablespoon sugar,
- Increases baking powder (1 tbsp vs. 2½ tsp),
- Lowers salt (½ tsp vs. ¾ tsp),
- Expands nutmeg (⅛–¼ tsp vs. ⅛ tsp),
- Allows a buttermilk substitute (milk + vinegar),
- And gives gram measurements for flour.
In the instructions, the new recipe:
- Bakes at 425°F instead of 400°F,
- Adds step to lightly spray or line a baking sheet,
- Mixes sugar and nutmeg with dry ingredients (not done before),
- Uses a box grater for butter instead of a pastry blender or knives,
- Warns not to use hands to keep butter cold,
- Combines wet ingredients directly in the bowl instead of mixing separately,
- Skips kneading into a ball, instead folds the dough 4 times for layers,
- Shapes into a 1-inch-thick rectangle (not a ½–¾-inch disk),
- Cuts into 8 squares (no circular cutter or re-rolling scraps),
- Bakes 13–15 minutes (not 15–17) and omits rotating the pan,
- Adds instructions to cool on pan 5 minutes, then wire rack,
- And includes storage and reheating directions.
The photos in this post were taken by Megan McKeehan.
For ultimate success, we highly recommend reading the tips in the full blog post above. All photos and content are copyright protected. Please do not use our photos without prior written permission. If you wish to republish a recipe, please rewrite the recipe in your own unique words. Link back to the source recipe here on The Real Food Dietitians. Thank you!
Can these be prepped, rolled down and ready to cut and frozen and then baked off later?
Hi Laura – yes, you can prepare them up to the point of baking then freeze them to be baked later. I recommend chilling the cut biscuits in the fridge for an hour before transferring them to the freezer on a plate or baking sheet. Once they are frozen you can place them in a freezer-safe container and store for up to 3 months. I bake them from frozen and add a couple of extra minutes to the baking time.
I was skeptical about the sugar and did cut it in half. The biscuits were flakey and delicious.
Thanks so much for the feedback, Helen!
These are a family favorite! My extended family loves them! Taste great toasted the next day.
We are so happy to hear it, Toya! Thanks so much for the 5-star review!