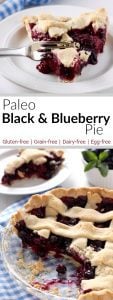
Sweet summer berries take center stage in our Paleo Black and Blueberry Pie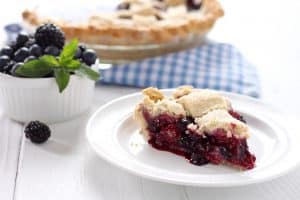
I can’t stop making this Paleo Black and Blueberry Pie with lard in the crust
I’m not kidding. I’ve been making pies for days now. Tinkering with the dry ingredients and the fats in the crust and the right amount of thickener for the filling. It’s been a veritable pie-a-palooza here. After several ‘dry runs’ comparing the all-lard crust and the butter + lard crust, a pinch of sugar vs. no sugar and arrowroot vs. tapioca I’ve finally found the crust I adore. Tender, flaky, lightly sweet and best of all, really easy to work with. Even pie baking newbies will be able confidently tackle this pie.
Wait…lard?! Did she say ‘lard’?
I sure did. I love baking with lard. In fact, even in my low-fat days I was an avid pie baker and lover of the lard because of the incredible pie crusts it makes. And I’ve always thought that using lard in my pie crust was terribly romantic in a nostalgic grandma-baked-this-way kind of way. I even wear the aprons that belonged to my grandmother and her mother when I bake pies (and everything else. I love those aprons.)
For this pie crust I used a combination of unsalted grass-fed butter and leaf lard. Leaf lard is my go-to for baking because it’s lighter in color and less “porky” than pure lard (which is great for frying, sautéing or braising). You can use all lard in the crust though I found the addition of butter along with the lard mellowed out the slightly bitter taste that you sometimes get in baked goods made with almond flour. Of course, adding a pinch or two of maple sugar to the dough also accomplishes the same thing so by all means, go hog-wild and use just lard in your crust. It’s going to be awesome either way.
Not just any old lard will do.
By this, I mean that I have big fat standards when it comes to the fats I use in my kitchen. You probably already know that I love grass-fed butter, coconut and avocado oil and leftover bacon fat for everyday cooking, but you’re probably surprised to hear that I love lard. Yep, I’m a lard loving dietitian.
There, I said it.
Yes, lard is a saturated fat. But it’s also a traditional fat, meaning one that’s stood the test of time and made the old-fashioned way through heat rendering – not chemical extraction. Lard is the fat your great-grandmother likely used on a daily basis for all of her baking and cooking. And now, in light of new research revealing that inflammation and oxidation (not saturated fat) are to blame for heart disease, lard and its traditional fat cousins like tallow and duck fat are making a comeback. No more guilt about lardy pie crusts, pastries and crispy fried potatoes, my friends. Fat is back!
However, most lard sold in stores has been hydrogenated (read: artery-clogging trans fats), contains preservatives and is harvested from conventionally raised animals given antibiotics and fed genetically modified feed. That is NOT the lard my ancestors would have used. And it’s not the lard you’ll find in my kitchen either.
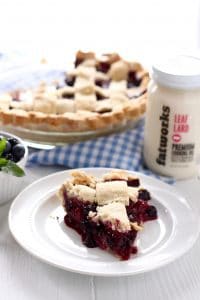
The love of my lard life is produced from pastured-raised pigs on small farms. I used to render my own lard each fall but now I don’t have to thanks to the incredibly passionate and dedicated self-proclaimed ‘fatworkers’ at Fatworks. Finding Fatworks was a game changer for me.
Pie Crust 101: How to make a flaky grain-free crust
Start with cold ingredients that are the best quality you can source. When I make pie, I put all of the ingredients – flours, fats and ice water – into the fridge until I’m ready to actually make the crust. Starting with cold ingredients ensures a flakier crust and dough that’s easier to work with.
Work quickly and handle the dough as little as possible (even for grain-free). Even though we’re not working with gluten here and you don’t have to worry about overworking the dough and making it tough, you still want to work with a light and quick hand. Over-handling any pie crust (especially in hot weather) causes the solid fats (butter + lard) to melt before they’ve had a chance to do their flake-making magic in the oven. So move quickly and if possible, work directly on a cool surface such as a countertop or marble pastry board.
Cut yourself some slack and know that an ugly pie is still a delicious pie. Check your inner Martha Stewart here and forget about the perfect pies on Pinterest. Even the most seasoned pie makers make ugly pies from time to time. Sometimes you’re rushed, sometimes your dough is ‘fussy’ and sometimes you just cut yourself a little slack and let that fluted edge be less than perfect. No matter, it’s still going to be drop dead delicious.
A note about grain-free crusts: Because there’s no gluten to hold things together, this crust is going to be more likely to fall apart when you transfer it to your baking dish. But don’t sweat, because it doesn’t have gluten you can easily push, press and patch it back together and not have to worry about making the crust tough.
Fill it with love. This may sound campy but it’s true. You’ve got to put some love in that pie or it will show in the end product. Food really is love in its most basic and primal ways. When we invite others to gather around our table and partake in a meal we are offering so much more than just food. Community and conversation shared by a group is deeply nourishing and connects us on a higher level. And what better way to connect than over pie and coffee?
So good you won’t even miss the gluten or the grain
As a long time lover of the gluten when it comes to crafting baked goods with my own two hands, I have to say that this crust is the closest approximation to any white flour crust I’ve made in the past. I’m not a big grain-free baker since most recipes require eggs but I’ve been pretty diligent about working on this recipe until I found the sweet spot – a tender, light, flaky and buttery crust that holds up well but isn’t greasy or tough like a crust made with all almond flour would be. And without eggs! Golden flaxmeal (ground flax seed) stands in for the eggs here and does a great job of holding it all together.
And those berries!
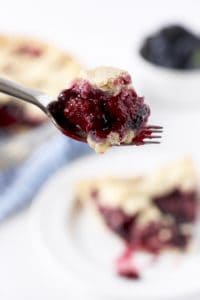
Oh, baby. Those berries. Plump blackberries and blueberries are tossed with pure maple syrup, lemon zest and a pinch of cinnamon makes the filling pleasantly sweet and tart all at once. Feel free to make yours alá mode using our Dairy-free Vanilla Bean Ice Cream to take your Paleo Black and Blueberry Pie over the top.
I used fresh berries for this pie though you could certainly use frozen berries in a pinch. However, be sure to thaw the berries and drain them before adding the rest of the ingredients and increase the arrowroot starch in the filling by a teaspoon or two to account for the higher liquid content of the frozen berries.
 Grab an apron and some real fat – it’s time to channel your inner granny and make some pie!
Whether it’s a party, a potluck or dinner with your friends or family, this Paleo Black and Blueberry pie with it’s tender, flaky grain-free crust made with the finest lard in the land promises to deliver big compliments and plenty of plate licking.
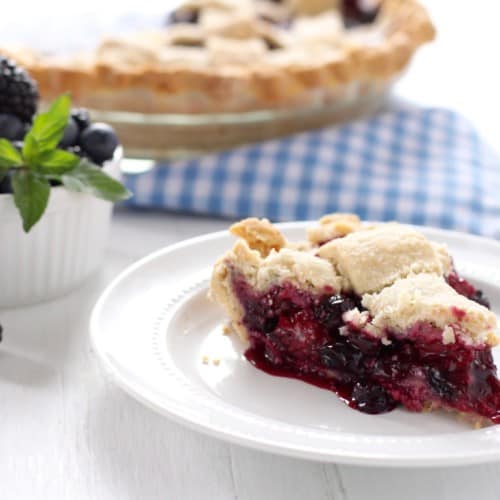
Paleo Black and Blueberry Pie
Pie is the perfect way to showcase the sweetness of summer berries. This pie uses a grain-free crust made with a blend of unsalted butter and wholesome lard for a tender and flaky crust that’s easy to work with – even for first time pie bakers. We specifically used Fatworks leaf lard for it’s high quality ingredients.
Ingredients
Crust:
- 2 ¾ cups finely ground almond flour
- 1 ¼ cups arrowroot starch
- 1 Tbsp. maple, date or coconut sugar (optional)
- ¼ tsp. fine sea salt
- 4 Tbsp. Fatworks leaf lard, chilled
- 4 Tbsp. unsalted butter, chilled
- 2 Tbsp. (flaxmeal) + 6 Tbsp. water
- 1–2 Tbsp. ice water or cold vodka
Filling:
- 2 ½ cups blackberries, fresh
- 2 ½ cups blueberries, fresh
- ¼ cup arrowroot starch
- ¼ cup maple syrup
- 1/8 tsp. cinnamon
- Zest and juice of 1 lemon
- ¼ tsp. sea salt
Instructions
To make the crust:
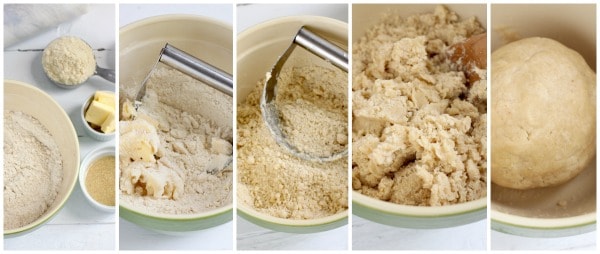
- In a large bowl, combine almond flour, arrowroot starch, sugar (if using) and sea salt. Stir well to combined.
- To a small bowl, add ground flaxseed and 6 Tbsp. water. Stir with a fork and set aside.
- Add chilled butter, lard or shortening and using a pastry blender or fork, cut the fat into the dry ingredients until the mixture resembles coarse crumbs.
- When the flaxseed + water mixture has formed a gel (about 5 minutes), add to flour mixture and stir just until combined. Mixture will not all come together quite yet, you’ll likely have some dry flour that needs to be worked in yet.
- Starting with ½ Tablespoon, add water or vodka to the dough by sprinkling it over the top then mix the dough again before deciding to add more liquid. Dough should come together into a smooth ball with just a little bit of pressing and gentle kneading. If the dough feels dry, add a little more water and mix it in again.
- When all of the flour has been incorporated and the dough is soft and smooth, divide dough in half. Place each half on a piece of parchment paper and press into a 6-inch disk (about 1 inch thick). Wrap tightly with parchment and place in the freezer for 20 minutes (or refrigerate for 1-2 hours).
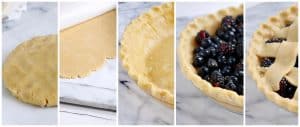
- After 20 minutes, remove 1 dough disk from the freezer. Place on a cutting board and unwrap. Lightly sprinkle both the top and underside of the dough with arrowroot starch. Lay a second piece of parchment paper over the disk and roll dough into a 12-inch circle using a rolling pin. Repeat for remaining ball of dough.
- Slowly remove top sheet of paper from 1 crust and transfer crust to a 9-inch pie pan. Flute edges as desired.
- Slice the second circle of dough into 8 strips and set aside.
To make the pie:
- Preheat oven to 350℉.
- In a large bowl, combine berries and sprinkle with arrowroot starch. Gently mix to coat all of the berries.
- Combine maple syrup, lemon zest, lemon juice and sea salt. Pour over berries and gently mix to combine.
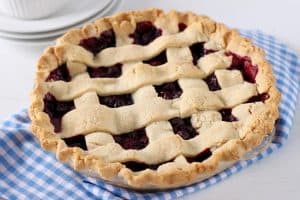
- Pour berries into crust and top with strips of dough, pressing ends of strips into the edges of the bottom crust to seal them together.
- Place pie on a baking sheet and bake for 45-55 minutes or until crust is lightly golden brown and filling starts to bubble. To prevent the crust from becoming too dark, lightly cover the pie with a sheet of aluminum foil halfway through baking time.
- Remove pie from oven and set on a wire rack to cool completely before slicing.
Last Step! Please leave a review and rating letting us know how you liked this recipe! This helps our business thrive so we can continue providing free recipes and high-quality content for you.
Notes
All photos and content are copyright protected. Please do not use our photos without prior written permission. If you wish to republish this recipe, please rewrite the recipe in your own unique words and link back to the source recipe here on The Real Food Dietitians. Thank you!
Nutrition Information
- Serving Size: 1/10th of pie
- Calories: 387
- Fat: 20g
- Sodium: 119mg
- Carbohydrate: 35g
- (Fiber: 7g
- Sugar: 13g)
- Protein: 8g
Dietary
What’s your favorite pie? Fruit pie or Cream pie? Leave a comment below and tell us about the pie of your dreams.
This post may contain affiliate links which won’t change your price but will share some commission.
 Grab an apron and some real fat – it’s time to channel your inner granny and make some pie!
Thank you for great recipe! Wanna try it out for my daughter’s summer party in the kindergarden.
I have all the ingredients except arrowroot. Can I use cassava flour instead?
Hi Alyona,
I’m sorry but I can’t say for sure…I have not tried the recipe using cassava flour as a thickener.
Jessica, and one more question: Can it be baked overnight and left in the fridge? or will get mushy?
My experience has been that the pie crust will hold up well for a day in the fridge. Just be sure to allow it to cool completely before covering it loosely and storing in the fridge.
can this crust be frozen
Hi Alice,
Yes, you can freeze the crust. I often divide it into two balls then flatten them into 1-inch thick disks before wrapping them in plastic wrap and storing them in a zip-top plastic bag in the freezer.
I’m wondering if the pie was actually taste-tested? It was not great. Well, the berry part was great! But the crust was like shoe leather. Actually I made it twice and the first time I didn’t have all the right ingredients and winged it and it turned out pretty good. The second time I went out and bought all the right ingredients and followed the directions for the crust pretty well to the tee and it was a terrible tough texture. I will do some experimentation on my own to get a better crust recipe as this one was very disappointing.
Hi Emily,
I’m sorry to hear that you were disappointed with the crust as written. This recipe has been tested multiple times, in fact, dozens of times over the past few years as it’s the only pie crust we make in our house. I’d love to hear what changes you make as I’d love to take another stab at it with those modifications because I certainly don’t want my grain-free pie crust to be a leathery disappointment.
Hello, so excited to try this recipe, but wanted to check and make sure it uses 1 1/4 cups arrowroot? Thanks
Hi Ginny,
Yes, that’s correct – 1 1/4 cups arrowroot starch for the crust (this makes it flakier than if you used all almond flour) and 1/4 cup for the filling (to thicken it). Hope that helps – now I want to make some pie, too!
Thanks so much. Just finished picking 10 lbs of blackberries so making the pie now.
Ten pounds! I’m so envious of your berry haul. Happy baking!!