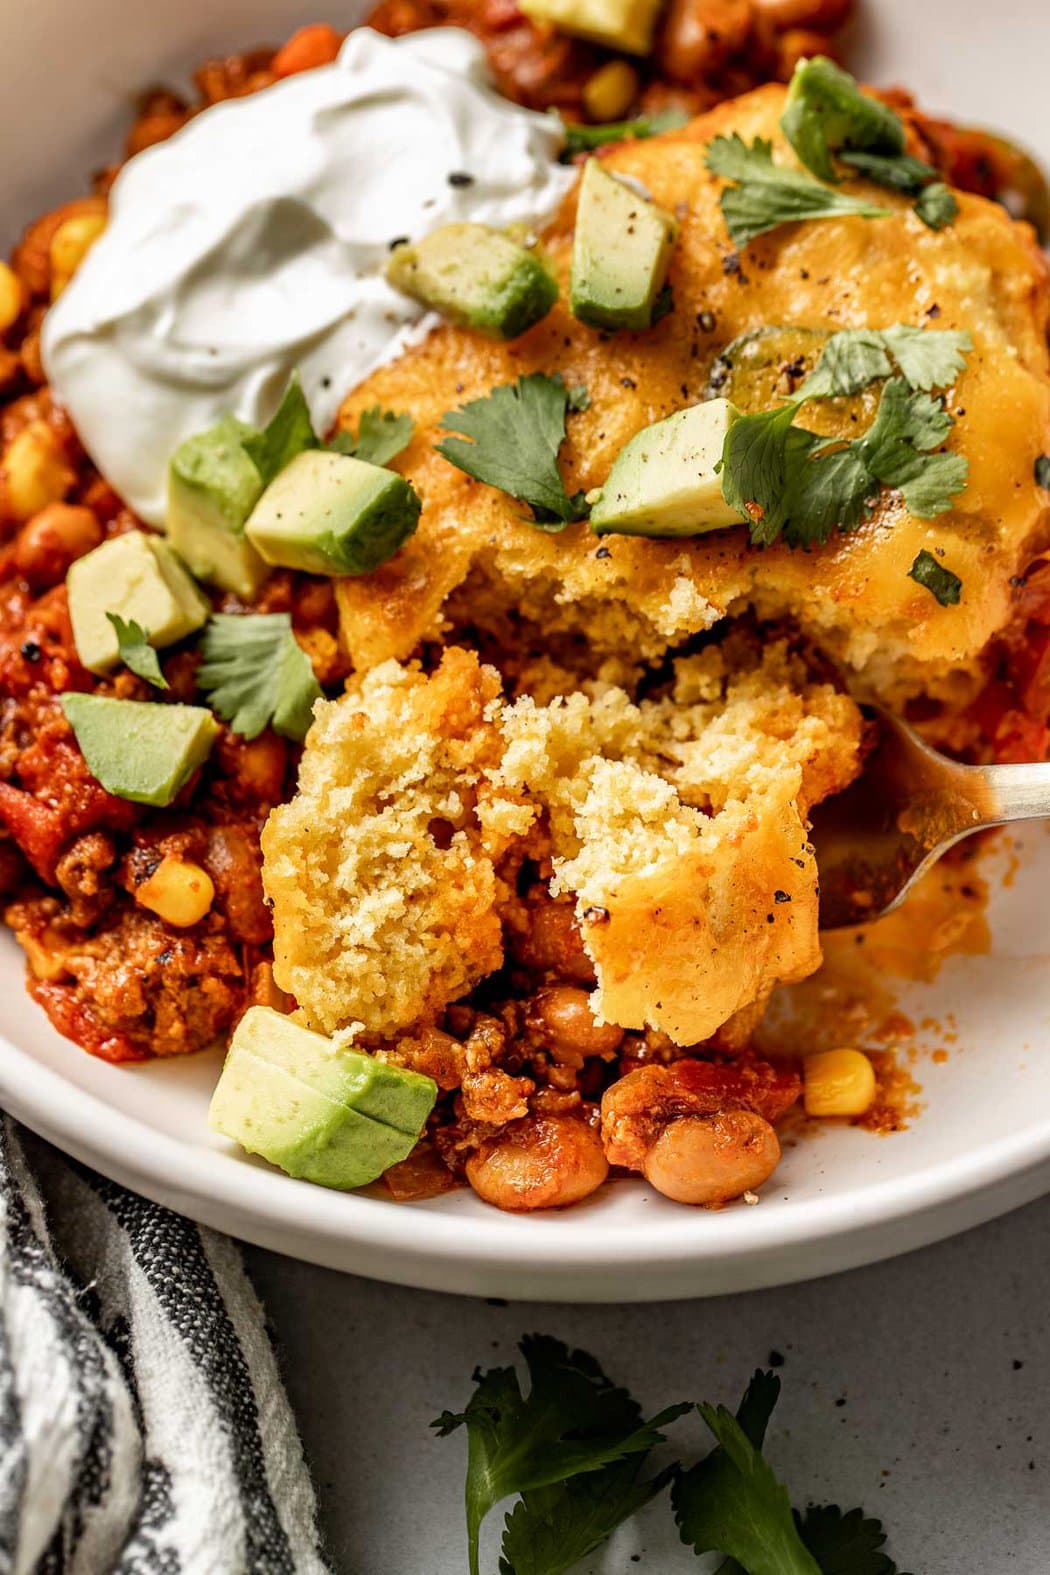
Living in Colorado, fall and winter can get pretty cold, and nothing warms me up quite like a bowl of chili. It’s one of my favorite comfort food meals, especially when paired with cornbread muffins. However, I’m all about ease and convenience. So, I decided to transform the two dishes into one filling meal with this chili cornbread casserole recipe.

The chili base is warm, savory, and loaded with veggies. Then, I add sweet cornbread biscuits on top. I love that cooking the two dishes together reduces prep time, keeping this recipe quick and easy. It’s perfect for busy weeknights and is one meal everyone in my house is always excited to eat.
Recipe Highlights
These are just a few reasons why this cornbread chili casserole is one of my favorite chili recipes of all time:
- With minimal prep time and a quick cooking time, the entire dish is ready to eat with a total time of under an hour
- A heartier chili, packed with protein, veggies, healthy fats, and carbs, it satisfies even the hungriest guests
- I don’t use any boxed cornbread mixes for the topping, instead combining staple pantry ingredients to create a homemade cornbread batter
- I have tested this recipe with several variations, making it gluten-free, dairy-free, and egg-free to accommodate a variety of dietary needs, and they all taste great
- Personally, I aim to get at minimum of 75 grams of protein per day, and this recipe makes it easy to hit my goals thanks to the ground beef and beans
- One batch makes enough to feed up to 8 people, which is more than enough for my small family, and leftovers store and reheat well for quick meals the next day
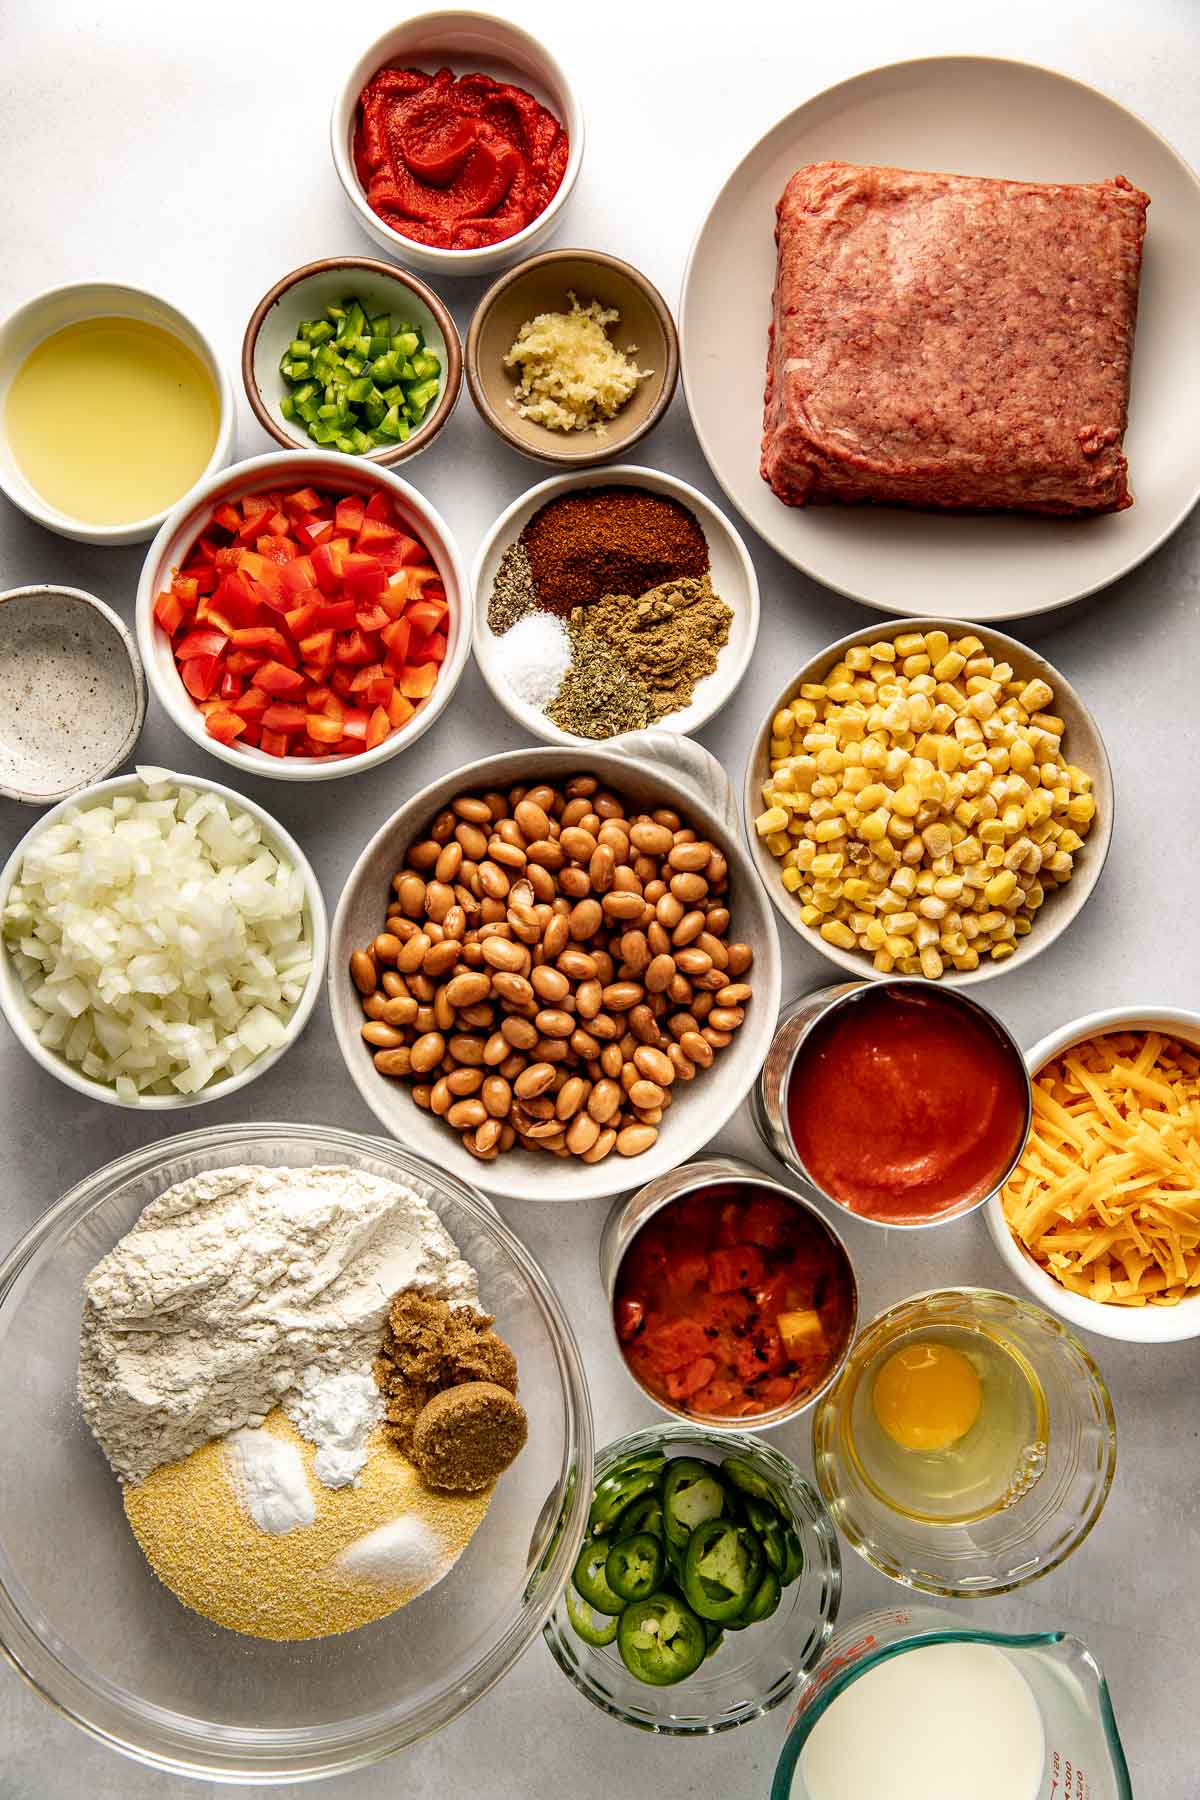
Ingredients To Make Chili Cornbread Casserole
For the Chili:
- Lean ground beef – I always use grass-fed beef and look for 90-93% lean ground beef; may sub lean ground turkey
- Yellow onion – may sub white onion
- Bell pepper – any color bell pepper will work
- Jalapeño – for less heat, remove the membrane and seeds; may omit for less heat
- Seasonings: garlic, chili powder, ground cumin, dried oregano, salt, black pepper
- Tomato sauce
- Diced fire-roasted tomatoes
- Pinto beans – may sub black beans or kidney beans
- Tomato paste
- Frozen corn
For the Cornbread Topping:
- Yellow cornmeal – if gluten free is needed, choose a certified gluten-free brand such as Bob’s Red Mill
- All-purpose flour – may sub a 1:1 all-purpose gluten-free flour to keep the cornbread topping gluten-free
- Brown sugar – light or dark brown sugar will work
- Baking powder and baking soda
- Milk – I use 2% milk, but any dairy or plant-based milk will work
- Egg
- Avocado oil
- White vinegar
- Sharp cheddar cheese – may sub dairy-free shredded cheese
Find the ingredient list with exact measurements in the recipe card below.

Ingredient Highlight: Cornmeal
Cornmeal is a staple ingredient in any cornbread or corn muffin mix, creating the bright yellow color, sweet taste, and crispy exterior I love. Not only is it tasty, but cornmeal is also often fortified, making it a good source of many nutrients, including:
- fiber
- iron
- zinc
- vitamin A
- vitamins B1, B2, B3, B6, B9, and and B12
- vitamin D3
Equipment Needed
One of my favorite things about this chili cornbread casserole is that it requires very minimal equipment. I always use a large oven-proof skillet with a lid, opting for one that’s 3.5 to 4 quarts in capacity to ensure there’s plenty of room for the chili. Then, I gather cooking spray, a spatula, and a medium-sized bowl, and I’m ready to get started.
Really, the key to success is using a large, oven-proof skillet. Otherwise, I find I have to transfer the ingredients back and forth and end up making a mess.
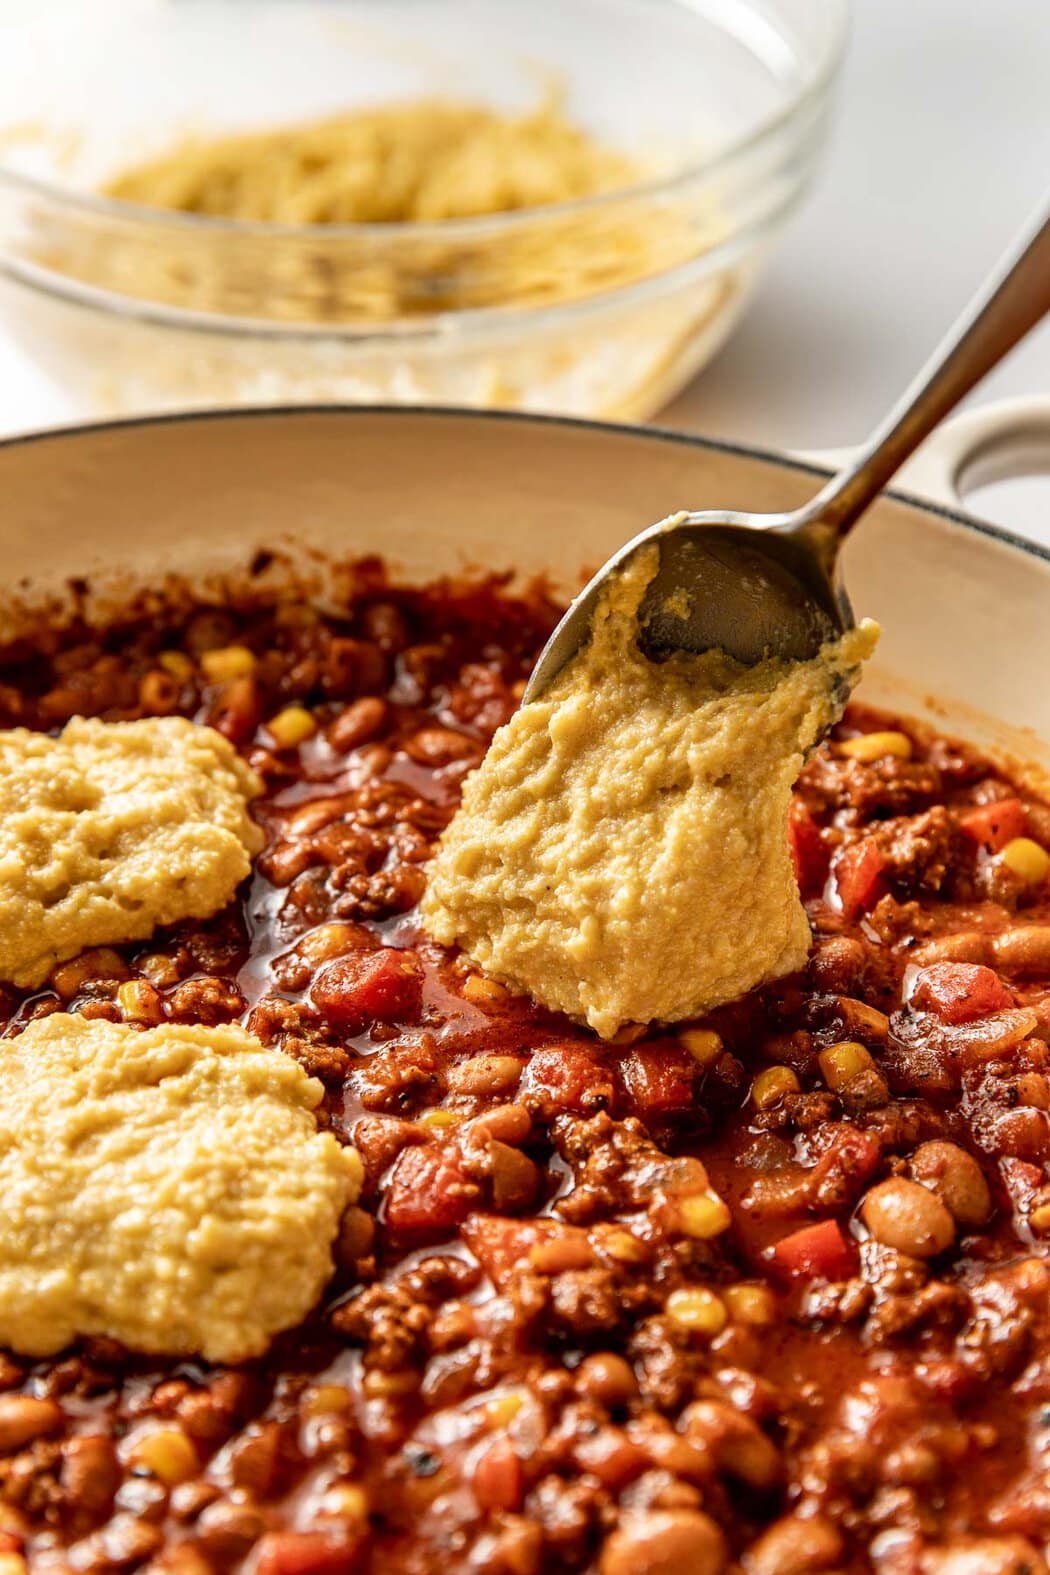
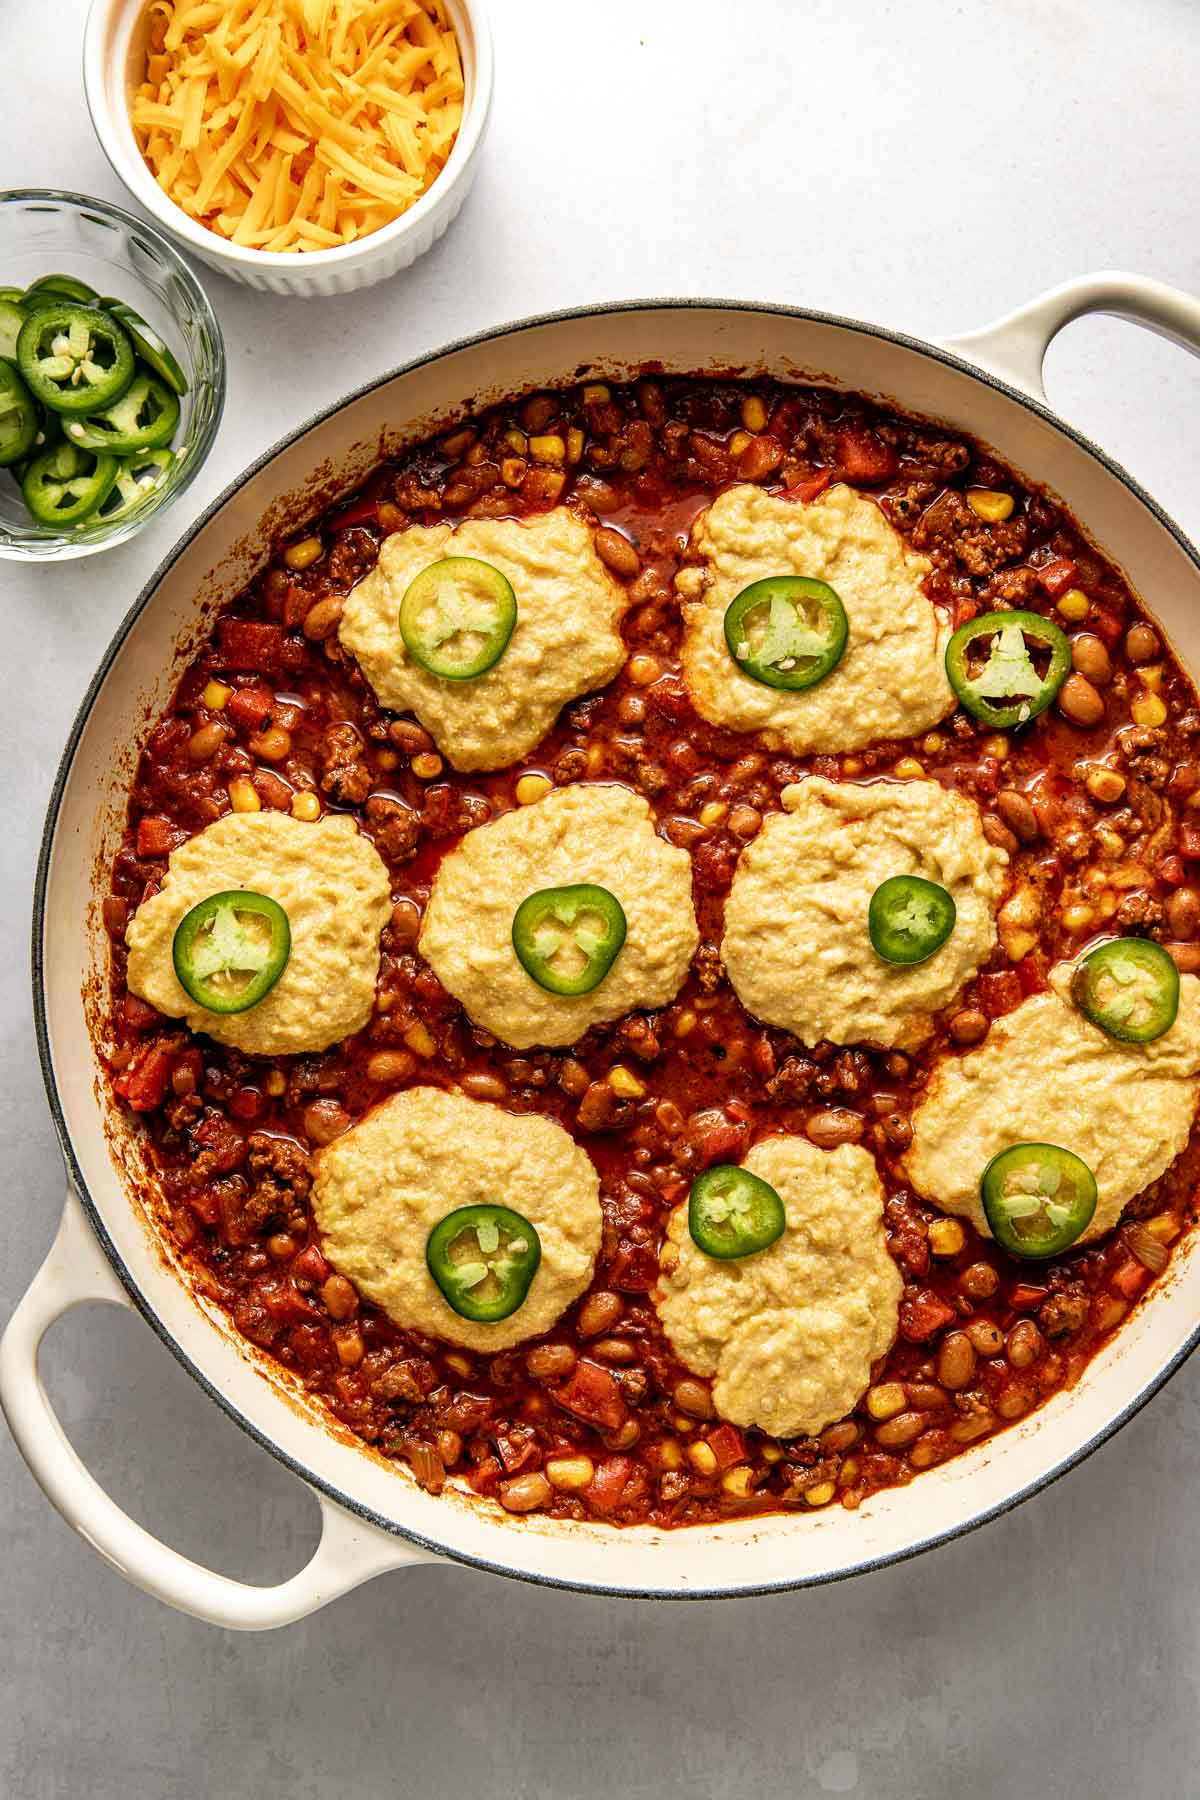
How To Make The Casserole
- Cook the beef and veggies: Grease a large oven-proof skillet with cooking spray, and heat it over medium-high heat. Once hot, add the ground beef, onion, bell pepper, jalapeño, and garlic. Cook until the beef is browned and the onions soften, stirring occasionally and breaking the beef up as it cooks.
- Add the seasonings and tomato products: Stir in the chili powder, cumin, oregano, salt, and pepper. Then, add the tomato sauce, diced tomatoes, beans, tomato paste, and frozen corn. Bring the mixture to a boil. Reduce the heat to medium-low, and simmer with the lid on. Then, remove the lid, and continue to cook and thicken.
- Make the cornbread topping: Combine the flour, cornmeal, brown sugar, baking powder, baking soda, and salt in a medium bowl. Add the milk, egg, oil, and vinegar, and stir just until the cornbread mixture is smooth.
- Top the chili with the cornbread: Drop the cornbread batter onto the chili, and top each mound with sliced jalapeño.
- Bake: Transfer the chili and cornbread to a preheated oven and bake until a toothpick inserted into the center of the cornbread comes out clean. Sprinkle the cheese over the casserole after the first 10 minutes of baking. Allow it to rest for 10 minutes before serving.
For serving size and the complete directions and ingredient amounts, scroll down to the recipe card below. All of our recipes include the nutrition analysis, listing calories (kcals), protein, carbohydrates/carb, fiber, sugar, sodium, cholesterol, and more per serving.
Make It Egg Free
Since I have a severe egg allergy, I tested this chili cornbread casserole using egg substitutes for the cornbread topping, and it worked great. To do so, I simply whisked 1 tablespoon of flax seed with three tablespoons of water to create a flax egg. Then, I set the mixture aside for about ten minutes to thicken and stir it into the cornbread mix just like I would a large egg. The taste and texture of the cornbread were so similar to the original that no one even noticed the recipe was egg-free.
Make The Topping Extra Fluffy
I love extra fluffy cornbread from time to time and have found that the best way to make the cornbread topping for this homemade chili extra fluffy is to swap the milk for buttermilk.
How To Serve
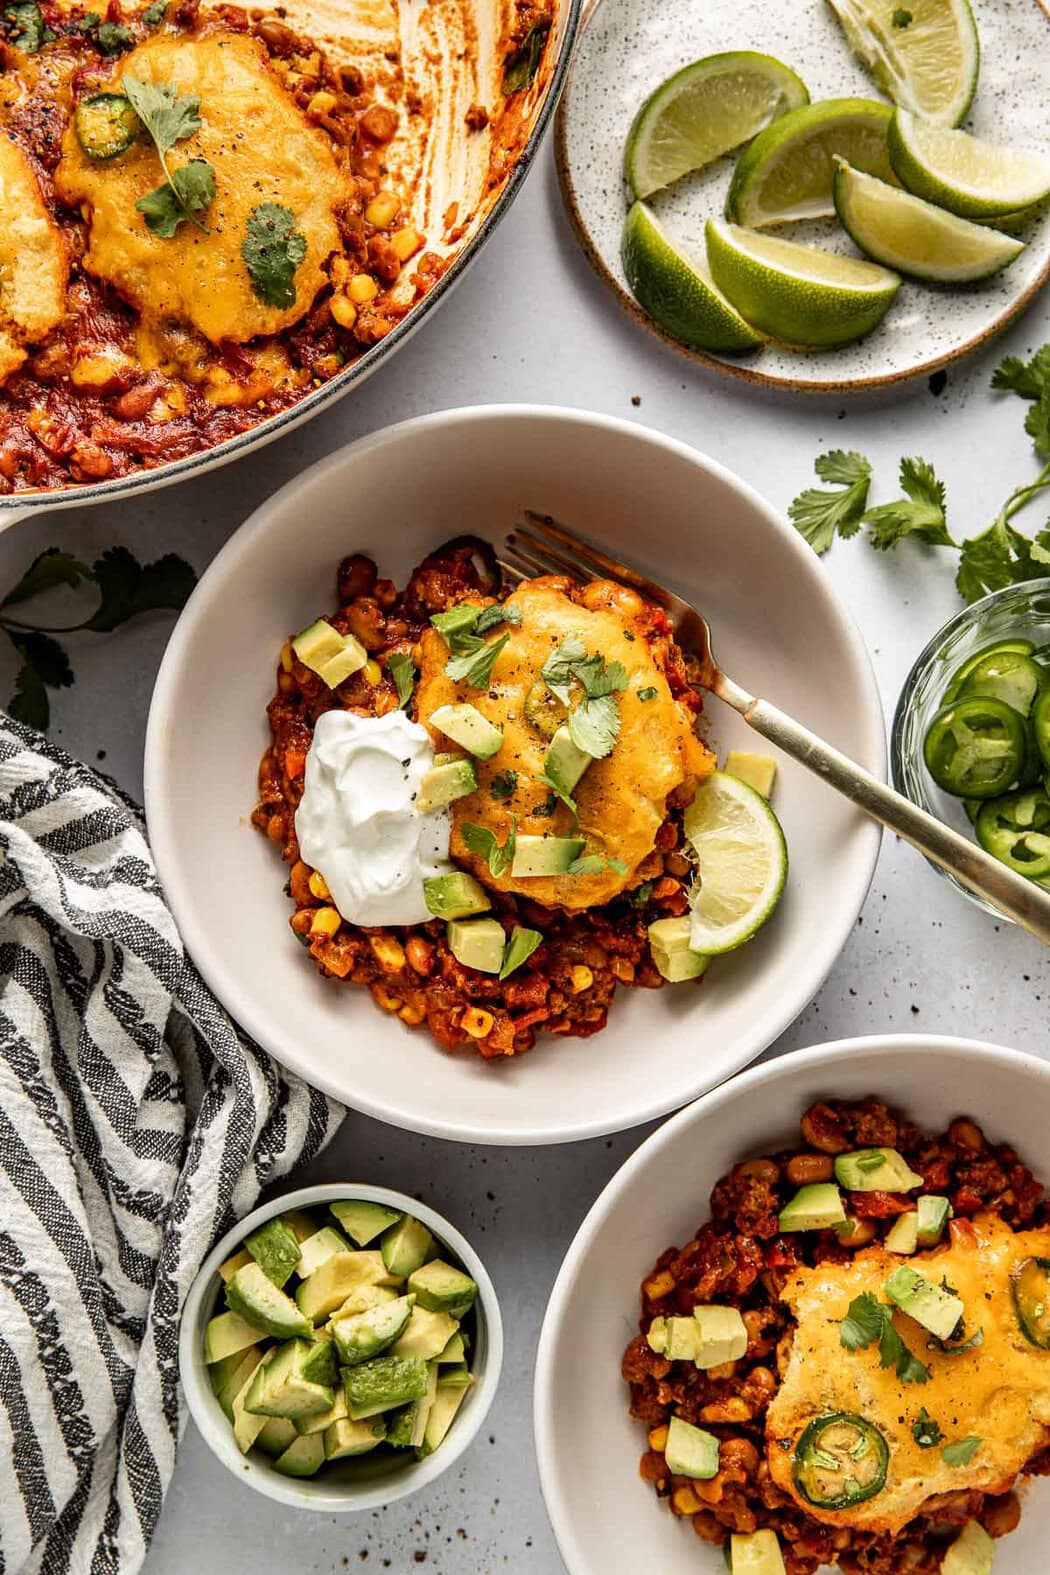
Personally, I think everything is better with toppings, this chili cornbread casserole included. So, I top mine with options like sour cream, fresh cilantro, diced avocado, sliced jalapeño, green onions, and/or lime wedges before serving. I find that this dish is plenty filling to enjoy on its own. However, if I know I will be feeding a particularly hungry crowd, I often add sides such as a sautéed veggie, baked potatoes, or roasted root vegetable fries.
This recipe is perfect for weeknight meals at home, but I also love bringing it to potlucks, family gatherings, and Super Bowl parties. I simply let it cool and place the lid on the skillet. It’s easy to transport, and I just pop it back in the oven to reheat before serving.
How To Store
Store leftovers in a covered airtight container in the refrigerator for 3-4 days. Or, freeze leftovers for up to 3 months. Before freezing, I let my casserole cool completely. Then, I transfer it to a large reusable zip-top bag or a large glass container with a tight-fitting lid.
When ready to serve, I thaw the frozen leftovers in the fridge overnight. Then, I reheat them in a skillet or baking dish in the oven at 300°F for 15-20 minutes or until warmed through. I’ve also warmed leftovers in the microwave. It works in a pinch, but I like the stovetop method better.
Video: Making Chili Cornbread Casserole
Want to save this recipe?
Enter your email below & we’ll send it straight to your inbox. Plus you’ll get great new recipes from us every week!

Chili Cornbread Casserole Recipe
This hearty chili cornbread casserole features a veggie-packed chili base topped with sweet cornbread for a filling, one-dish comfort food that’s easy to make.
Ingredients
For the Chili:
- Cooking spray
- 1 pound lean ground beef
- 1 small yellow onion, diced (1 cup)
- 1 small bell pepper, any color, diced (1 cup)
- 1 small jalapeno, diced (seeds and membranes removed for less heat) additional 2 tablespoons sliced jalapeno for topping, optional
- 3–4 garlic cloves, minced (1 ½ tablespoons)
- 1 tablespoon + 1 teaspoon chili powder
- 2 teaspoons ground cumin
- 1 ½ teaspoons dried oregano
- ¾ teaspoon fine salt
- ¼ teaspoon black pepper
- 1 (15-ounce) can tomato sauce
- 1 (14-ounce) can diced fire-roasted tomatoes
- 1 (15-ounce) can pinto beans or black beans, drained and rinsed
- 3 tablespoons tomato paste
- 1 cup frozen corn
For the Cornbread Topping:
- ¾ cup yellow cornmeal
- ¾ cup all-purpose flour (use 1:1 gluten-free baking flour blend, if needed)
- 2 tablespoons brown sugar
- ½ teaspoon baking powder
- ¼ teaspoon baking soda
- ¼ teaspoon fine salt
- ½ cup milk of choice (I used 2%)
- 1 large egg*
- 2 tablespoons avocado oil
- ½ teaspoon white vinegar
- ¾ cup shredded sharp cheddar cheese
- Optional for serving: sour cream, fresh cilantro, diced avocado, sliced jalapeño and/or lime wedges
Instructions
- Preheat the oven to 400℉.
- Place a large oven-proof skillet with lid (3.5 – 4 quart capacity) over medium-high heat and mist the skillet with cooking spray.
- When the skillet is hot, add the ground beef, onion, bell pepper, jalapeño (if using), and garlic.
- Cook for 8-9 minutes or until the beef is cooked through and the onions have softened, stirring occasionally. Use a spatula to break up the meat and mix in the vegetables.
- Add the chili powder, cumin, oregano, salt, and pepper to the skillet; stir to combine.
- Add the tomato sauce, diced fire-roasted tomatoes, beans, tomato paste, and frozen corn to the beef mixture. Stir well and bring almost to a boil.
- Reduce the heat to medium-low and simmer, with the lid on, for 8 minutes.
- Remove the lid and continue cooking for another 4 minutes.
- Meanwhile, make the cornbread topping: In a medium bowl, combine the flour, cornmeal, brown sugar, baking powder, baking soda, and salt. Stir to combine.
- Add the milk, egg, oil, and vinegar; stir just until the batter is smooth.
- Drop the cornbread batter onto the chili in 6-8 mounds. Top each cornbread mound with a jalapeno slice (if using).
- Bake for 10 minutes, then sprinkle the cheese over top of the casserole and biscuits. Return to the oven for another 6-8 minutes, or until a toothpick inserted into the center of the cornbread comes out clean.
- Remove the skillet from the oven and allow it to rest for 10 minutes before serving.
- If desired, serve with sour cream, fresh cilantro, diced avocado, sliced jalapeño and/or lime wedges.
Last Step! Please leave a review and rating letting us know how you liked this recipe! This helps our business thrive so we can continue providing free recipes and high-quality content for you.
Notes
To make the biscuits egg-free, substitute 1 flax egg (1 tablespoon ground flaxseed + 3 tablespoons water) for the egg; let sit for 5 minutes to thicken. Stir into the batter when the egg is called for.
Nutrition Information
- Serving Size: 1/8 of the recipe
- Calories: 336
- Fat: 10 g
- (Sat Fat: 3 g)
- Sodium: 970 mg
- Carbohydrate: 40 g
- (Fiber: 8 g
- Sugar: 12 g)
- Protein: 21 g
- Cholesterol: 57 mg
Dietary
The photos in this post were taken by Megan McKeehan.
For ultimate success, we highly recommend reading the tips in the full blog post above. All photos and content are copyright protected. Please do not use our photos without prior written permission. If you wish to republish a recipe, please rewrite the recipe in your own unique words. Link back to the source recipe here on The Real Food Dietitians. Thank you!

So good! Easy to make and the balance of the chili and cornbread is perfect. Even my picky kids devoured it!
Excellent, Cara!
This recipe was delicious and came together so fast and easy. I will definitely be making it again. Everyone in my house loved it, toddler and 11 month old included. Looking forward to having leftovers for lunch tomorrow!
Fantastic, Giovanna!
Amazing dinner I made this for my 91 year I’d mom who enjoys comfort food froze the leftovers so she could enjoy down the road. She told me she’s already enjoyed another serving. High praise of how good this is.
Thanks so much, Sandy!
Delicious! My husband said while eating it that it has the taste of a slow-cooked chili, went back for seconds, and then added that he wouldn’t mind eating it again–the highest praise he can ever muster. XD Thanks for sharing!
We appreciate the feedback and 5-star review, Emmy!
Super easy with ingredients I already had around the kitchen and super delicious!! Definitely going in my winter rotation.
Thanks so much, Dawn!