Why are these the best biscuits you could make? Simply put, I’ve been making homemade biscuits since I was 14 years old. That’s right, my very first job was at the Hardee’s restaurant in my little Minnesota hometown. I’d ride my bike early every morning to start my 5:00 a.m. shift. Back then, the buttermilk biscuits and their now retired cinnamon raisin biscuits were made by hand (my hands!). It was hard work, but I loved being in the quiet kitchen in the wee hours of the morning next to the hot ovens before the restaurant filled with noisy customers and the clash of the dishroom.
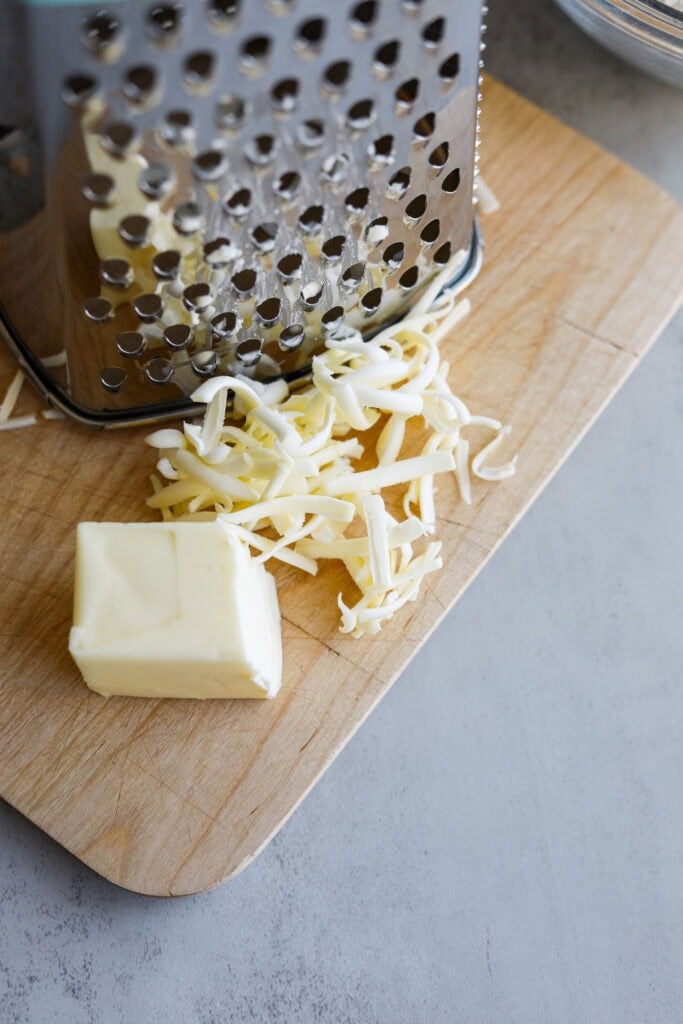
One would think that after making thousands of biscuits that I wouldn’t want to make them anymore, but that’s not true. I still love making biscuits. Over the years I’ve adapted my process to make it even simpler. For one, now I use a box grater to shred the cold butter rather than cutting it in by hand or crumbling it between my fingers (which, by the way, results in subpar biscuits since warm butter makes less flaky layers). I’ve also adopted a fold-and-press method that’s much faster than kneading and using a rolling pin.
I hope you love these biscuits as much as I do. My nearly 80-year-old Dad still asks me to make these for him every time I visit. And nothing makes me smile bigger than when I hear him say, “THE Best!” after he takes that first bite.
Recipe Highlights
Simple ingredients: Only pantry staples–like flour, baking powder, and butter–are required for making homemade biscuits.
Easy method: I’ve perfected this recipe over many years, and the method I use for grating the butter and folding the dough is about as simple as it can get. Even if you’ve never made homemade biscuits before, I took a lot of how-to photos, which I share below, so you can also visualize the process of making this easy recipe.
Make-ahead option: It only takes a total time of 30 minutes to make these biscuits. But I’ve included instructions for making them ahead of time and then refrigerating or freezing the unbaked biscuits. I love these options for the convenience of baking homemade biscuits on any timeline that works best for me.
Ingredient Spotlights
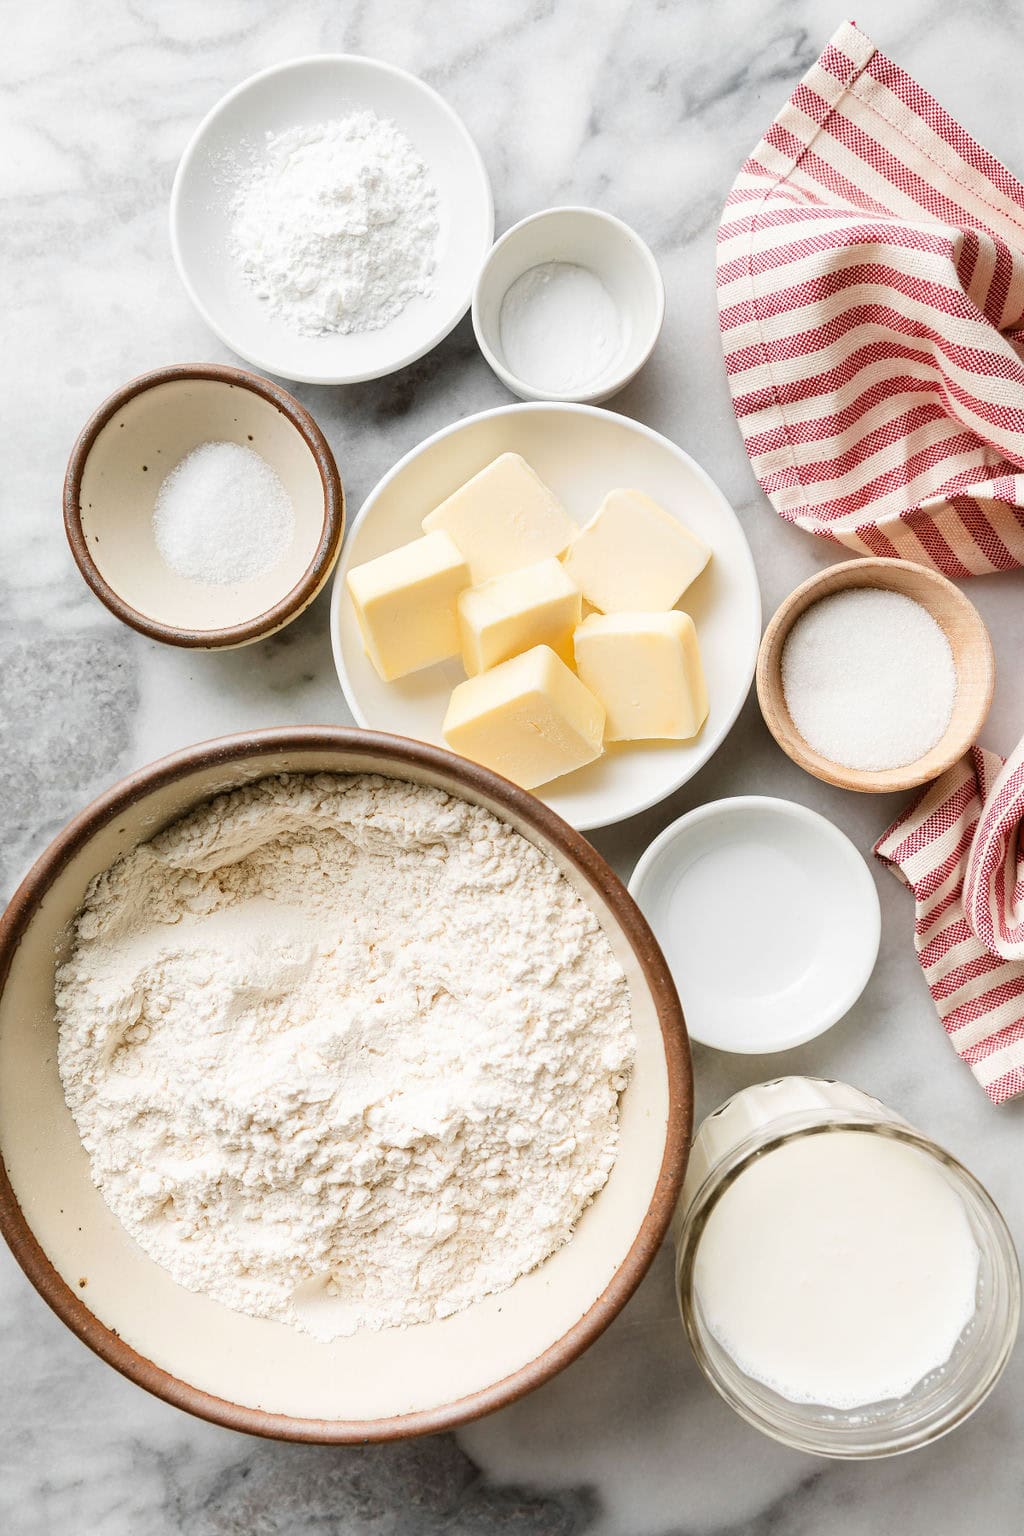
What I love most about this baked biscuit recipe is that I always have what I need to make them, since they require just eight pantry and refrigerator staples.
- Flour – I use regular all-purpose flour for these biscuits. My favorite brands are King Arthur and Bob’s Red Mill because they’re good quality flours.
- Cold unsalted butter – I always use unsalted butter to make these biscuits so they have a consistent buttery flavor and texture. If salted butter is all you have on hand, go ahead and use it the biscuits will not taste overly salty. The most important note about the butter is that it should be chilled. I leave mine in the fridge until it’s time to grate it into the flour mixture. And if I’m making these on a hot day, I’ll often pop the grated butter back into the fridge for a few minutes to let it harden up again.
- White vinegar – you just need ½ teaspoon vinegar, but that’s enough to react with the baking powder and create leavening, which means you get fluffier and lighter biscuits.
- Granulated sugar – while it may be tempting to omit the sugar, it adds tenderness and a tiny bit of sweetness to balance the flavor, so I recommended keeping it
- Milk – I always use 2% or whole dairy milk, but my preference is whole milk, since the extra fat makes these biscuits even more tender. If you don’t have whole milk, you can use ¾ cup of 2% milk + 2 tablespoons of heavy cream or buttermilk. If using buttermilk, you can omit the vinegar

Suggested Equipment
You can make perfect biscuits without a few of these tools. But if you have them, they’re super handy to use:
- Bench scraper – to help shape and cut the biscuit dough. I also like using a bench scraper because it has a measuring tool along the side so you can easily measure the thickness of your dough. If you don’t have a bench scraper, you can also use a knife. Instead of using a biscuit cutter to make round biscuits, this dough is cut into eight square pieces.
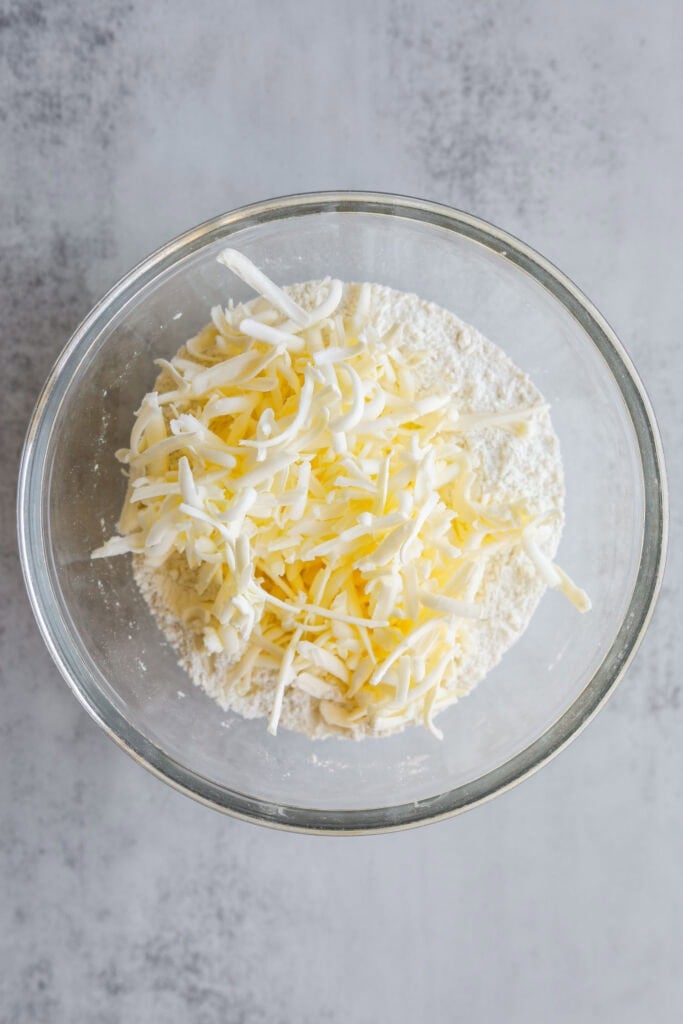
- Box grater – this is a stand-up grater mostly used to grate cheese. I think it’s the best tool for quickly breaking the butter into small pieces, which get incorporated into the dough and result in tender and flaky biscuits.
- Pastry blender – also called a dough blender or pastry cutter, this tool is great for quickly mixing and mashing the butter into the dry ingredients. If you don’t have one, you can use a fork.
- Baking sheet – any size will do, even a small quarter sheet pan. Either mist the baking sheet with cooking spray or use parchment paper to prevent the biscuits from sticking.
How To Make Homemade Biscuits
Trust me, after making biscuits one time, it won’t feel as intimidating and will be much faster next time. I’ve included a photo tutorial to show the simple steps.


For serving size and the complete directions and ingredient amounts, scroll down to the recipe card below. All of our recipes include the nutrition analysis, listing calories (kcals), protein, carbohydrates/carb, fiber, sugar, sodium, cholesterol, and more per serving.
Avoid Kneading The Dough
Resist the temptation to knead and overmix the dough. Instead of kneading, I simply fold the dough over a few times to incorporate the chilled butter pieces and flour.
Trust that making the 4 folds and presses is enough to mix the dough and develop the gluten, which helps the biscuits rise. Overhandling the dough prevents the biscuits from being light and fluffy and can make them too dense or tough instead.
Make Them Gluten Free
Yes, you can make these biscuits gluten. To do so, use an equal amount of 1:1 gluten-free baking flour, such as Bob’s Red Mill 1-to-1 gluten-free baking flour. The gluten-free biscuits will rise slightly less and have less browning, but they still taste great. Bake them for 1 minute longer than the biscuits made with all-purpose flour, so 13-14 minutes total.
The Best Ways To Store
Store any leftover biscuits in an airtight container at room temperature on the counter for up to 3 days. I don’t recommend storing them in the fridge, as that can make them dry out faster.
The baked or unbaked biscuits can also be refrigerated or frozen until ready to bake. Sometimes I make the dough and form the biscuits ahead, then just refrigerate them right on the baking sheet for a day or two, until I’m ready to bake them fresh. See the recipe card notes for baking instructions.
When I have time to make an extra batch, the unbaked biscuits also freeze well for up to 1 month as a super fast addition to meals in the future. I simply take the frozen biscuit pucks out of the freezer and bake them on a baking sheet for 12 to 14 minutes. See the recipe card for more notes I share about this method.
Get Tall, Fluffy Biscuits Every Time
These are a few biscuit-making pro tips I’ve learned over the years:
- If it’s hot in the kitchen, place the flour-butter mixture back into the fridge for 20-30 minutes before adding the milk.
- Use the “spoon and level” method when measuring the flour. Avoid scooping the flour from the bag with the measuring cup, since that will result in too much flour and dry biscuits
- Make sure the oven is fully preheated. It takes about 30 minutes for most ovens to fully preheat and an oven thermometer is super helpful for determining accurate oven temperature. Biscuits baked in an under-heated oven will not get the desired tall appearance and light, airy texture.
- The dough should be 1-inch thick before cutting it. If a ruler or bench scraper is not available to help measure, you can use your thumb. The distance between the tip of your thumb to the first knuckle is roughly 1 inch.
Favorite Biscuit Pairings
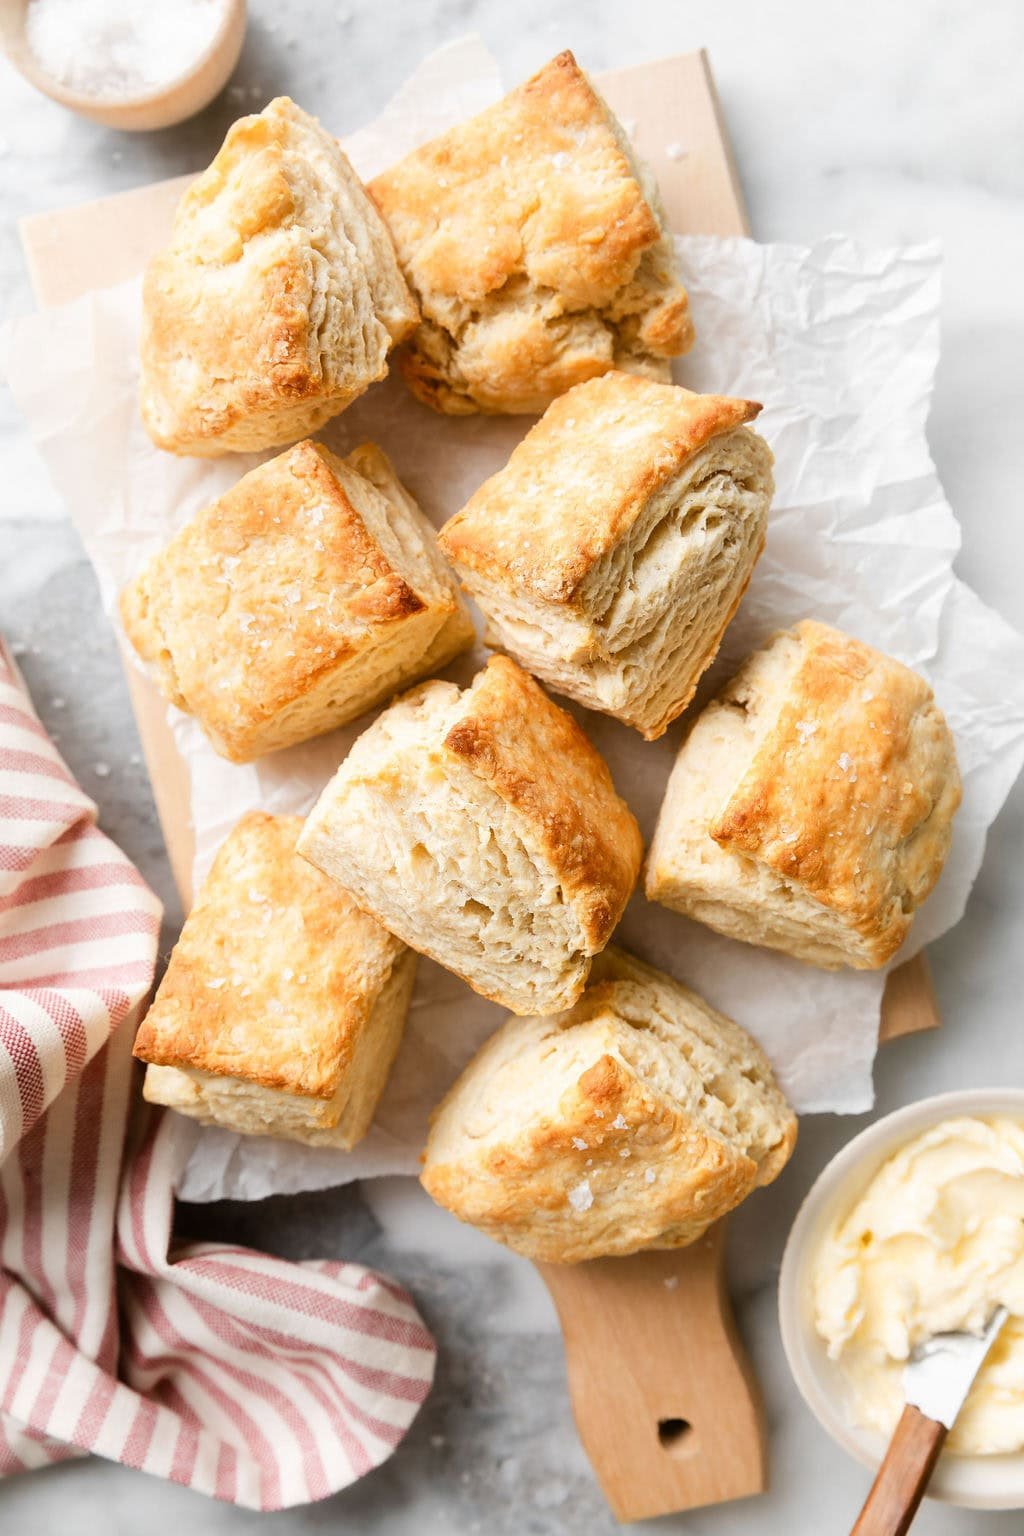
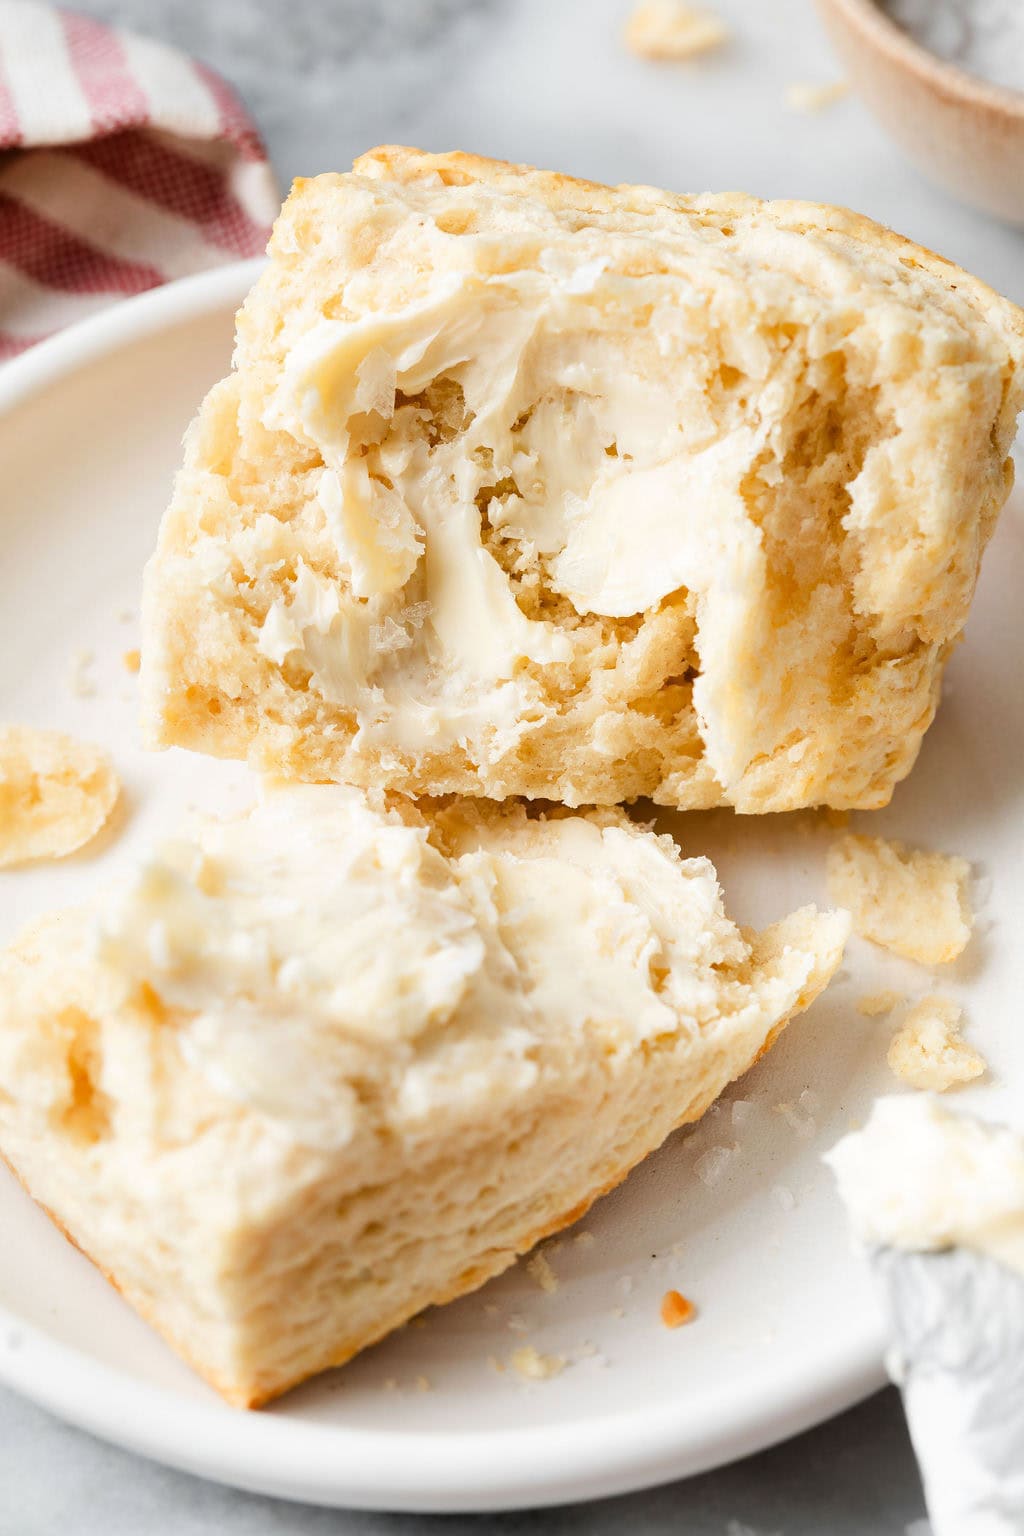
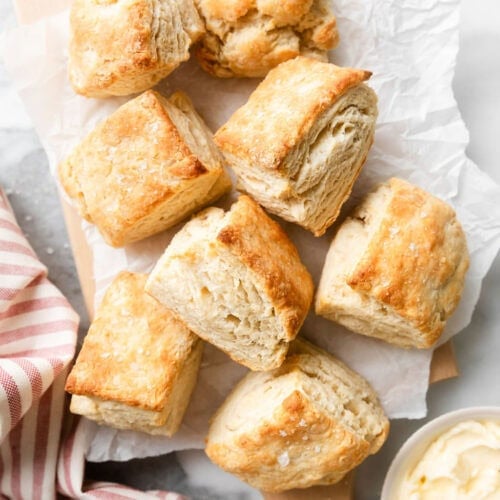
My favorite way to enjoy these biscuits is fresh out of the oven with some melted butter smeared over top. I love to tear one open while it’s still steamy on the inside.
My husband often requests them alongside homemade sausage gravy for a delicious stick-to-your-bones breakfast.
He also likes them for making the best breakfast sandwiches, topped with bacon, eggs, avocado, and a dash of hot sauce. My youngest daughter, who needs egg-free breakfast recipes, enjoys these biscuits with her favorite jams and jellies spread over top. My Dad, who I mentioned at the top of this post, enjoys them fresh off the baking sheet with a drizzle of honey and he also loves these copycat Hardee’s cinnamon raisin biscuits.
These biscuits are also great served with this crockpot chicken pot pie soup recipe where they make a delicious stand-in for the typical pie crust. You can also use easy drop biscuits to top the soup. My husband loves to slather them with jam to enjoy alongside a slice of savory mushroom frittata.

Want to save this recipe?
Enter your email below & we’ll send it straight to your inbox. Plus you’ll get great new recipes from us every week!
The Best Homemade Biscuits Recipe
I’ve been making these easy homemade biscuits for more than three decades and this is the best method for achieving tall, buttery, and flaky biscuits. Serve them warm with butter or jam, use them to make breakfast sandwiches or biscuits and gravy, or serve them over chicken pot pie soup.
Ingredients
- 2 cups all-purpose flour, plus more for rolling (use gluten-free flour, if needed)
- 1 tablespoon baking powder
- 1 tablespoon granulated sugar
- 1 teaspoon fine salt
- ¼ teaspoon baking soda
- 6 tablespoons cold unsalted butter, plus more for brushing the tops after baking
- ¾ cup milk of choice (I recommend whole or 2% dairy)
- ½ teaspoon white vinegar
Instructions
- Preheat the oven to 425℉. Lightly mist a baking sheet with cooking spray or line it with parchment paper; set aside.
- To a mixing bowl, add the flour, baking powder, sugar, 1 teaspoon salt, and the baking soda; whisk together to combine.
- Using a box grater, grate the cold butter into the flour mixture. If you don’t have a box grater, you can cut the cold butter up into very small pieces with a knife. Just be sure to work quickly and handle the butter as little as possible to prevent it from melting.
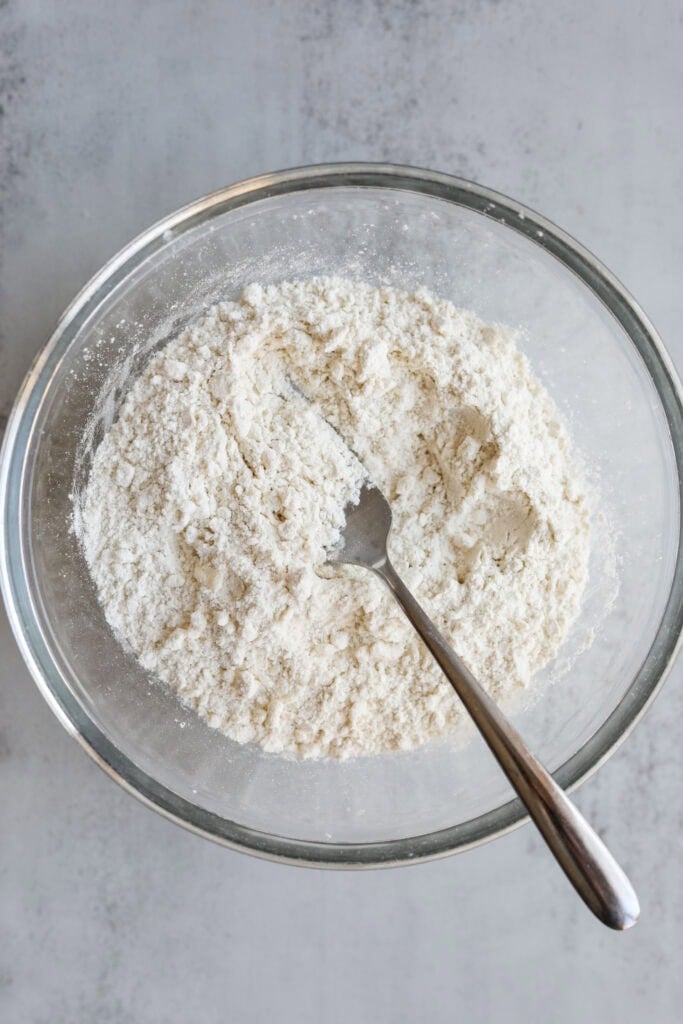
- Use a fork or pastry blender to work the grated butter into the flour mixture until it resembles coarse crumbs. TIP: Avoid using your hands to mix, as this can cause the butter to melt and will not give you the fluffiest biscuits.
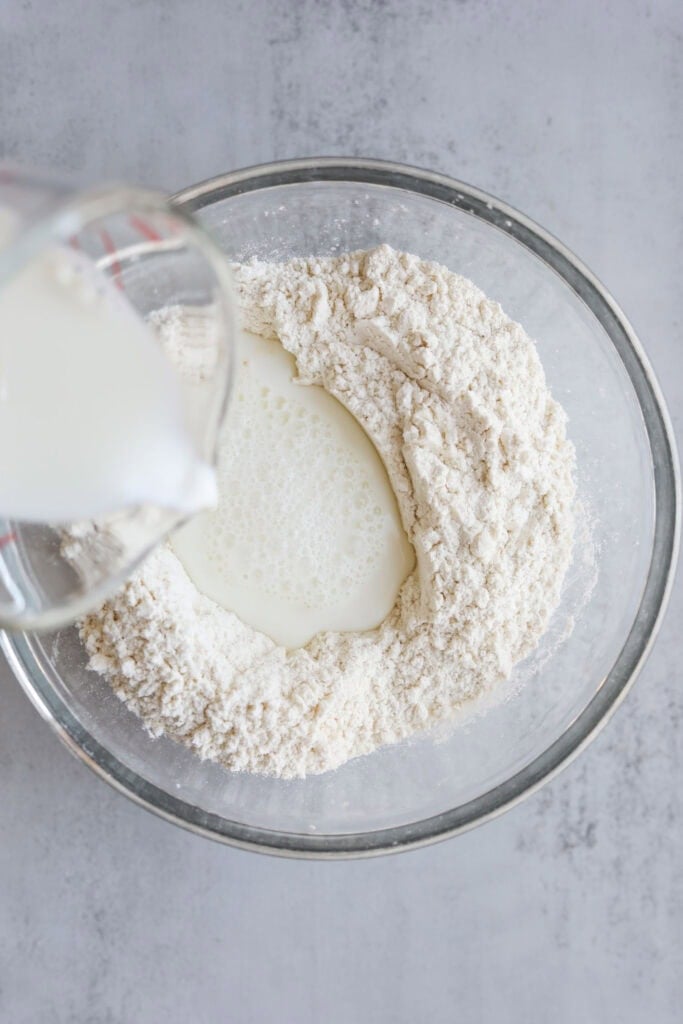
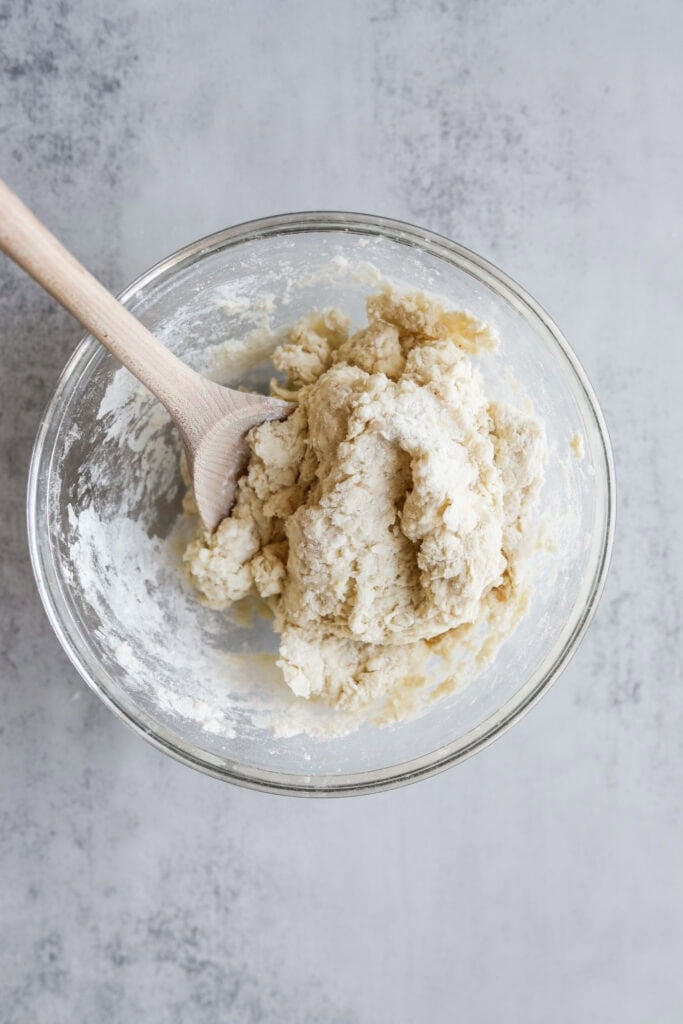
- Make an indentation (or “well”) in the center of the flour mixture. Pour the milk and vinegar into the well and stir until a soft, craggy dough forms (rough and uneven with some lumps). NOTE: Not all of the flour will be incorporated into the dough.
- Turn the dough and any loose bits of flour out onto a lightly floured flat surface.
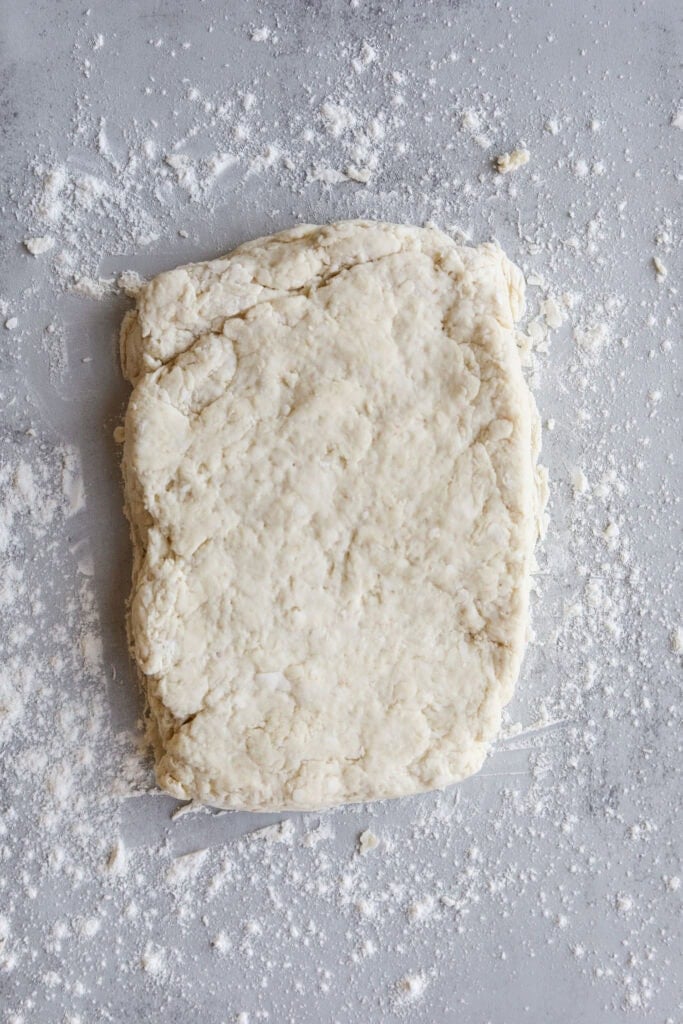
- Use your hands to quickly pat the dough into a rectangle that is 1-inch thick.
- Working quickly, fold the rectangle of dough in half and then press it into a rectangle again.
- Repeat this fold-and-press process 4 more times. By now all of the flour should be incorporated into the dough but the dough won’t be perfectly smooth (and that’s okay!)
- Shape the dough once again into a rectangle that is 1-inch thick. This is the final shaping. Use your hands or a bench scraper to make the edges tidy.
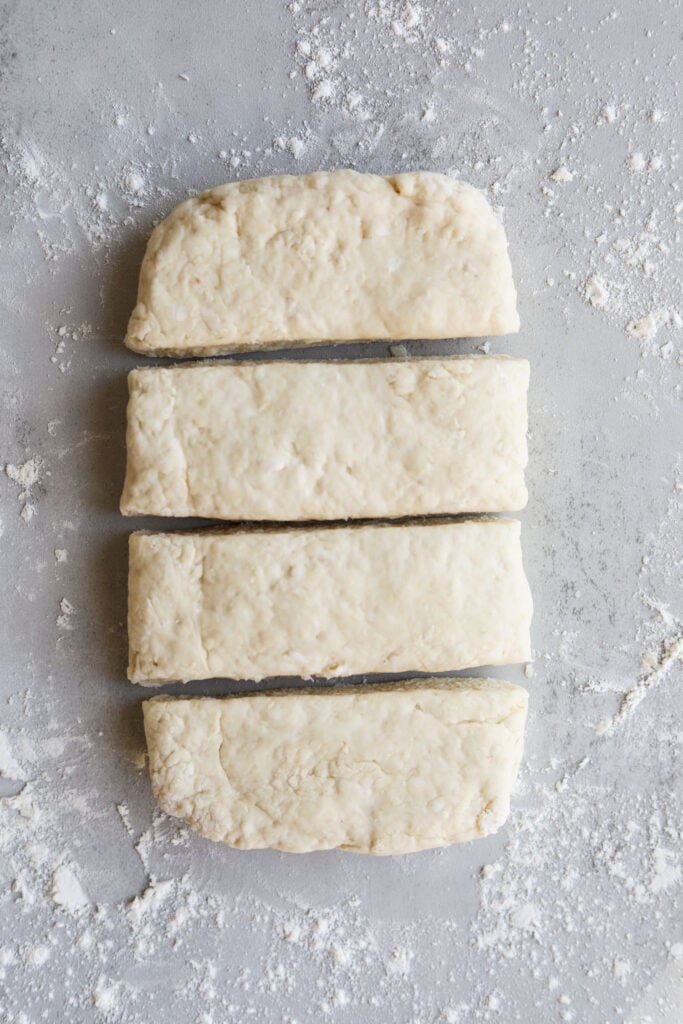
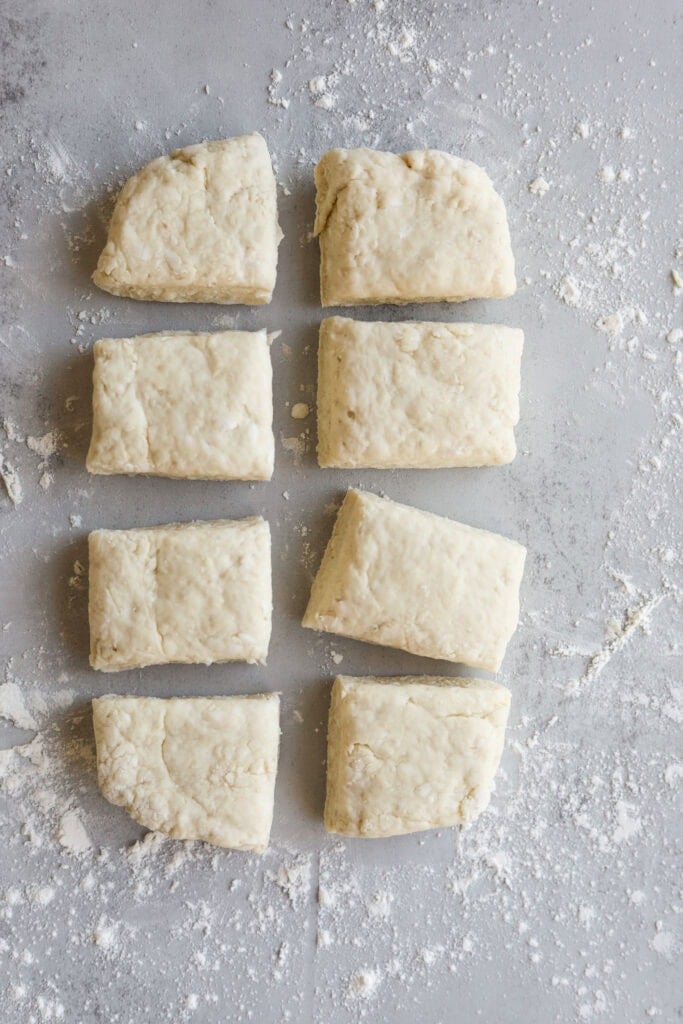
- Use a bench scraper or sharp knife to cut the dough into 8 squares.
- Place biscuits on the prepared baking sheet, spacing them 1 to 2 inches apart.
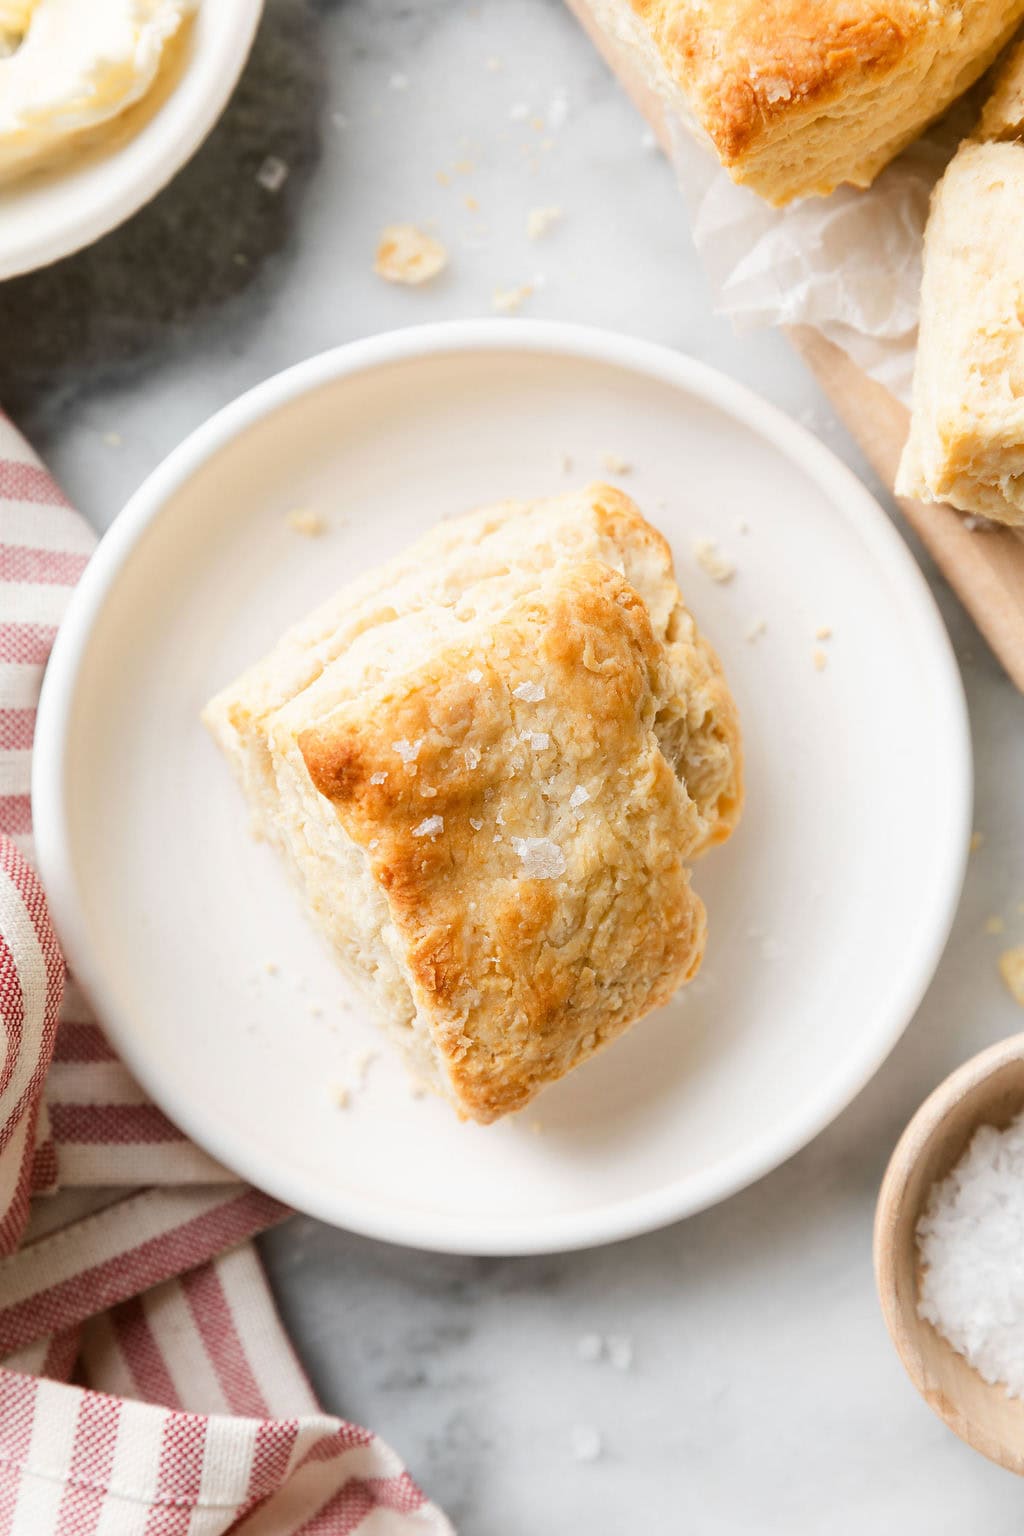
- Bake the biscuits for 12-13 minutes or until the tops are a very light golden brown.
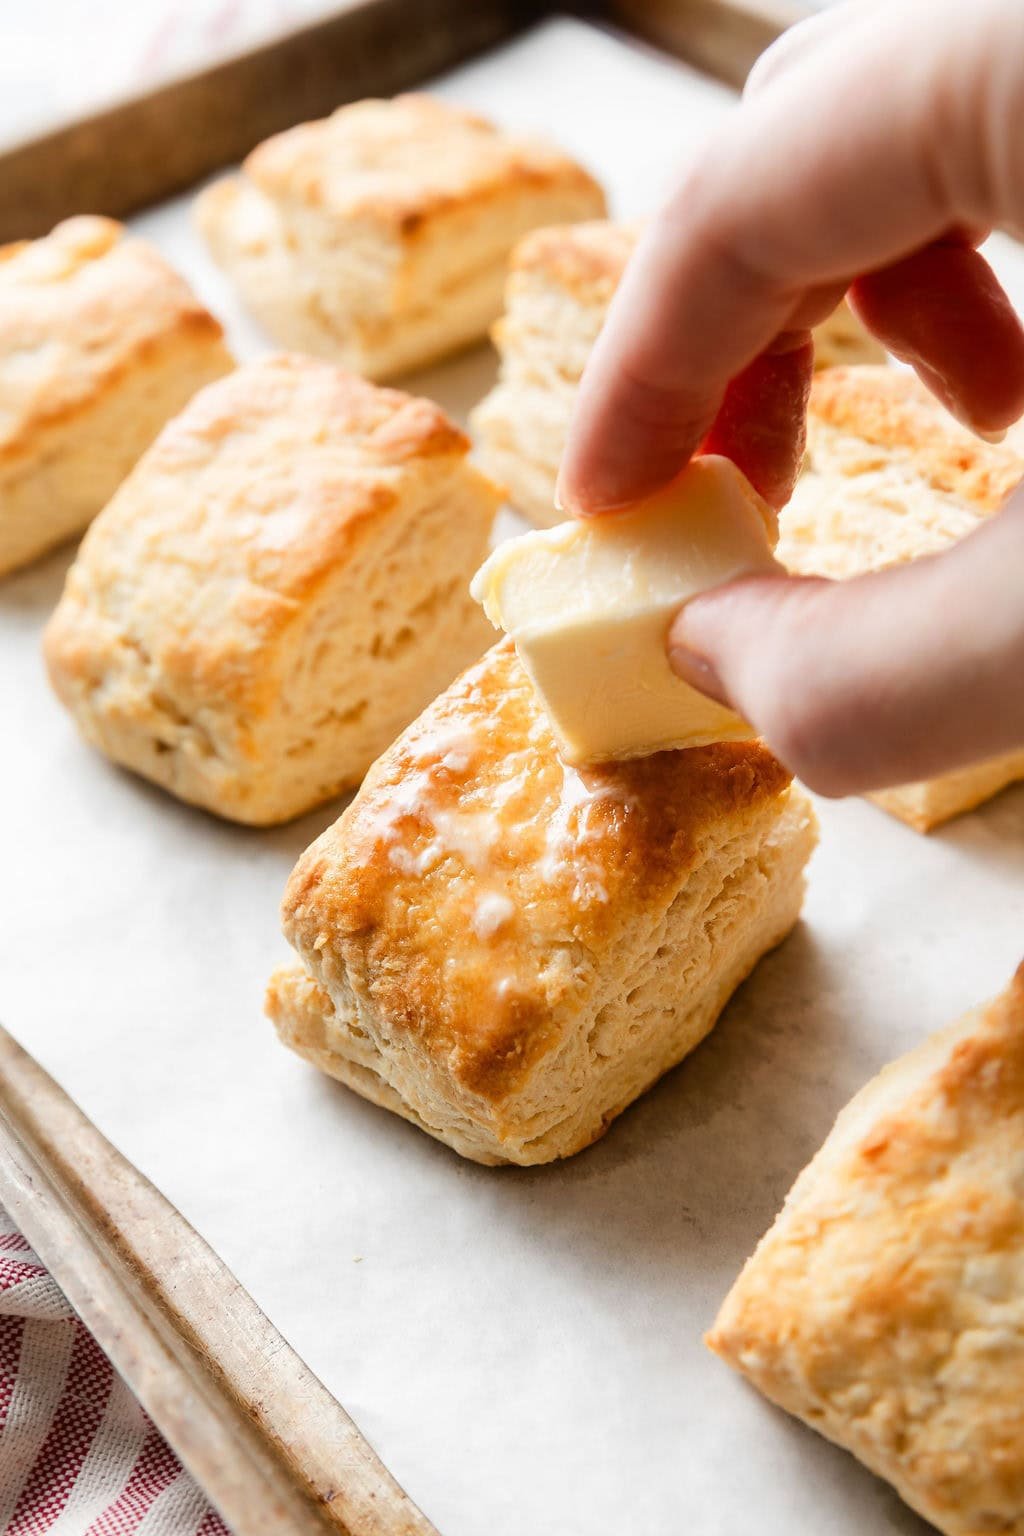
- Remove the biscuits from the oven and rub the top of each biscuit with a pat of cold butter if desired (I highly recommend not skipping this step!) Serve the biscuits warm.
- Store leftover biscuits in an airtight container at room temperature for up to 3 days.
Last Step! Please leave a review and rating letting us know how you liked this recipe! This helps our business thrive so we can continue providing free recipes and high-quality content for you.
Notes
For gluten free, use an equal amount of 1:1 gluten-free baking flour, such as Bob’s Red Mill 1-to-1 gluten-free baking flour. Note that gluten-free biscuits will rise slightly less and have less browning, but they still taste great. Bake them for 1 minute longer, 13-14 minutes total.
To Refrigerate The Dough And Bake Later: Prepare the biscuits through Step 11 in the recipe above. Place the unbaked cut-apart biscuits in a large airtight container, separating layers with parchment paper. Or, place the unbaked biscuits on a baking sheet and wrap the entire baking sheet with plastic wrap. Refrigerate the biscuits for up to 4 days. When it’s time to bake, remove from the fridge and arrange the biscuits on a parchment-lined baking sheet (if they’re not already on one) and allow the biscuits to rest at room temperature while you preheat oven to 425℉. Bake for 12-13 minutes or until biscuits are golden brown on the bottom and lightly browned on top.
To Freeze The Dough And Bake Later: Prepare the biscuits through Step 12, placing the unbaked biscuits on a parchment-lined baking sheet. Refrigerate the biscuits on the baking sheet for 30 minutes. Then, transfer the unbaked biscuits to a freezer-safe airtight container or a zip-top freezer bag. Freeze chilled biscuits for up to 1 month. When it’s time to bake, remove the biscuit pucks from the freezer and arrange them on a parchment-lined baking sheet. Allow biscuits to rest at room temperature while you preheat oven to 425℉. Bake for 12-14 minutes or until biscuits are golden brown on the bottom and just very lightly browned on top
Baker’s Notes: The above options are excellent methods if you want make-ahead convenience. However, the biscuits may not rise as much as they do when you bake them right away but they are still very delicious tender biscuits. When refrigerating or freezing ahead, mine have a very slight crunch to the outside but the insides are still flaky and tender.
Nutrition Information
- Serving Size: 1 biscuit
- Calories: 202
- Fat: 10 g
- (Sat Fat: 5 g)
- Sodium: 472 mg
- Carbohydrate: 25 g
- (Fiber: 1 g
- Sugar: 3 g)
- Protein: 5 g
- Cholesterol: 24 mg
Dietary
For ultimate success, we highly recommend reading the tips in the full blog post above. All photos and content are copyright protected. Please do not use our photos without prior written permission. If you wish to republish a recipe, please rewrite the recipe in your own unique words. Link back to the source recipe here on The Real Food Dietitians. Thank you!


worked like a charm 1st time i used the recipe!
Excellent, Nancy! Thanks for the 5-star review!
Yummy!
Perfect, Lisa!
Really want to make these but I’m fresh out of white vinegar. What can I do?
Hi Jennifer, you could use another type of vinegar if you have it (apple cider vinegar or rice vinegar, for example) or try using an equal amount of lemon juice.