Turkey brine is a salted, seasoned liquid used to soak a raw turkey for one to two days before it is cooked. Soaking the turkey in brine is a great way to make roasted turkey more flavorful, juicy, and tender. I first used a brine when I harvested a wild turkey last year and was determined to make it taste as juicy and flavorful as possible. And it worked! Since then, I’ve been using this brine whenever I roast a store-bought Thanksgiving turkey or a wild turkey. I’m convinced it’s always worth the effort.
Recipe Highlights
Quick to make: Making the brine itself is a simple and quick method that requires just about 10 to 15 minutes of time. I combine all of the ingredients in a pot on the stovetop and heat them just until simmering. This brine recipe works well on any size turkey, but most often I use it to make a 12- to 15-pound turkey.
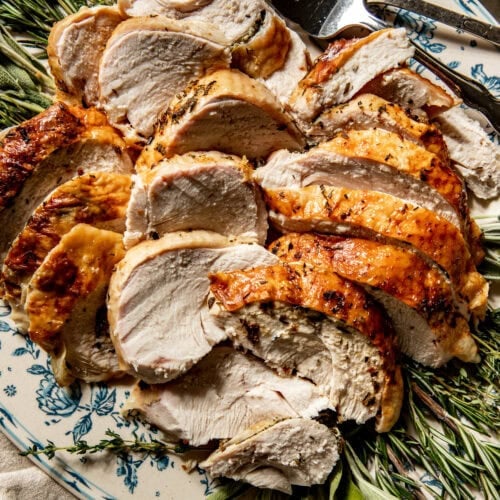
Tender, flavorful, juicy turkey: The benefits of brining a turkey are that the flavorful, herby, salty liquid helps tenderize and moisten the turkey meat, infusing it with flavor prior to roasting.
Real-food ingredients: I love that I can combine water and a few whole-food ingredients and spices to make the best turkey I’ve ever tasted. It’s always worth the extra time it takes to soak the turkey.
Key Ingredients To Have On Hand
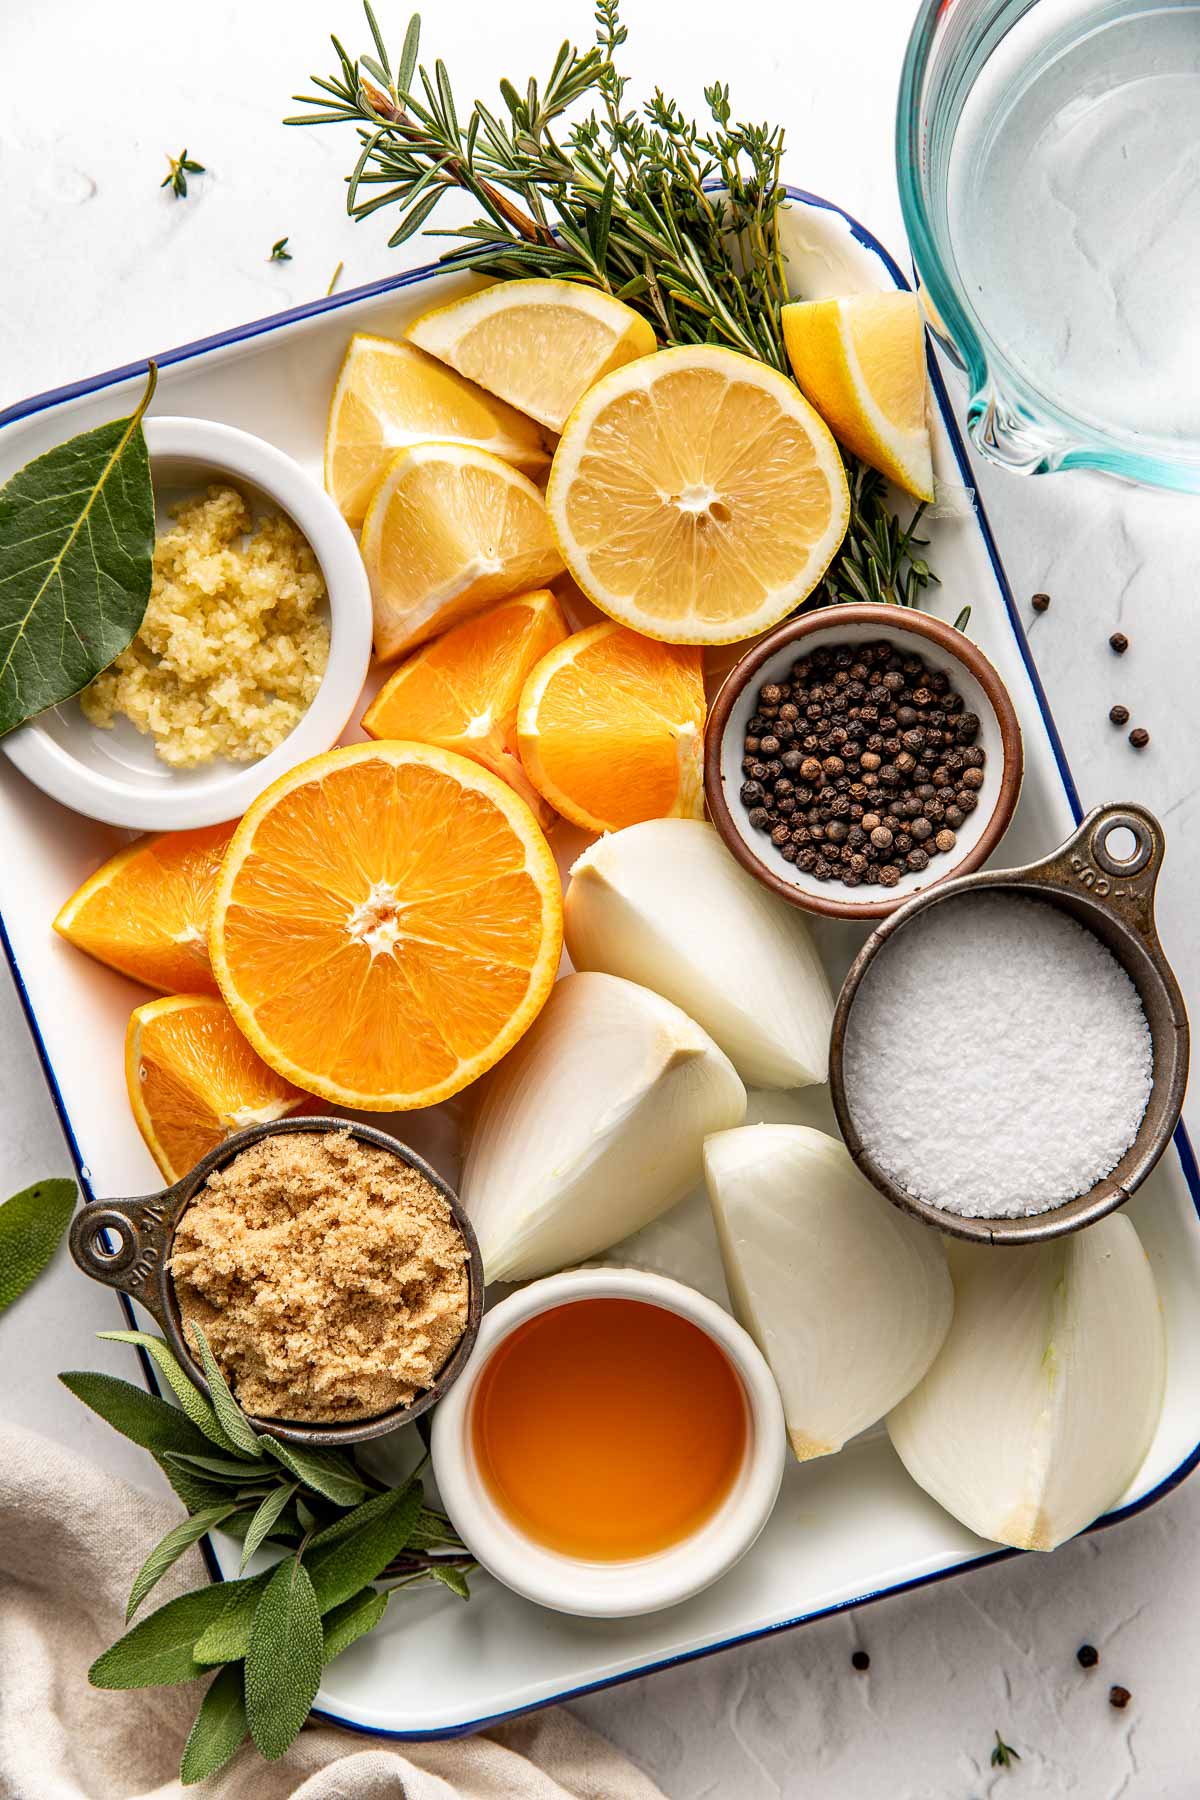
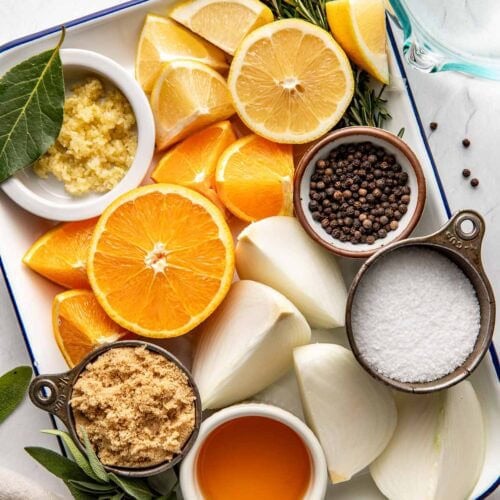
- Salt – salt is an essential ingredient in any brine recipe, as sodium is the main mineral that helps penetrate the turkey meat, breaking down the fibers and making a more flavorful turkey that is tender and moist. May use table salt or coarse salt, though I prefer kosher salt.
- Brown sugar – brown sugar helps balance the saltiness and adds a richer, deeper flavor to the turkey. Honey or apple juice also work.
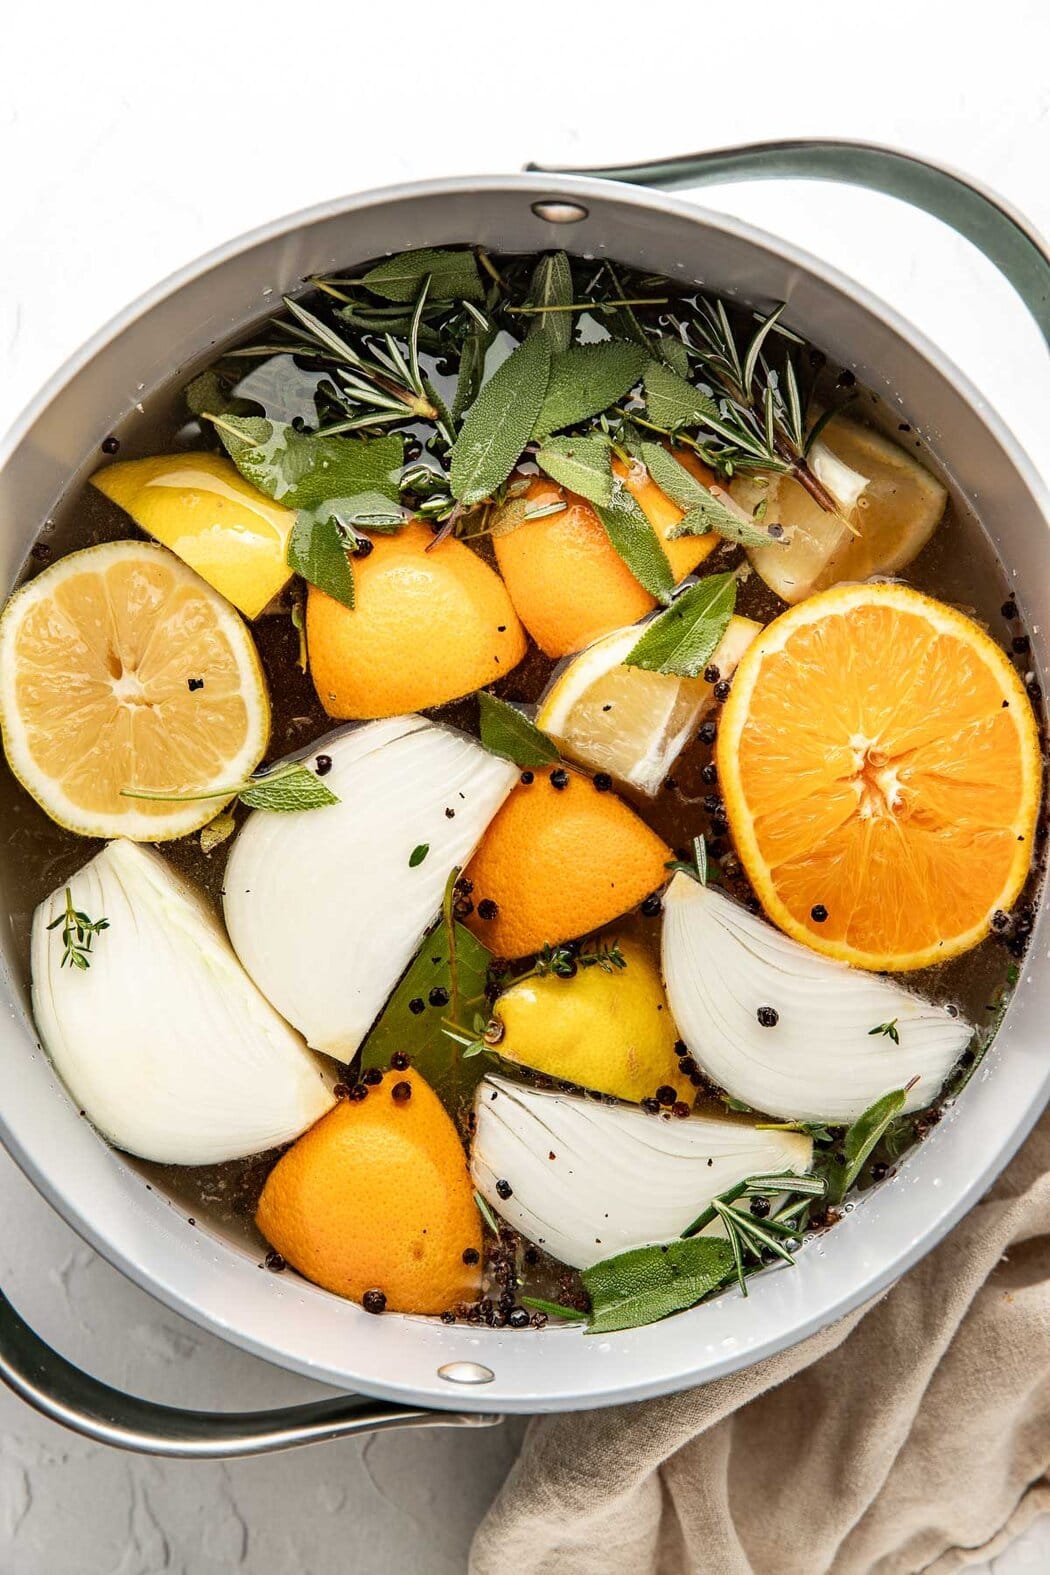
- Citrus fruits – fresh lemons and oranges help add flavor to the brine and the acidity also helps tenderize the turkey meat.
- Fresh herbs – I use aromatic fresh herbs in a lot of my Thanksgiving cooking, and also in this brine recipe, where they add great flavor to the turkey meat. Most often I pick up a bundle of poultry herbs from the store, but several sprigs of fresh rosemary, fresh thyme, and/or sage work well.
- Apple cider vinegar – vinegar is an acidic ingredient that helps balance the saltiness and sweetness of a brine, while also preventing the growth of microorganisms.
- Black peppercorns – I use whole black pepper corns to add more depth of flavor and help balance the saltiness of the brine.
Find the ingredient list with exact measurements in the recipe card below.
Essential Equipment
These are a just few tools and equipment that make it easy to brine a whole turkey:
- Large pot – this is necessary to combine all of the brine ingredients on the stovetop and bring it to a simmer so the salt and brown sugar completely dissolve in the liquid.
- Brine bag – I like to use a brine bag and find it so convenient for holding the liquid near the turkey and also cleaning it up afterward. But even if you don’t have one, you can make this brine recipe by combining all of the ingredients in a large bowl or stock pot. Or, use any large container that is big enough to hold the turkey submerged in the brine and also fits inside the refrigerator.
- Large bowl – I set the filled brine bag (with the turkey and brine ingredients inside of it) in a large bowl as a sturdy way to hold the turkey in the fridge for a few days.
How To Make Turkey Brine
Brining a turkey is not difficult. In fact, I think it’s probably one of the easiest parts of making any of my favorite Thanksgiving recipes. Here are the basic steps.
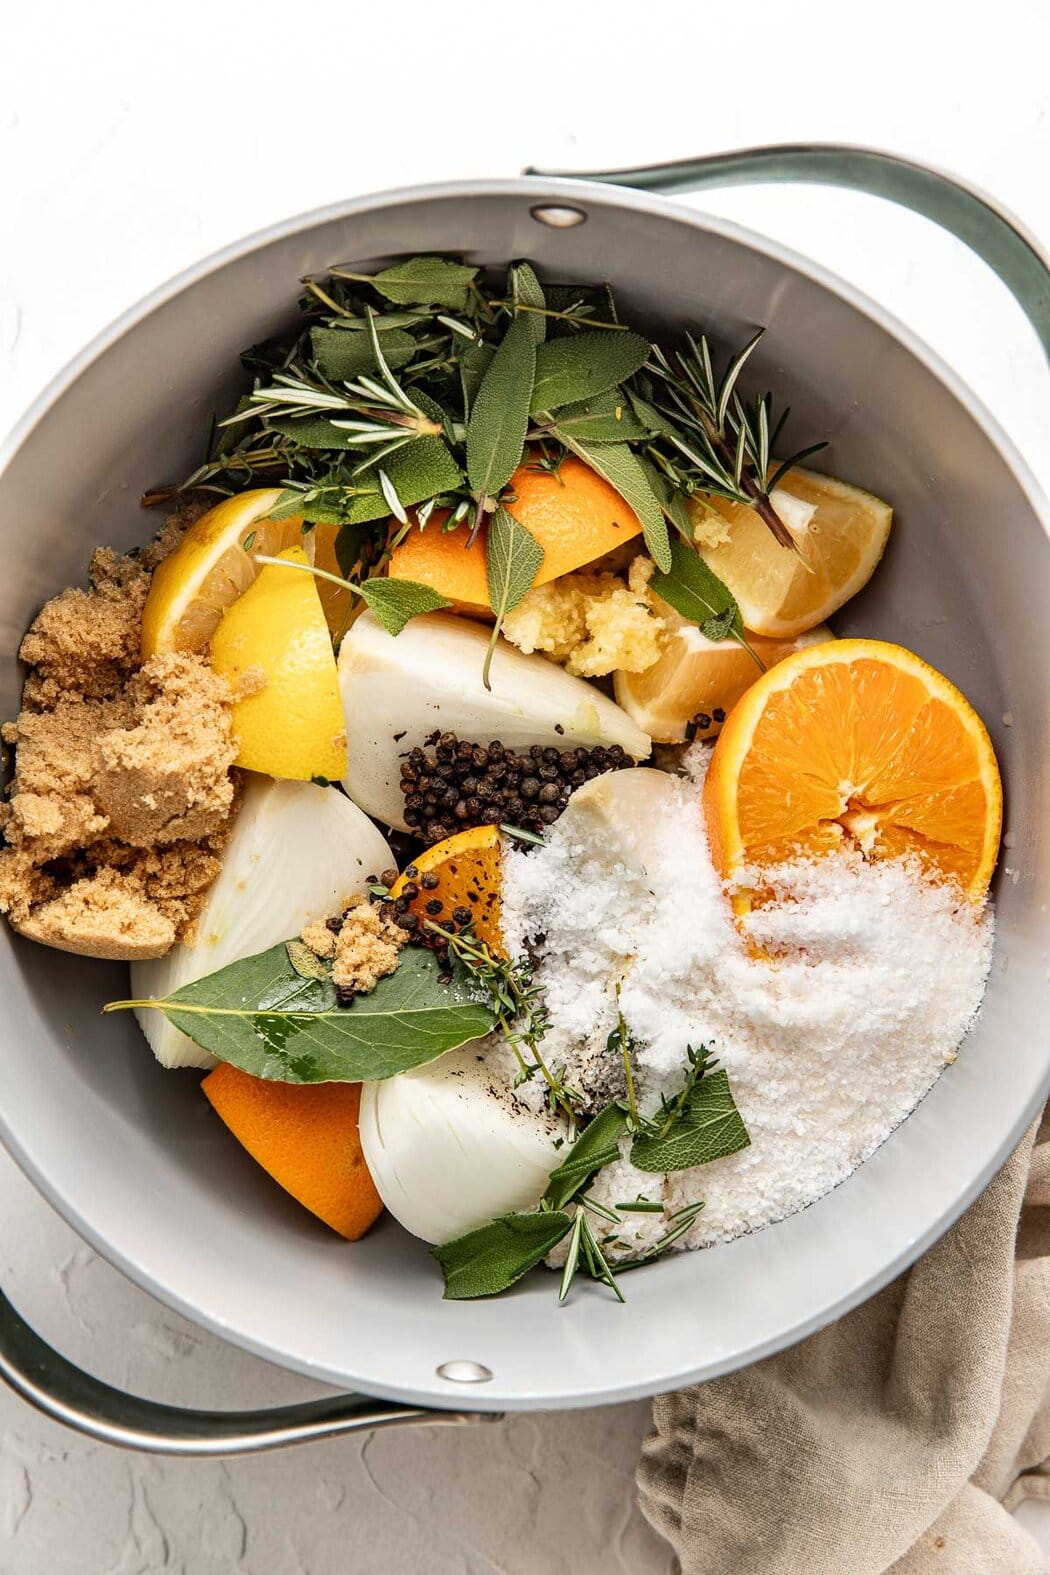
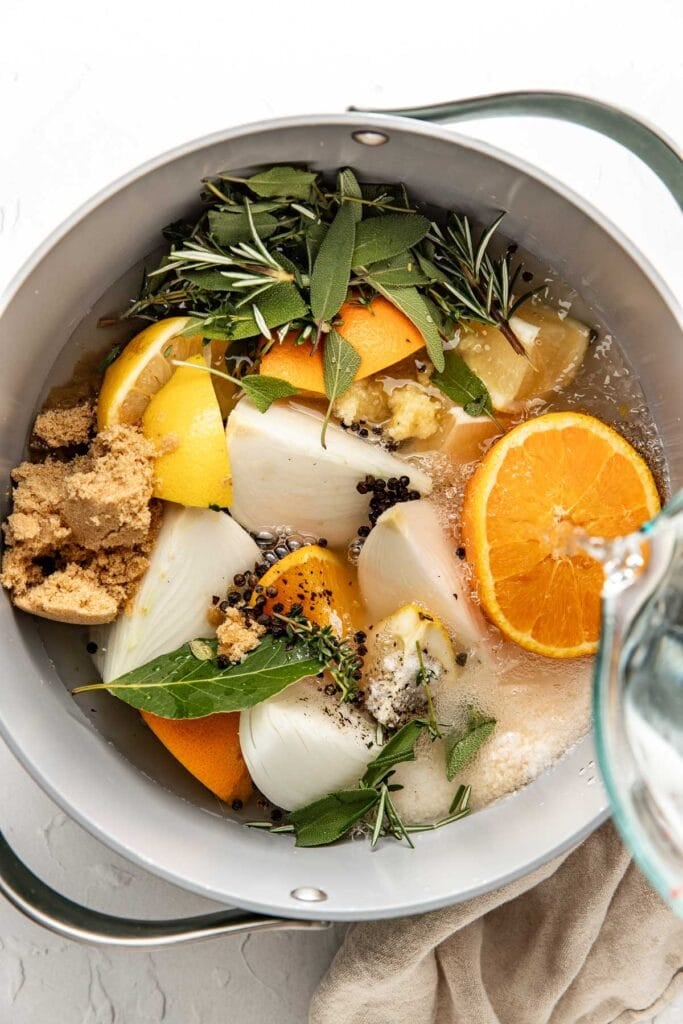
- Make the brine: Combine a half gallon of water, salt, seasonings, and citrus in a large pot on the stovetop. Heat and stir the liquid until it simmers and the salt and brown sugar dissolve. Let the brine cool to room temperature.
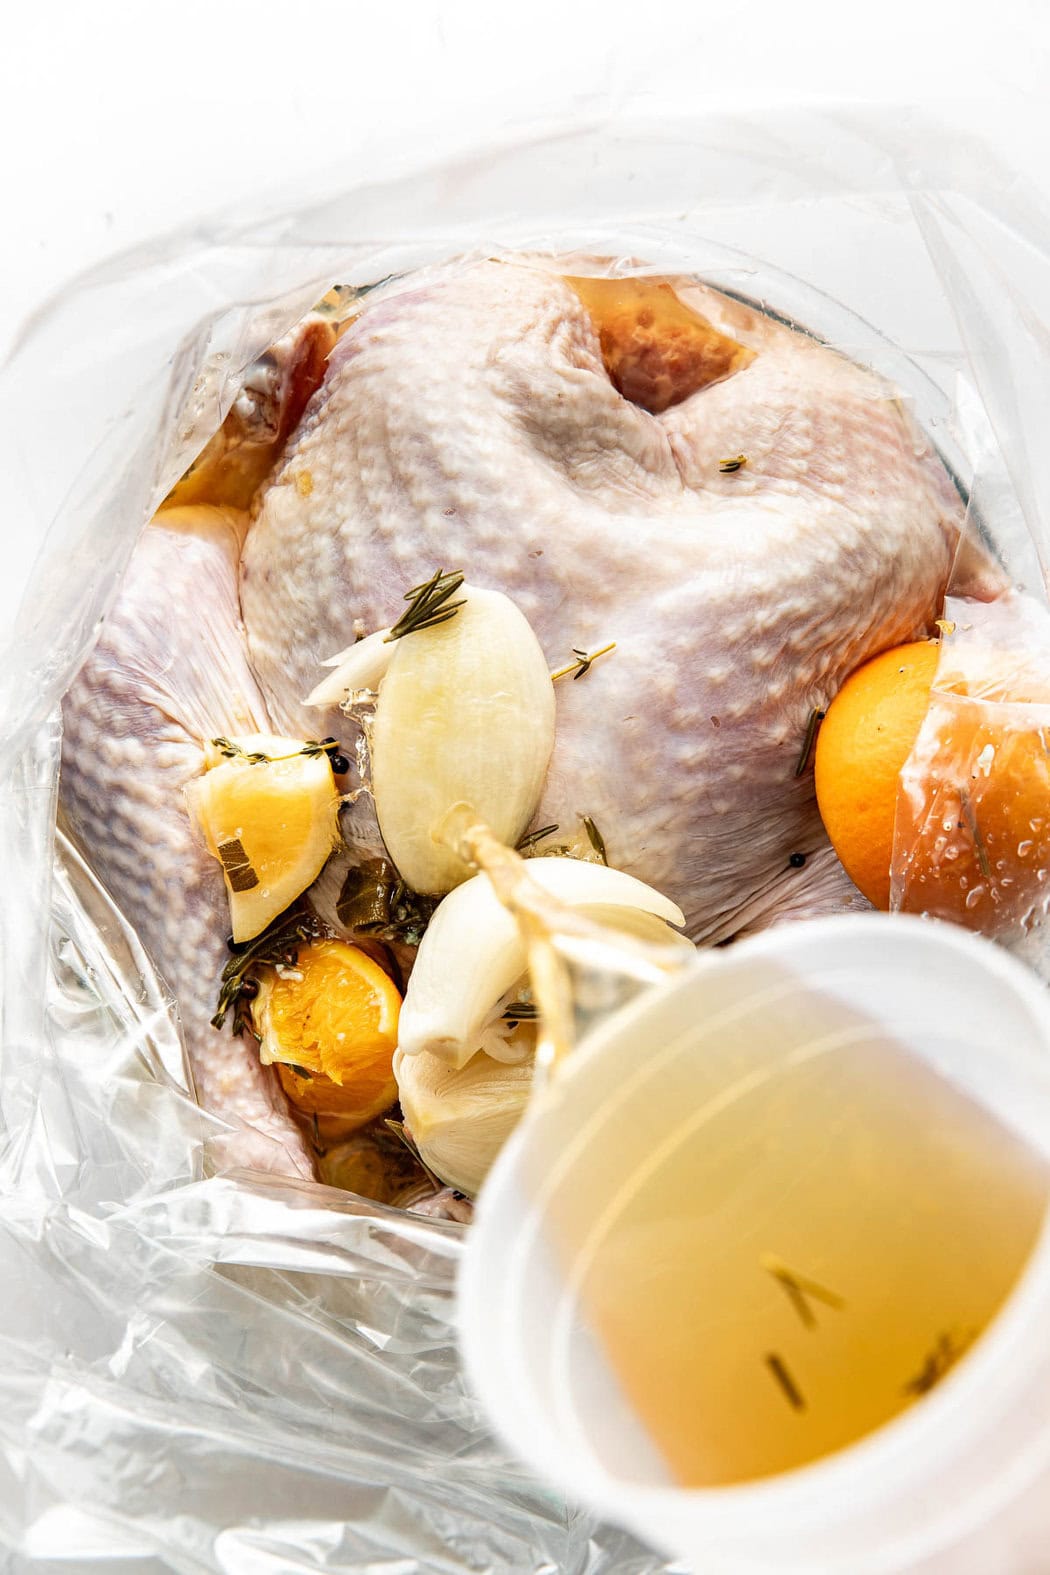
- Submerge the turkey: Place a thawed turkey inside a large bowl, roasting pan, or inside of a brine bag. Pour the cooled salt water brine over top, fully submerging the turkey in the liquid. If needed, add more water.
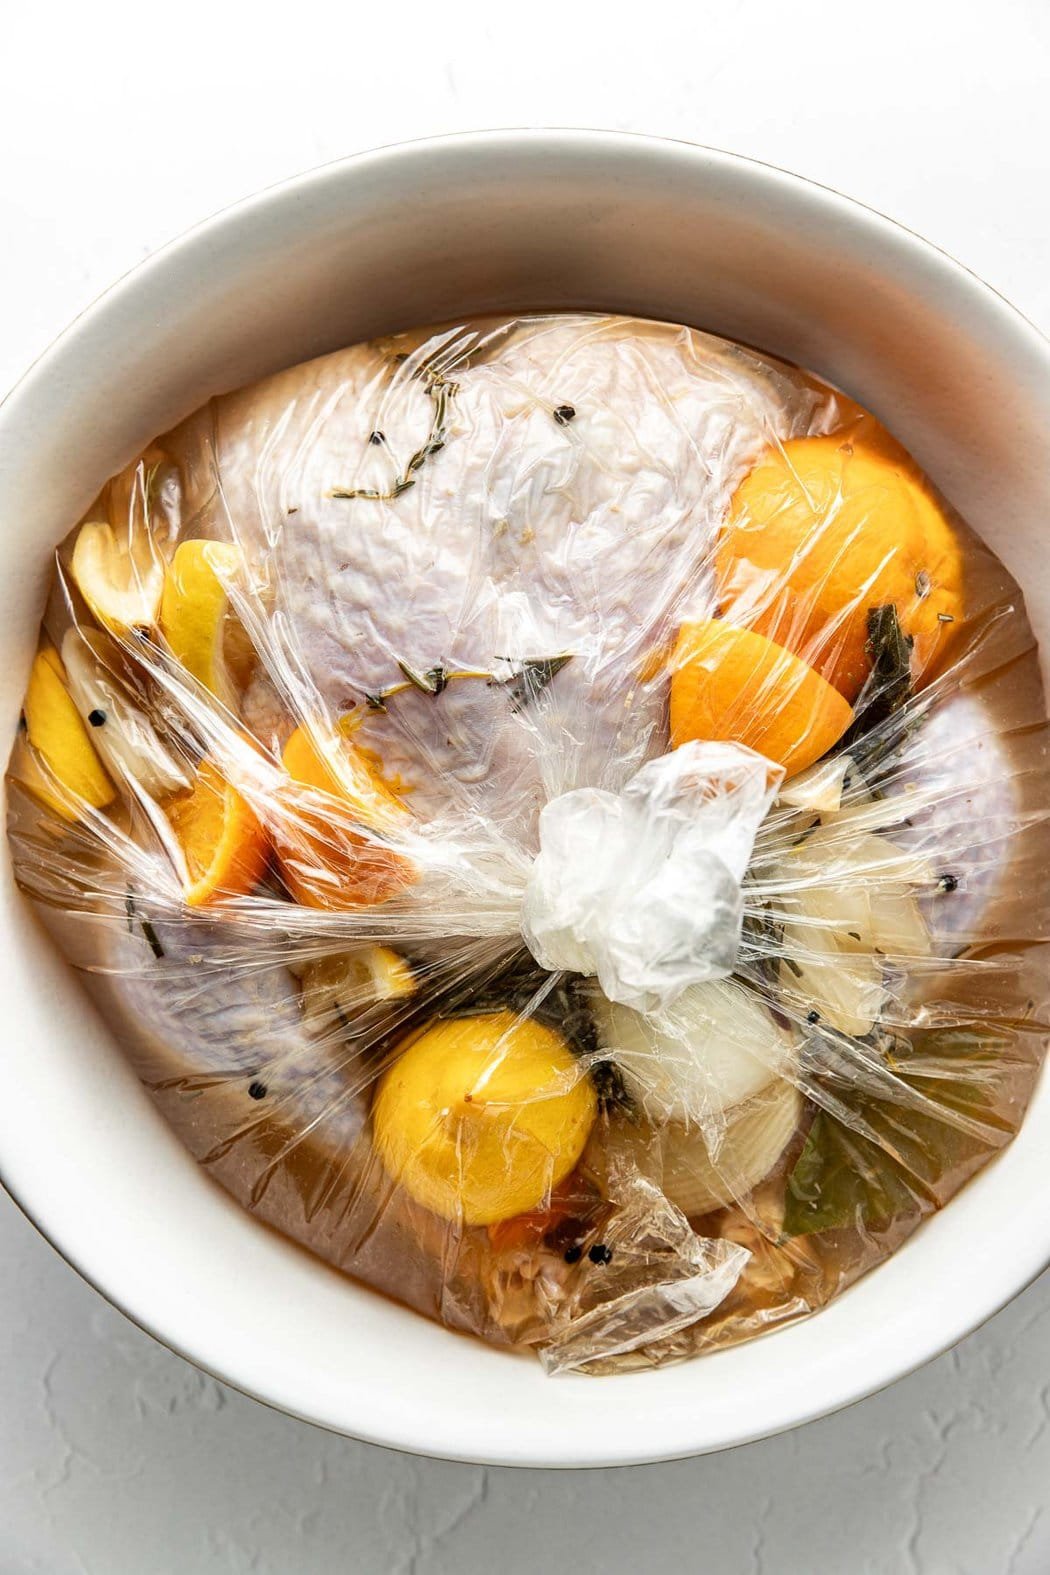
- Let it soak: Close the bag or cover the bowl and place the turkey in the refrigerator for at least 24 hours and up to 48 hours.
For serving size and the complete directions and ingredient amounts, scroll down to the recipe card below. All of our recipes include the nutrition analysis, listing calories (kcals), protein, carbohydrates/carb, fiber, sugar, sodium, cholesterol, and more per serving.
Prepare The Brine In Advance
Since the brining liquid should be fully cooled before it’s poured over the turkey, the brining mixture can be made up to 2 days ahead of time and stored in a pot or bowl in the refrigerator until ready to use.
After Brining The Turkey
After the turkey has been soaking in the brine for up to 24 hours, remove the turkey from the liquid. Discard all of the brine ingredients. I typically compose the citrus pieces and spices, then pour the liquid down my sink drain.
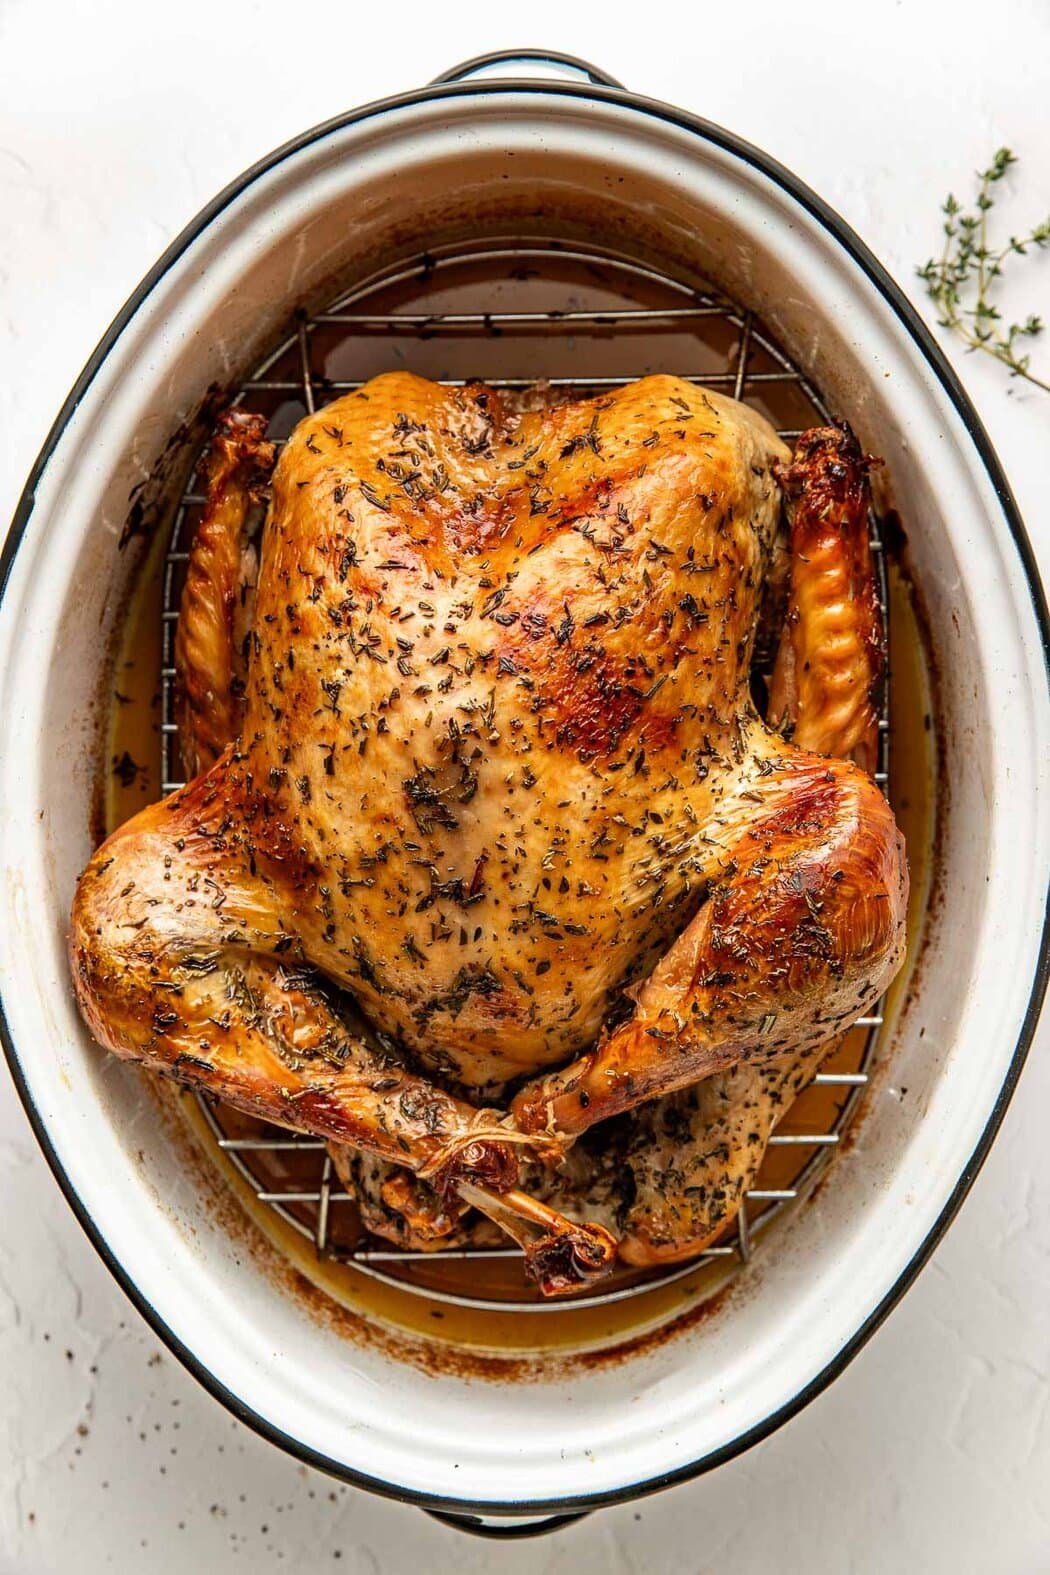
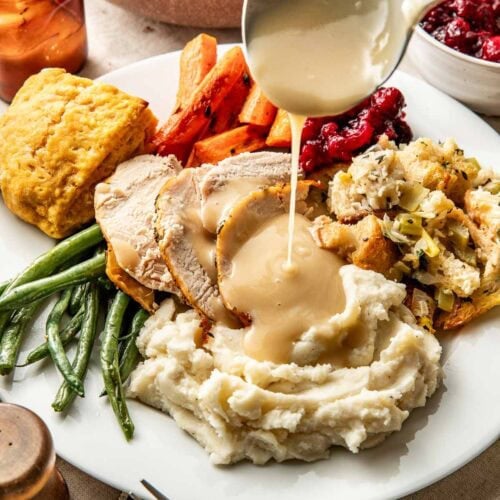
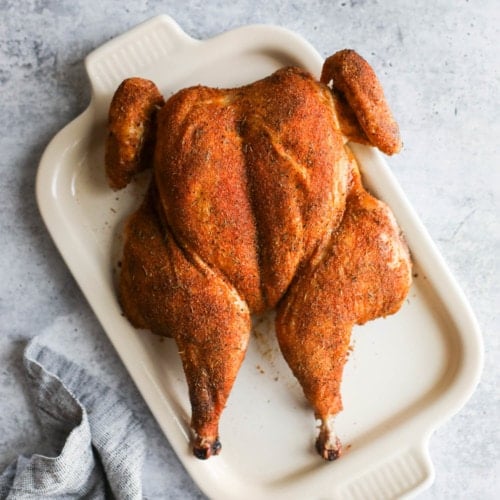
Then, I rinse the turkey under running water and pat dry with paper towels before moving on to cook the turkey. To do that, most often, I use my perfect roasted turkey recipe to finish the bird. But a brined turkey can be cooked in any preferred way. It can be fried in a turkey fryer, smoked turkey on the Traeger, or spatchcocked and grilled on the BBQ.
Frequently Asked Questions
I prefer wet brining, as it seems to be a better method for getting flavor infused into the turkey meat. I also think a salty liquid brine solution is optimal for getting juicy and tender turkey.
Brining a turkey requires enough refrigerator space to hold a whole turkey inside of a large bowl or other container. And sometimes it can result in turkey skin that is less crispy. Or, the turkey meat could be mushy or overly tender if the turkey is brined for too long. Be sure not to brine for more than 24 hours.
They shouldn’t be. After brining a turkey, rinse it under cold water. That way, the salty solution on the exterior of the bird washes away. What remains is a turkey that has soaking up the solution that helps make it more tender, flavorful, and juicy.
It really can be done either way, but I find that it’s easier to spatchcock (remove the backbone and flatten) a turkey after it brining. It’s easier to submerge a turkey in the brining solution before it’s cut.
A brine is most effective when used on a fully thawed turkey. However, you can brine a frozen turkey or a partially frozen turkey, it’s just not ideal.
It’s difficult to calculate the nutrition information of a brined turkey since it’s impossible to know how much sodium the turkey meat retains. But my dietitian friend, Jessie, shares the following averages.
A non-brined turkey typically has about 100 milligrams of naturally occurring sodium per 4-ounce serving. A brined turkey, on the other hand, may have as much as 3x that much sodium, containing about 300 milligrams of sodium or more per 4-ounce serving of turkey.
Yes, some store-bought turkeys come already brined in a salt water solution, so always check the label first. A pre-brined turkey shouldn’t also be brined at home, which could make it too salty. Look for an all natural turkey and avoid terms on the label such as “injected” “self-basted” “basted” or “enhanced.”
Want to save this recipe?
Enter your email below & we’ll send it straight to your inbox. Plus you’ll get great new recipes from us every week!
Turkey Brine Recipe
This simple brine recipe helps create the most flavorful, juicy, and tender turkey. Soak a fully thawed turkey in this brine for one to two days before cooking it.
Ingredients
- 8 cups water
- ¾ cup kosher salt
- ½ cup brown sugar (may sub pure honey)
- 1 lemon (quartered, roughly smashed)
- 1 orange (quartered, roughly smashed)
- 1 small white onion (quartered)
- ¼ cup apple cider vinegar
- 5 garlic cloves, crushed or grated
- 1 bundle of fresh poultry herbs, roughly chopped (or a mix of fresh rosemary, sage, and thyme sprigs)
- 2 tablespoons black peppercorns
- 1 bay leaf
Instructions
- Place a large pot or Dutch oven on the stovetop over medium-high heat.
- Add all ingredients to the pot and stir while bringing the liquid to a simmer (almost a boil).
- When the liquid has simmered and the salt and brown sugar are dissolved, remove the pot from the heat and allow the brine to cool completely. *
- Remove any giblets or seasoning package that may be inside the turkey. Place the thawed turkey inside of a brine bag or turkey oven bag, then place the bagged turkey inside a very large bowl or roasting pot. Then, pour the cooled brine (including all spices and citrus) over the thawed turkey, making sure the turkey is fully covered in the brine (NOTE: If needed, add an additional 1-2 cups of water to make sure the turkey is covered). If you don’t have a brine bag, you could also use a large stock pot or roasting pan (any vessel that is large enough to hold the turkey and fit inside your refrigerator).
- Close the bag or cover the pot and refrigerate the brining turkey for 12 to 24 hours.
- When ready to roast the turkey, drain the turkey and rinse it. Discard the brine.
Last Step! Please leave a review and rating letting us know how you liked this recipe! This helps our business thrive so we can continue providing free recipes and high-quality content for you.
Notes
* It’s important to let the brine cool completely before pouring it over the turkey, otherwise the meat will begin to cook. This can be sped up by transferring the brine to a bowl and placing it in the fridge to cool. The brine may also be made up to 2 days before adding the turkey, and refrigerated until ready to use.
Dietary
The photos in this post were taken by Megan McKeehan.
For ultimate success, we highly recommend reading the tips in the full blog post above. All photos and content are copyright protected. Please do not use our photos without prior written permission. If you wish to republish a recipe, please rewrite the recipe in your own unique words. Link back to the source recipe here on The Real Food Dietitians. Thank you!


Can this be done for Turkey breast as well? I won’t be doing a whole Turkey. Thanks.
Hi Linda, yes you can brine just a turkey breast.