Ingredients
For the Crust:
- 9 graham cracker sheets (use gluten-free if needed)
- ½ cup chopped pecans
- 3 tablespoons cane sugar or coconut sugar
- ¼ teaspoon pumpkin pie spice
- ¼ teaspoon fine salt
- ¼ cup unsalted butter, melted
For the Cheesecake:
- 1 cup full-fat plain Greek yogurt
- 8 ounces cream cheese, softened at room temperature
- ¾ cup canned pumpkin puree
- 2 large eggs
- 1 teaspoon pure vanilla extract
- ⅓ cup cane sugar or coconut sugar
- 3 tablespoons pure maple syrup
- 2 tablespoons all-purpose flour (use gluten-free baking flour, if needed)
- 2 teaspoons pumpkin pie spice
For the Maple Whipped Topping:
- ½ cup heavy cream
- 2 teaspoons pure maple syrup
- Optional for topping: reserve 2 tablespoons of the crust mixture to sprinkle over the whipped topping, and a dash of pumpkin pie spice
Instructions
For the crust:
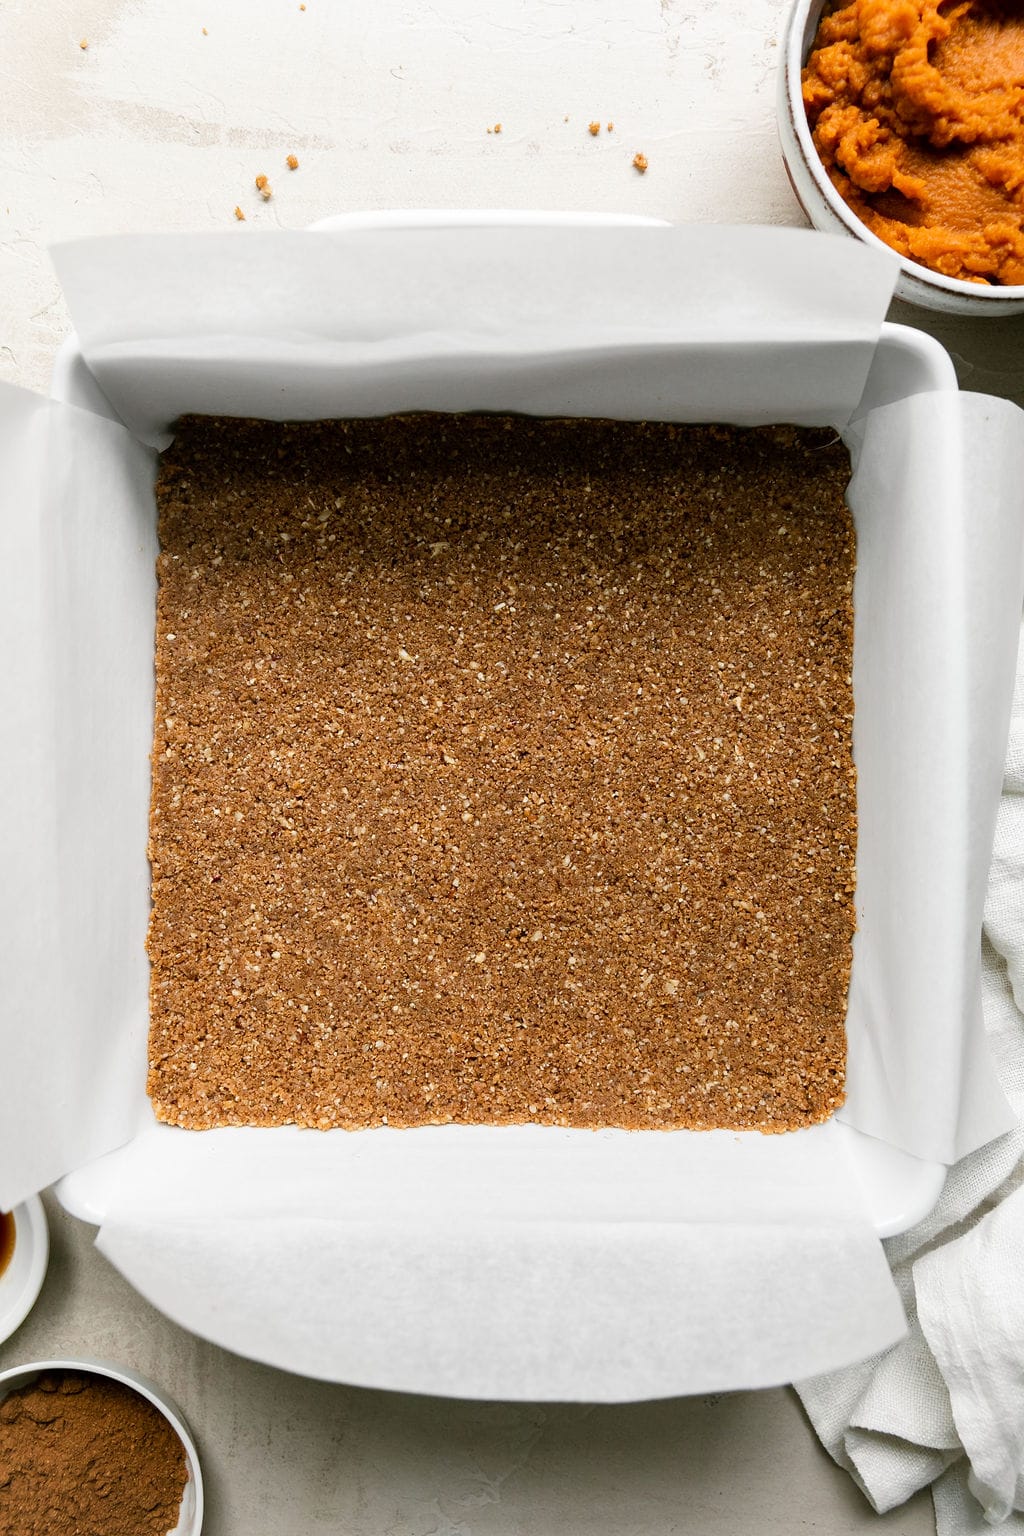
- Preheat the oven to 325 degrees F. Line a 9×9 inch pan with parchment paper making sure there is enough excess that hangs over the edge for easy removal.
- In a large food processor or blender, add the graham crackers and process them into fine crumbs. Next add the pecans, sugar, pumpkin pie spice, salt, and melted butter. Continue to process until everything comes together.
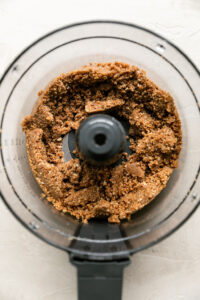
- Remove 2 tablespoons of the crust mixture and set aside to reserve for a topping. Then transfer the remaining mixture to the prepared pan and spread it out evenly. garnish Then, using clean hands, press the crust mixture firmly into the prepared pan.
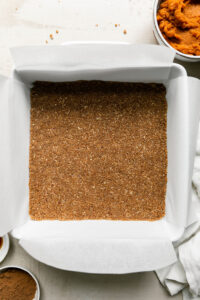
- Bake the crust until golden brown, 8-10 minutes. When the crust is done, remove from the oven and set aside.
For the cheesecake filling:
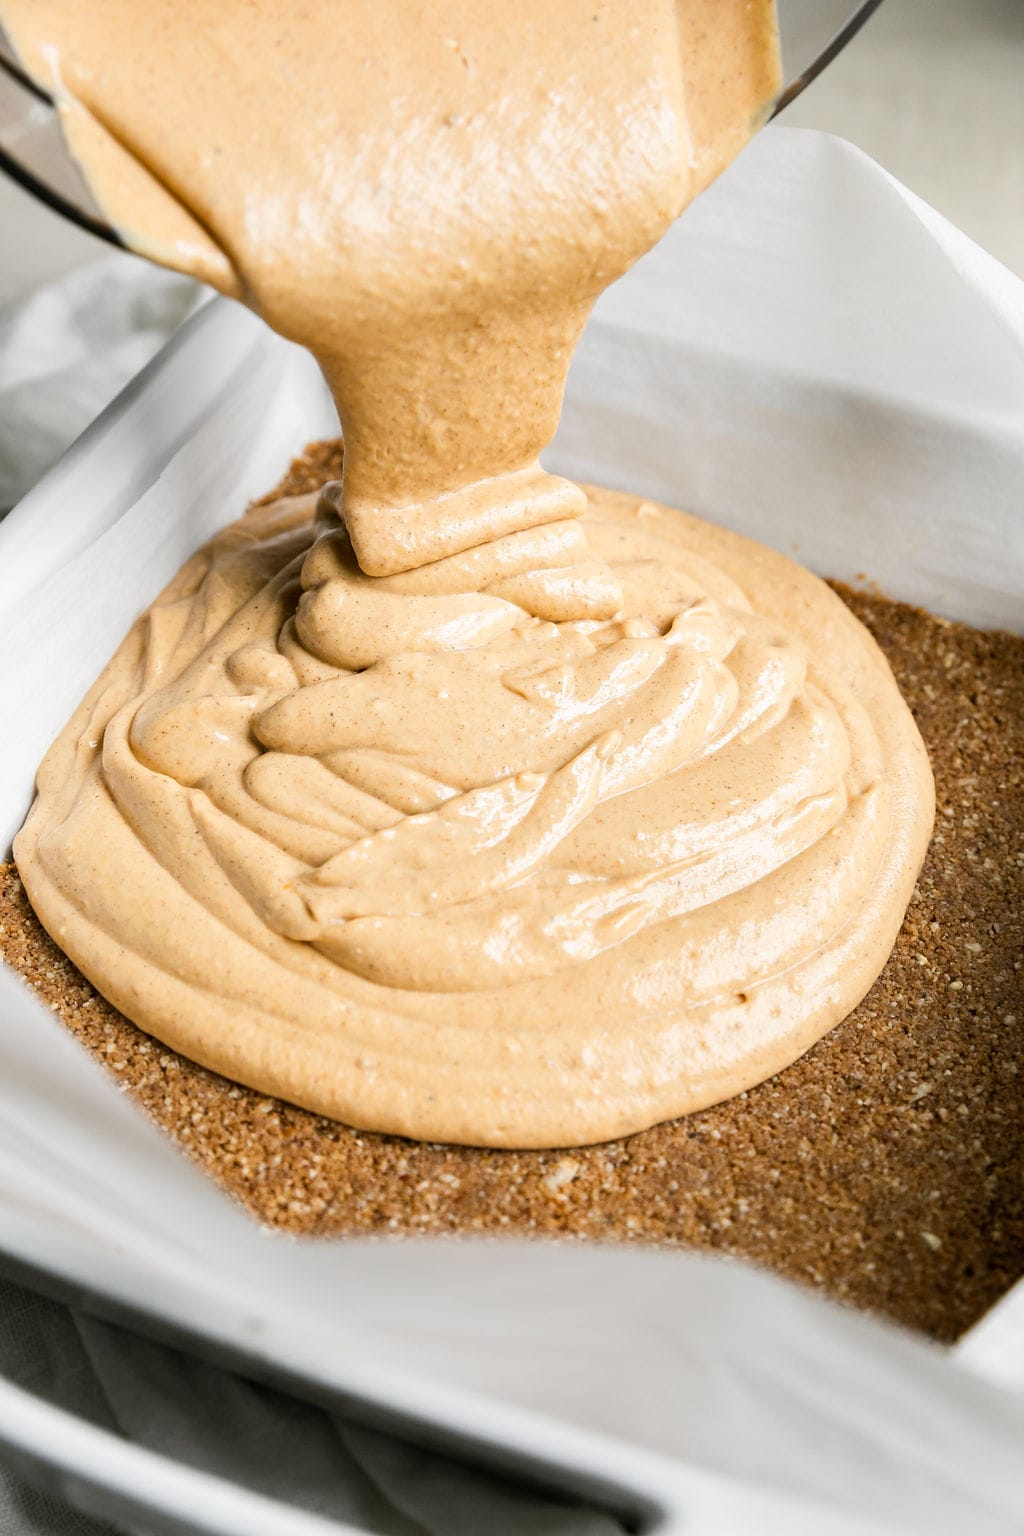
- While the crust is baking, make the cheesecake filling. In the same food processor (wiped out) or a blender, add the yogurt, softened cream cheese, pumpkin puree, eggs, vanilla, sugar, maple syrup, flour, and pumpkin pie spice. Process until smooth.
- Pour the filling onto the pre-baked crust and spread it out evenly.

- Bake for 40-50 minutes or until the center is slightly firm to the touch. (Note: Baking time will depend on dish or pan used. Start checking at 40 minutes, and continue as needed.) When done, remove the cheesecake from the oven and place on a cooling rack. Allow the cheesecake to cool completely in the pan for 2-3 hours, then transfer to the fridge to chill. If making ahead, after the cheesecake comes to room temperature, you can store it in the refrigerator until ready to serve.
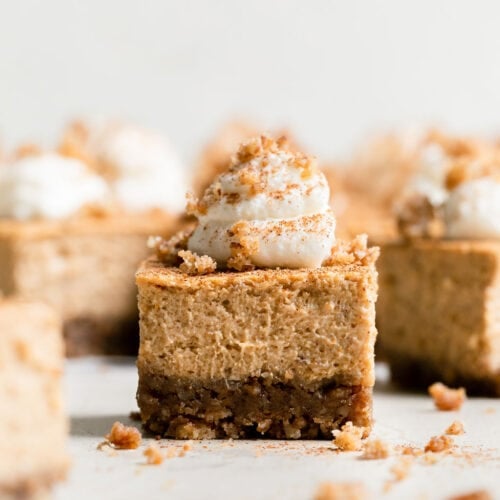
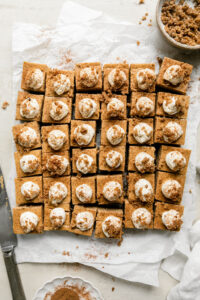
- Once the cheesecake is chilled, remove it from the pan by grabbing the parchment paper edges and lifting up. With a sharp, non-serrated knife, cut the cheesecake into 36 squares (6 x 6 rows). Clean the knife between each cut to prevent tearing the cheesecake.
For the maple whipped topping:
- In a small bowl, add the heavy cream. Using a handheld mixer (or stand up mixer), whip the cream for 2-3 minutes until peaks form and it stiffens. Drizzle in the maple syrup and mix until just combined.
To serve:
- Top each bar with a dollop of whipped cream (or use a piping bag for a polished presentation). Garnish the whipped cream with a sprinkle of the reserved crust mixture and a light dusting of pumpkin pie spice.

Notes
To freeze: Whether you freeze the bites with whipped topping already added or without, we recommend storing them in a single layer in airtight storage container for up to 3 months. To serve, remove from the freezer and allow to thaw in the refrigerator. However, thawing isn’t necessary as these can also be served as a delicious frozen treat!
Tip: To keep the cheesecake bites looking nice you want to be sure the cheesecake is fully cooled before cutting into it. The best knife to use is one with a non-serrated blade that’s sharp and thin. Lastly, be sure to clean the knife between each cut to remove any bits of cheesecake that could interfere with getting a clean cut.
Nutrition Information
- Serving Size: 1 square
- Calories: 100
- Fat: 7 g
- (Sat Fat: 3 g)
- Sodium: 60 mg
- Carbohydrate: 9 g
- (Fiber: 0 g
- Sugar: 6 g)
- Protein: 2 g
- Cholesterol: 25 mg