Ingredients
- 2½ cups gluten-free flour blend*
- 1 cup (2 sticks) cold, unsalted butter, cut into ½-inch thick slices**
- ½ teaspoon fine salt
- 2 tablespoons sugar
- 1 teaspoon apple cider vinegar***
- 1 large egg**
- 2 tablespoons cold water
Instructions
To make the dough balls:
- In a large bowl, combine the flour and butter.
- Using a pastry cutter, cut the butter into the flour until the dough resembles a crumbly texture and is about pea-sized.
- Add the salt, sugar, vinegar, egg, and 2 tablespoons of cold water. Stir to mix.
- With clean hands, continue to work the dough until it comes together, forming a loose, large ball. The dough should stick together pretty easily. If it does not, though, just add 1-2 teaspoons more of cold water.
- Divide the dough in half and form each portion into a ball (you’ll have 2 dough balls).
- Place each ball in the center of a large sheet of parchment paper.
- Fold the paper over and press down to form a thick, round disc and wrap it up.
- Repeat steps 6-7 with the other dough ball.
- Place the wrapped dough balls in the refrigerator to chill. If you only want to make a single-crust pie, wrap one of the dough discs tightly with plastic wrap and place it in the freezer to save for a future pie.
- Chill the dough discs at least 30 minutes or up to 2 hours. If chilling longer, you will need to allow the dough to set at room temperature for 15-30 minutes before rolling it out.
To roll the dough out:
- Remove the dough from the parchment paper and dust the paper lightly with flour.
- Place the dough back onto the center of the parchment paper and dust the top of the dough lightly with flour.
- Cover with another sheet of parchment paper.
- Using a rolling pin, roll the dough into a ⅛ to ¼-inch-thick round disc. If the dough starts to stick to the parchment paper, add more gluten-free flour as needed.
To transfer the first pie crust into the pie plate:
- Remove the top parchment paper.
- Mist a 9-inch pie plate with nonstick spray and place it upside down over the pie crust.
- Gently slide your hand under the bottom layer of parchment paper and quickly – but gently – flip the pie plate and crust over so it is right side up.
- Carefully remove the remaining parchment paper from the dough.
- Gently press the dough into the bottom and sides of the pie dish.
- Use a knife to remove any excess dough hanging over the pie plate’s edges, leaving enough to create a thick edge.
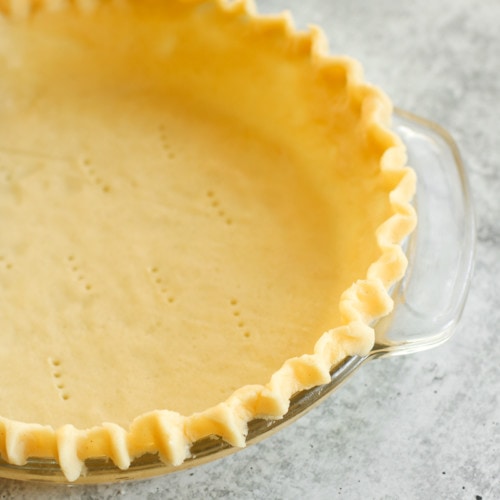
- Add a decorative pattern to the edge of the dough, if desired, such as a fluted edge.
- The crust is ready for filling or par-baking.
Notes
*This equates to 325 g of King Arthur All-Purpose Gluten-Free Flour or 360 g of Bob’s Red Mill One-to-One Gluten-Free Baking Flour if you’re using a kitchen scale instead of the “scoop method.”
**To make this recipe dairy-free, replace the regular butter with a plant-based butter alternative, such as Earth Balance or Plant-Based Country Crock.
To make this recipe vegan, omit the egg and replace the regular butter with a plant-based butter alternative, such as Earth Balance or Plant-Based Country Crock. Since you’re taking out the egg, you’ll need to make a “sans egg” to allow the dough to still have some of the elasticity it needs. To do this, use an additional ¼-⅓ cup of cold water in place of the egg. Slowly add the water in until the dough has the right texture.
***May substitute white vinegar.
Nutrition Information
- Serving Size: 1/8 of 1 pie crust
- Calories: 175
- Fat: 12 g
- (Sat Fat: 7 g)
- Sodium: 241 mg
- Carbohydrate: 16 g
- (Fiber: 2 g
- Sugar: 1 g)
- Protein: 1 g
- Cholesterol: 39 mg